Making a Temperature Tower Test in Cura
A guide by Slice Print Roleplay
In this guide, I will explain how to make a temperature tower test using the Calibration Shapes Plugin for Cura. This process works with any model and you can create tests for any printer that’s supported in Cura. The reason we’ll be using this plugin is that it makes the whole process much easier. With the Calibration Shapes plugin, we only need to add a few values to one script and the plugin will do the rest of the work for us. Once you understand how to use it, this plugin lets you create a temp tower test in just a few seconds!
If you are the type of person who learns better from a video tutorial then check out the video below.
Temperature Tower Tests Explained
Let’s quickly go over what a temp tower test is and why you would want to print one.
As the name suggests it’s a tower and each level of the tower will print at a different temperature. This allows you to find the best temp for each filament by printing only one test.
So what do I mean by, “Best temp”? Well, all filaments will have a minimum melt temp and a maximum melt temp.
If you go below the minimum melt temp then the filament simply won’t melt.
If you go above the maximum melt temp then the filament will likely burn inside the hotend.
If your goal is to have strong functional parts then a higher temp is better. This is because the layers melt into each other and form a stronger bond.
If your goal is to have highly detailed parts then a lower temp is better. This is because it takes the layers less time to get below the minimum melt temp so they hold their shape better.
So how do you figure out what’s too hot and what’s too cold? You guessed it, you print a temp tower test. You can test a wide range of temps and then review the results to figure out what’s the best temp for your needs.
And remember there is no one size fits all temp for every type of filament. It might sound odd, but it’s normal for two colors of the same filament to print at different temps.
For example, you might have blue PLA that gives the best finish at 200°c. But then have red PLA that gives the best finish at 190°c. This is true for most types of filament even when the colors are from the same brand.
Are you on the edge of your seat yet? Well, strap in because it’s about to get wild!
The other reason temp towers are so useful is that temperature values on 3D printers are not calibrated! *gasp*
That just means you might set your nozzle temp for 200°c, but it could be 5°c to 10°c above or below. This is also why you might have two identical printers that print the same spool of filament at different temps.
So in short, if you want to get the best results for your needs then run a temp tower test when printing with any new filament on each printer.
Installing the Calibration Shapes Plugin
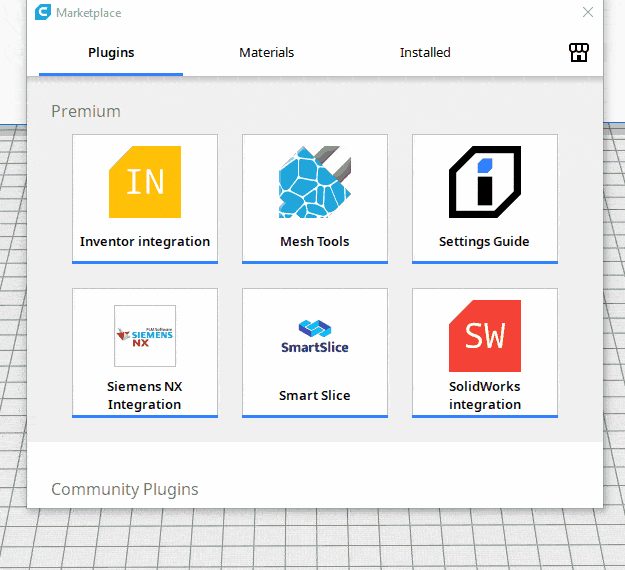
Installing this plugin is quick and easy. First, start Cura. Once it’s open, just click on the box labeled, “Marketplace” in the top right-hand corner. From there look for the Calibration Shapes plugin under the “Plugins” tab. Click on the icon and then hit “Install”. Once that’s finished be sure to click on, “Quit Ultimaker Cura”.
You will have to quit and restart Cura after installing a plugin in order to be able to use it.
How to Add Calibration Shapes
The Calibration Shapes plugin comes pre-loaded with tons of different calibration models. To access them click on, “Extensions”, and then, “Part for calibration.” Here you’ll find different temp tower models as well as models to calibrate stringing, bridging, and so much more. How cool is that?!
For this guide, I used the option, “Add PLA TempTower.” However, you can use this process with any temp tower model.
How to Add A Temperature Tower Script
Okay, so here is the coolest part about this plugin. It also comes pre-loaded with easy to use calibration scripts. This means that you can create tons of different tests using the pre-loaded models and scripts all from the same plugin!
To access these scripts go to, “Extensions” then, “Post processing” then, “Modify G-code” and then click on, “Add script.”
This will open a long drop-down menu with lots of options for different calibration scripts. When creating a temp tower you’ll want to select the script labeled, “TempFanTower.”
Temperature Tower Script Explained
For this script to work correctly we will need to enter data for each of the four values below.
Starting Temperature
As the name suggests you will set this to match the starting temp of your model. The temperature range of your test should always start with the highest temperature on the bottom/first block. Then move to the lowest temperature on the top/last block.
If you start with the lowest temp first you run the risk of the filament being too cold to print. Then the first layer wouldn’t print which would ruin the whole test….Just trust me on this.
Temperature Increment
This is where you tell the script how the temperature should change when moving between each part of the test.
Temp towers for PLA normally drop by 5°c between each block. However, towers for higher temp materials may have a greater decrease.
You can confirm this by reading any notes from the creator or checking the model for temperature change designations.
Change Layer
This is where you tell the script how many layers are in each block of the test. Or to put it another way, how many layers should be printed at each temp.
Depending on the model and layer height, each block of the test will be sliced into 30+ layers. So you want to be close, but if you’re a little off it won’t be the end of the world. We’ll talk about this more in just a bit.
Change Layer Offset
This is where you tell the script how many layers are in the base of your temp tower model.
This value is important because, if set incorrectly, it will throw off the rest of the test.
This might sound a little confusing, but it’s really not bad once you get the hang of it.
Now that we’ve covered all of the settings, let’s go over setting it up step by step.
How to Setup Your Temperature Tower Script
It’s important to note that all of these values will change depending on the temp tower model and layer height you’re using.
So learning how to correctly define each value for your model and layer height is vital for getting good results.
Layer Height
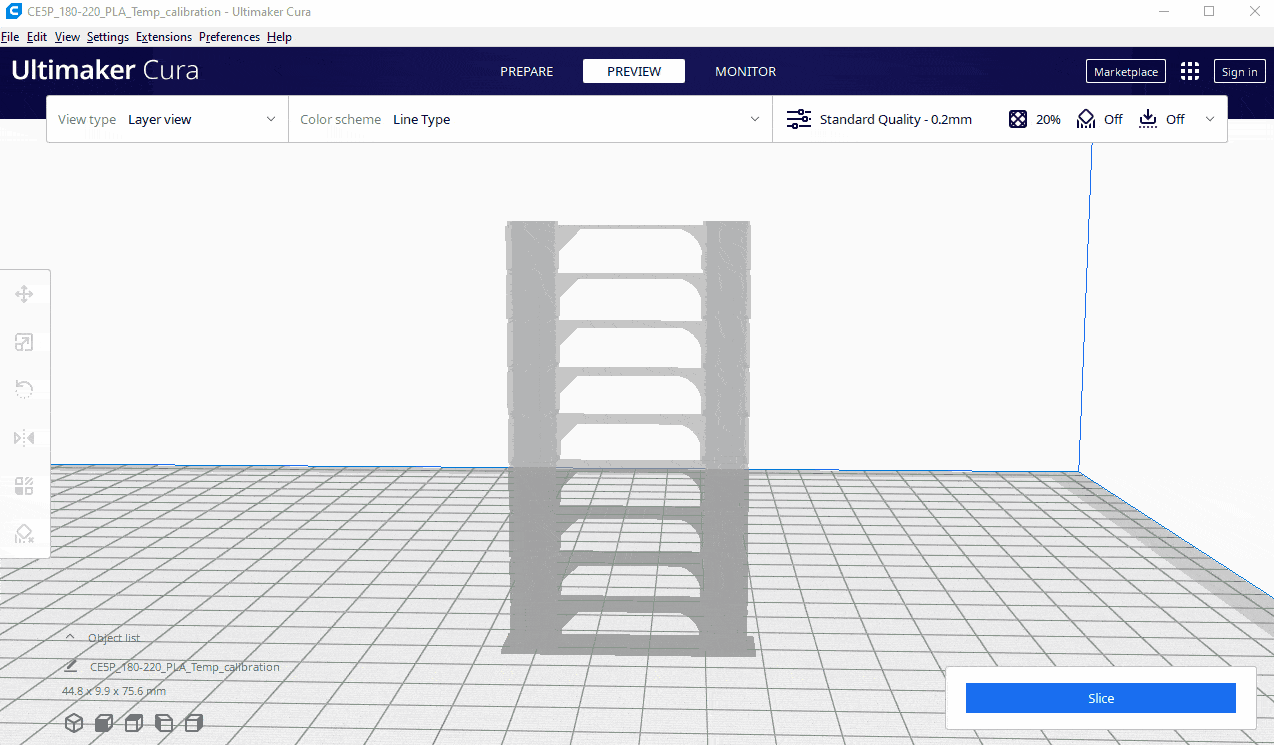
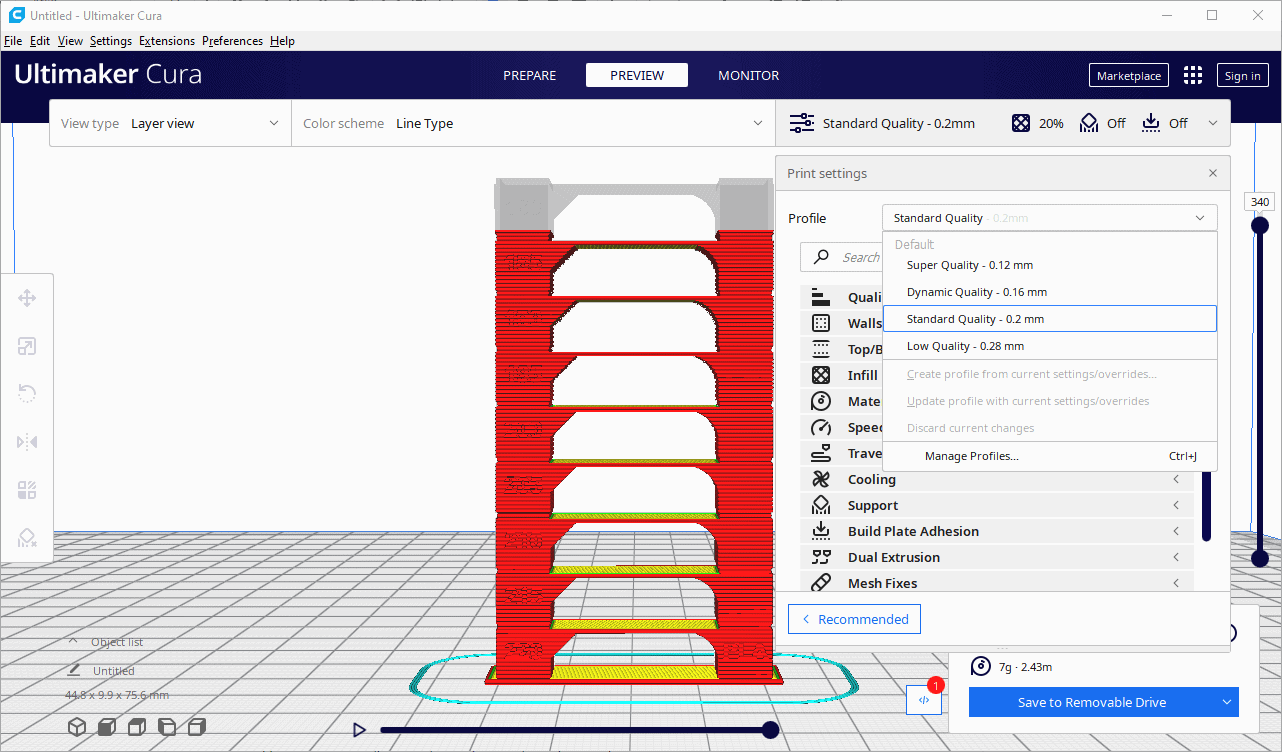
Unless you have very specific goals in mind, you’ll have good results when using a layer height equal to half the diameter of your nozzle. Since almost all printers come with a 0.4mm nozzle installed you’ll want to set your layer height to 0.2mm. To save time I would also recommend using the 0.2mm profile in Cura. This should be a quality setting in the drop-down tab for most printers. Obviously, if your printer has a different size nozzle then adjust accordingly.
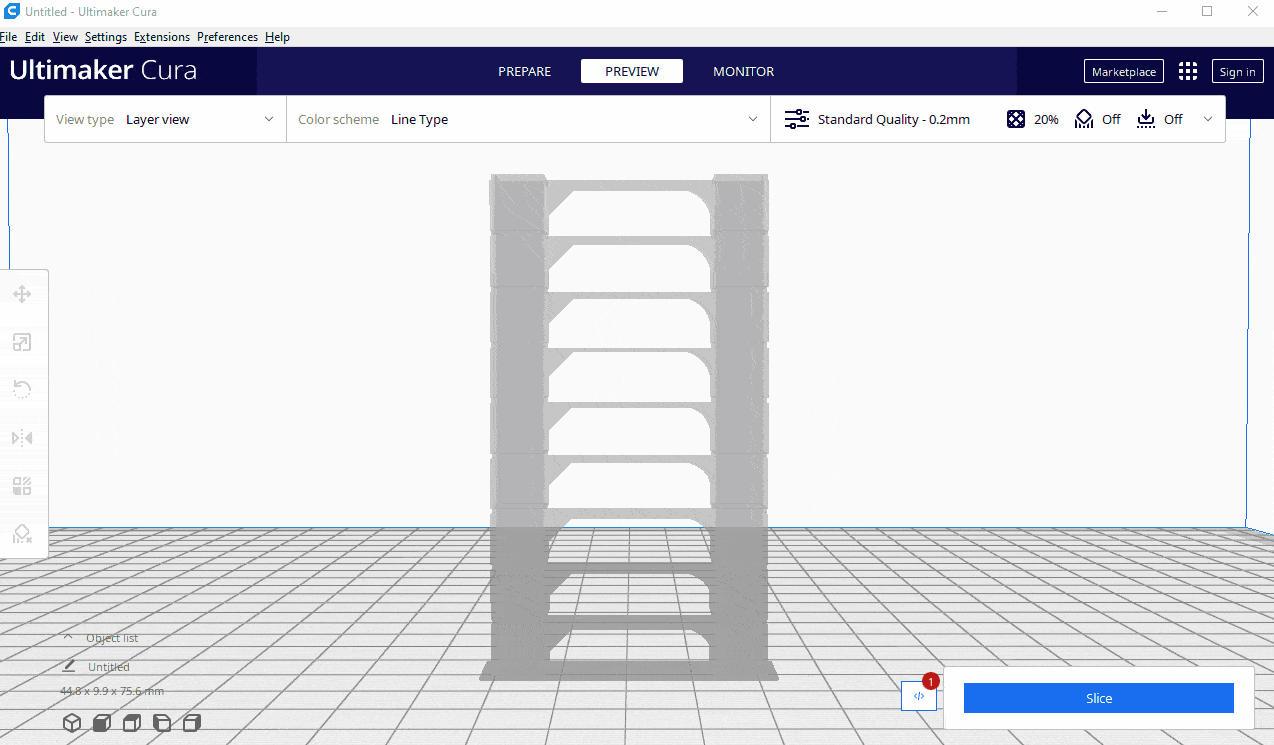
Once you have your layer height set go ahead and slice your model.
Change Layer Offset
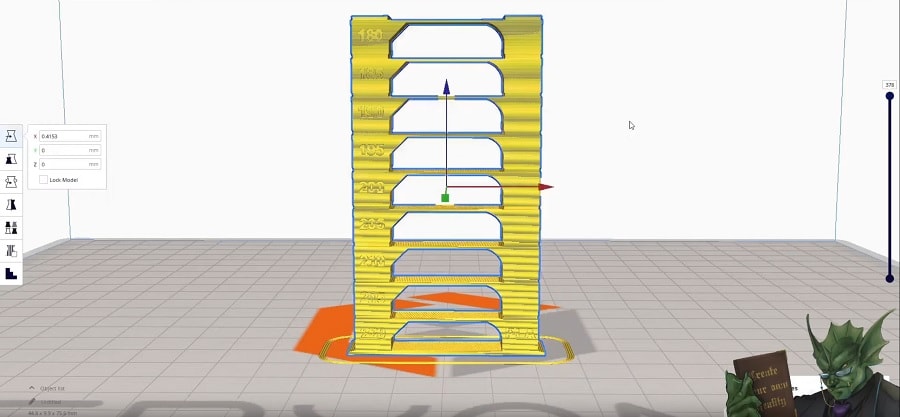
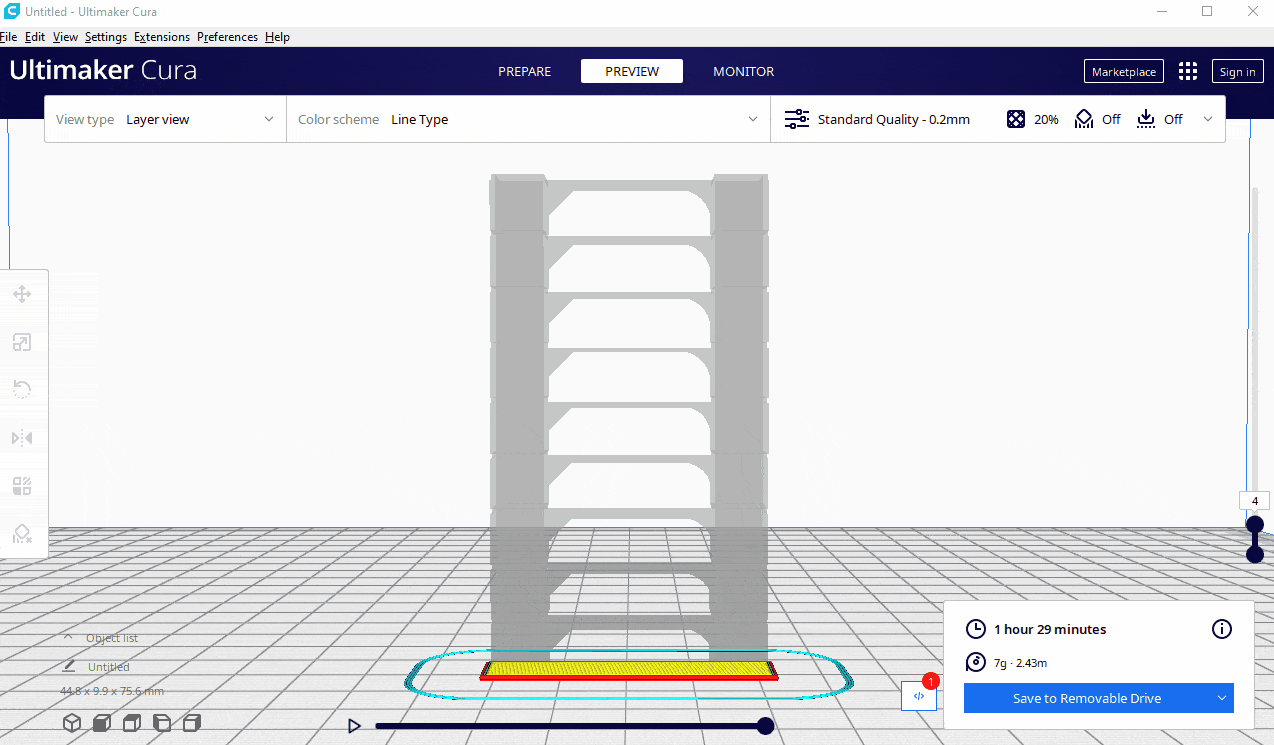
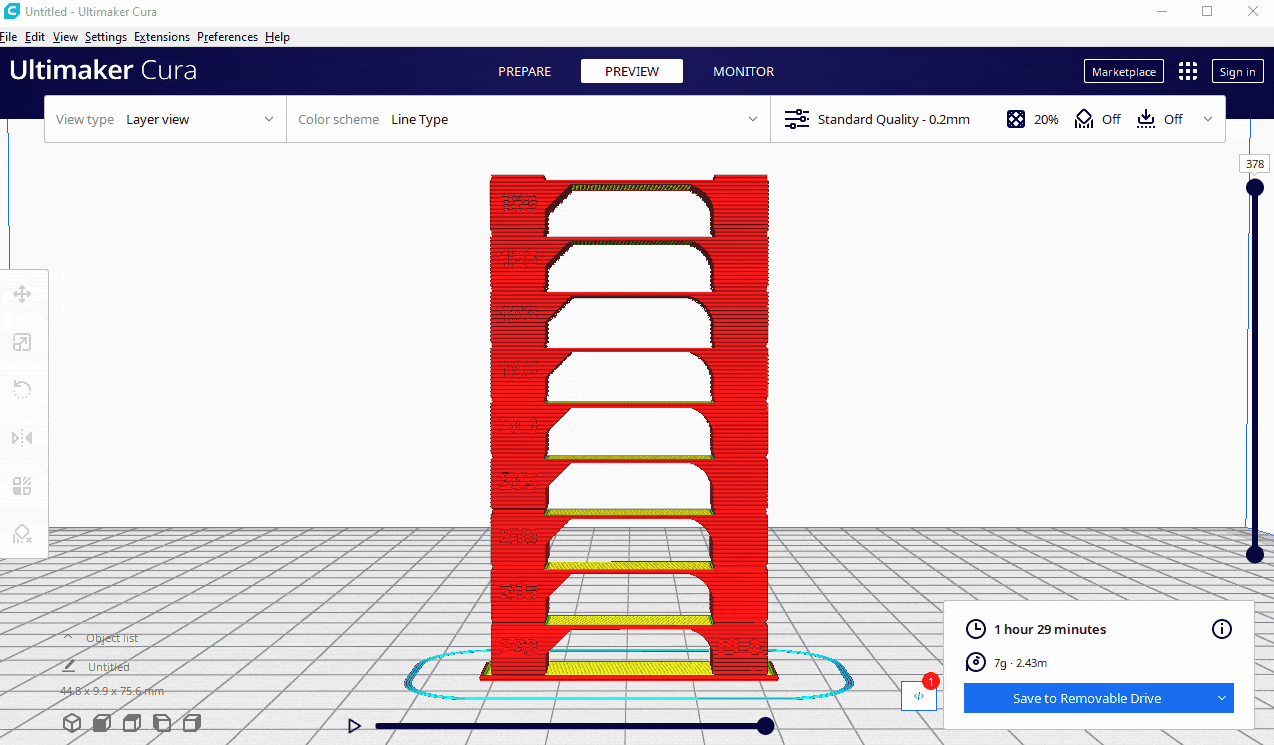
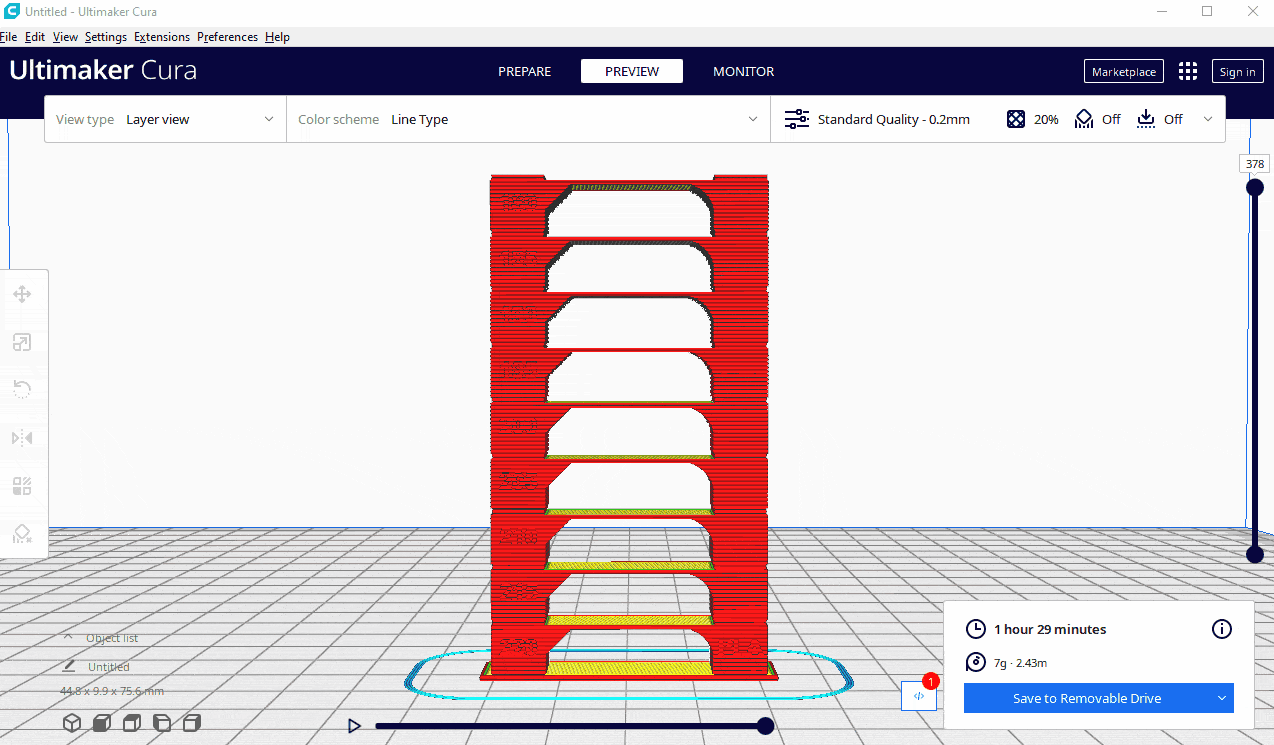
Once the model is sliced, figuring out how many layers are in the base is pretty easy. Grab the layer view slider on the right of the screen and take it down to the first layer. From there, use the up arrow on your keyboard to go up one layer at a time. It should be easy to find the layer where the base ends and the first test block begins. I’ve found that this process is even easier if you change your Color Scheme to “Line Type.”
You can see that the base of this model has 4 layers so our Change Layer Offset value is 4.
Change Layer
Finding this value takes a little more effort than the last one, but once you understand the process, it goes really quick.
You know how many layers are in the base of your model right? If not check out the Change Layer Offset section above and then come back. Got it? Okay great, Now just subtract that amount from the total layer count of your model. You can find the total layer count by moving the layer view slider to the very top.
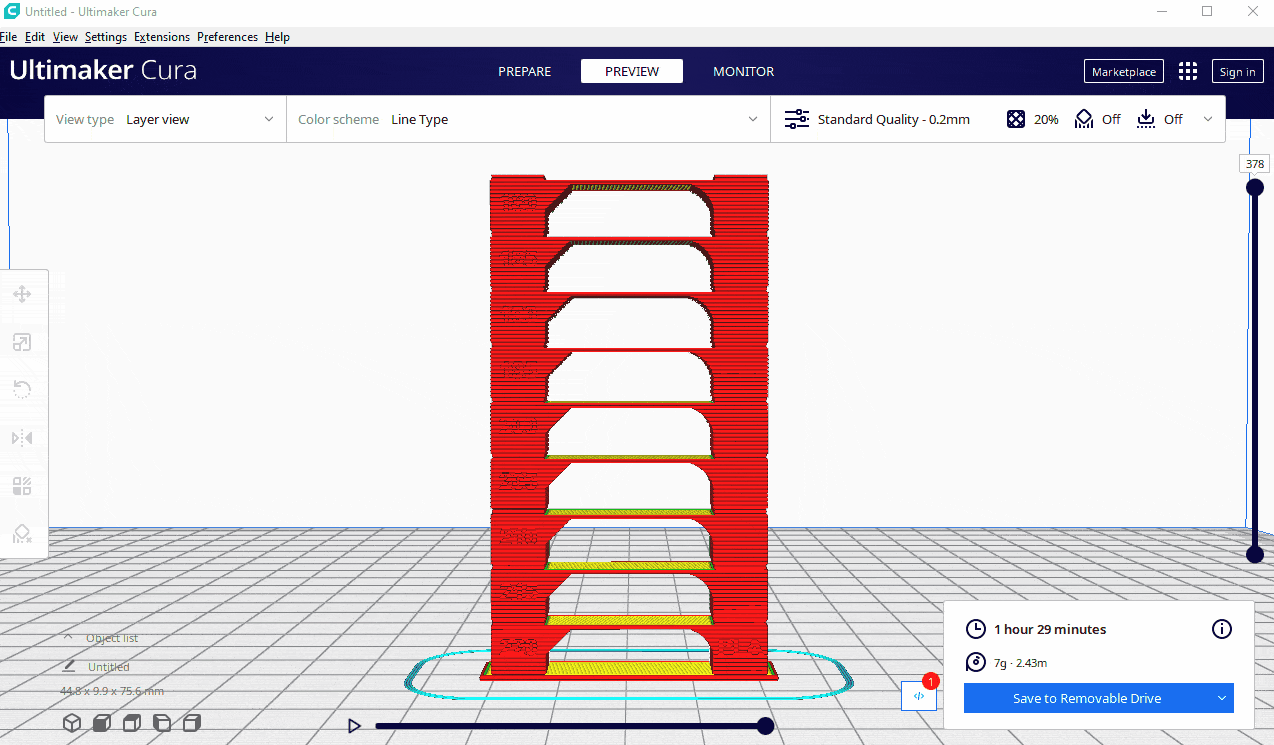
At a 0.2mm layer height, the model I’m using has 378 layers. So for this model, the first part of the process looks like this, 378 – 4 = 374. This tells us how many layers are in the test, excluding the layers in the base. With me so far?…. Good!
Next just count how many blocks/temperatures there are in your test model.
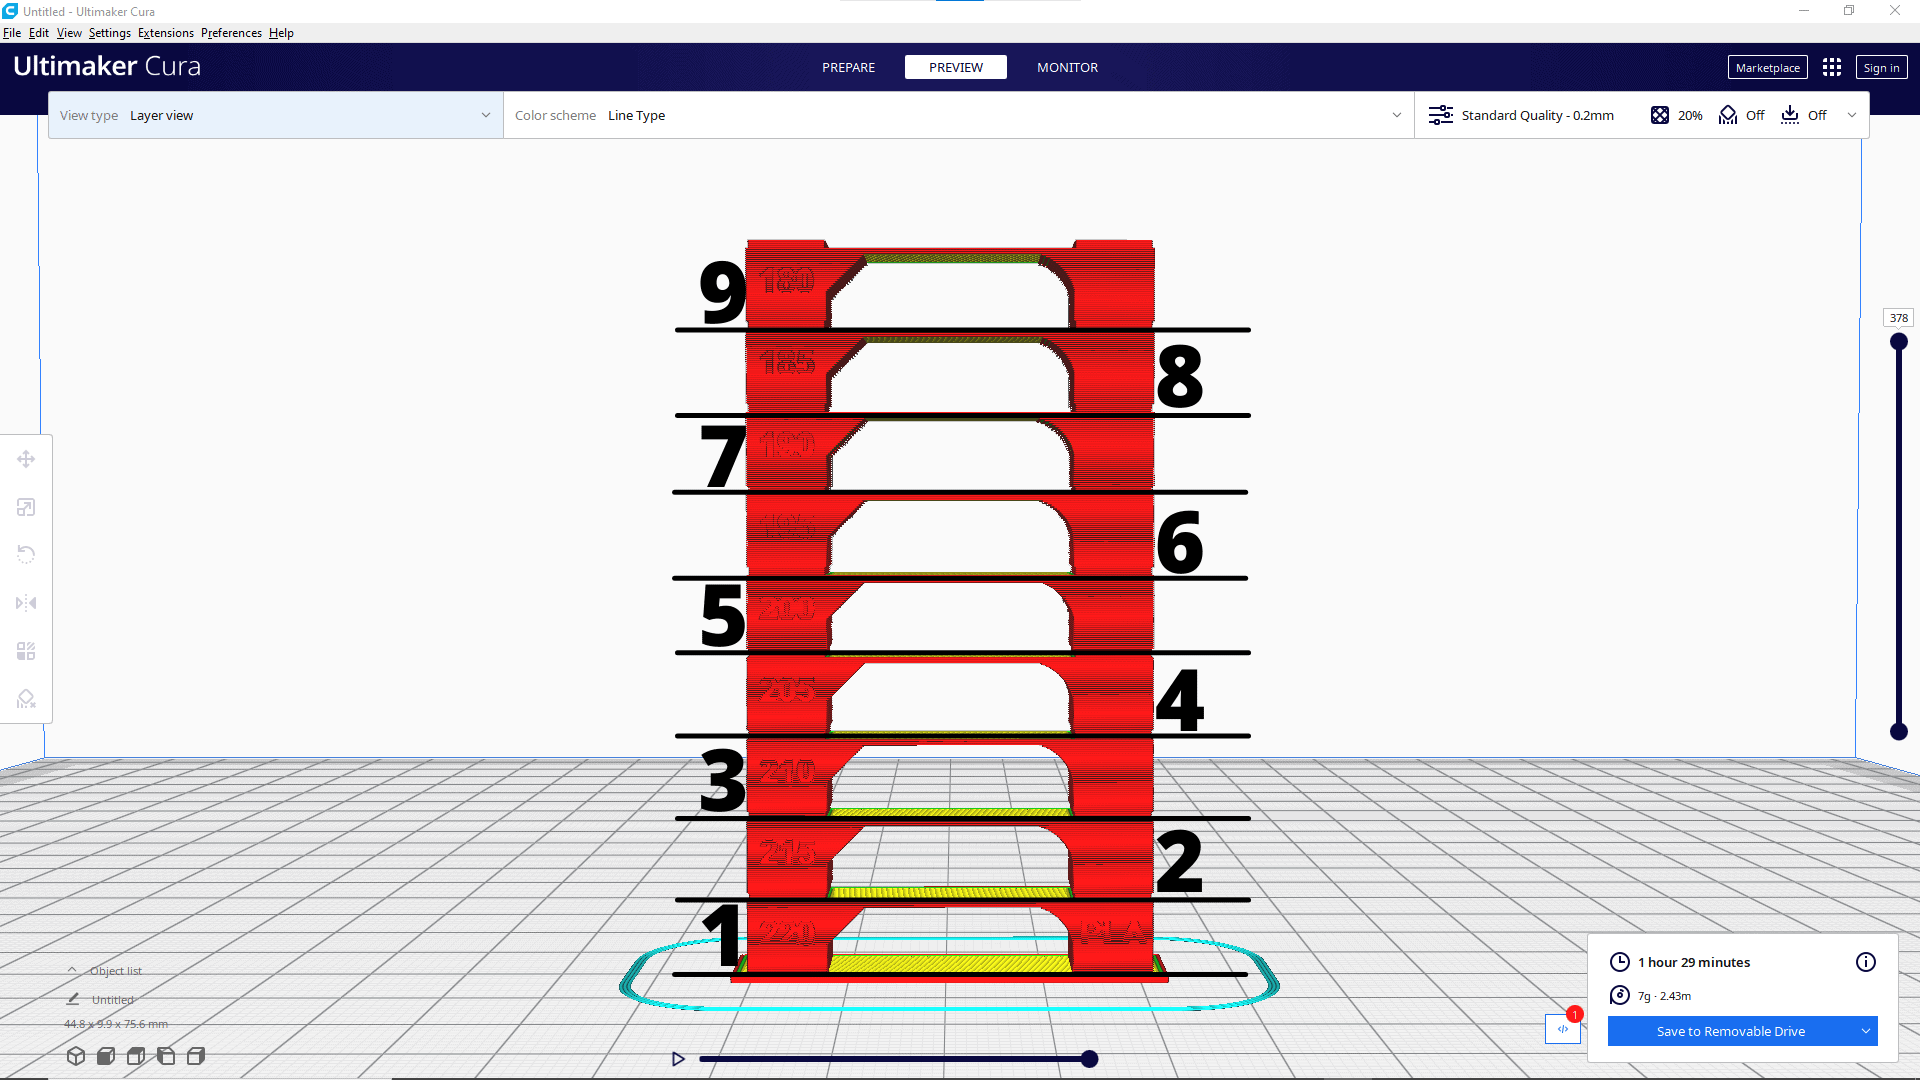
Now we divide the number of layers in the test by the number of different temperatures. For the model, I’m using that would be 374 ⁒ 9 = 41.55. It’s not at all uncommon to end up with fractional digits like that. However, we can’t use fractional numbers so let’s fix that.
If the number after the decimal is 5 or greater round it up. If it’s 4 or less then round it down. Or have you forgotten, “5 and above, give it a shove. 4 and below, let it go.”…Because I sure did and had to look up that rhyme.
Okay, I said we’d talk about it, so here it is. It’s okay if the model doesn’t divide evenly and you have to round a little. The reason it’s okay is that there are plenty of layers in each block so being off the mark by a layer or two isn’t going to make the results of your test unreliable. This is especially true when the temperature is only changing in increments of 5°c – 10°c. So don’t stress over it too much.
Okay so now we’ve got 42 which is our Change Layer value…And that makes sense since, after all, 42 is the answer to life, the universe, and everything.
Temperature Increment
This is probably the easiest of the values to find. Simply look at the temperatures of the first test block and the one above it. How much is the temperature changing by?
For the model I’m using, the temperature decreases by 5c° between each block of the test.
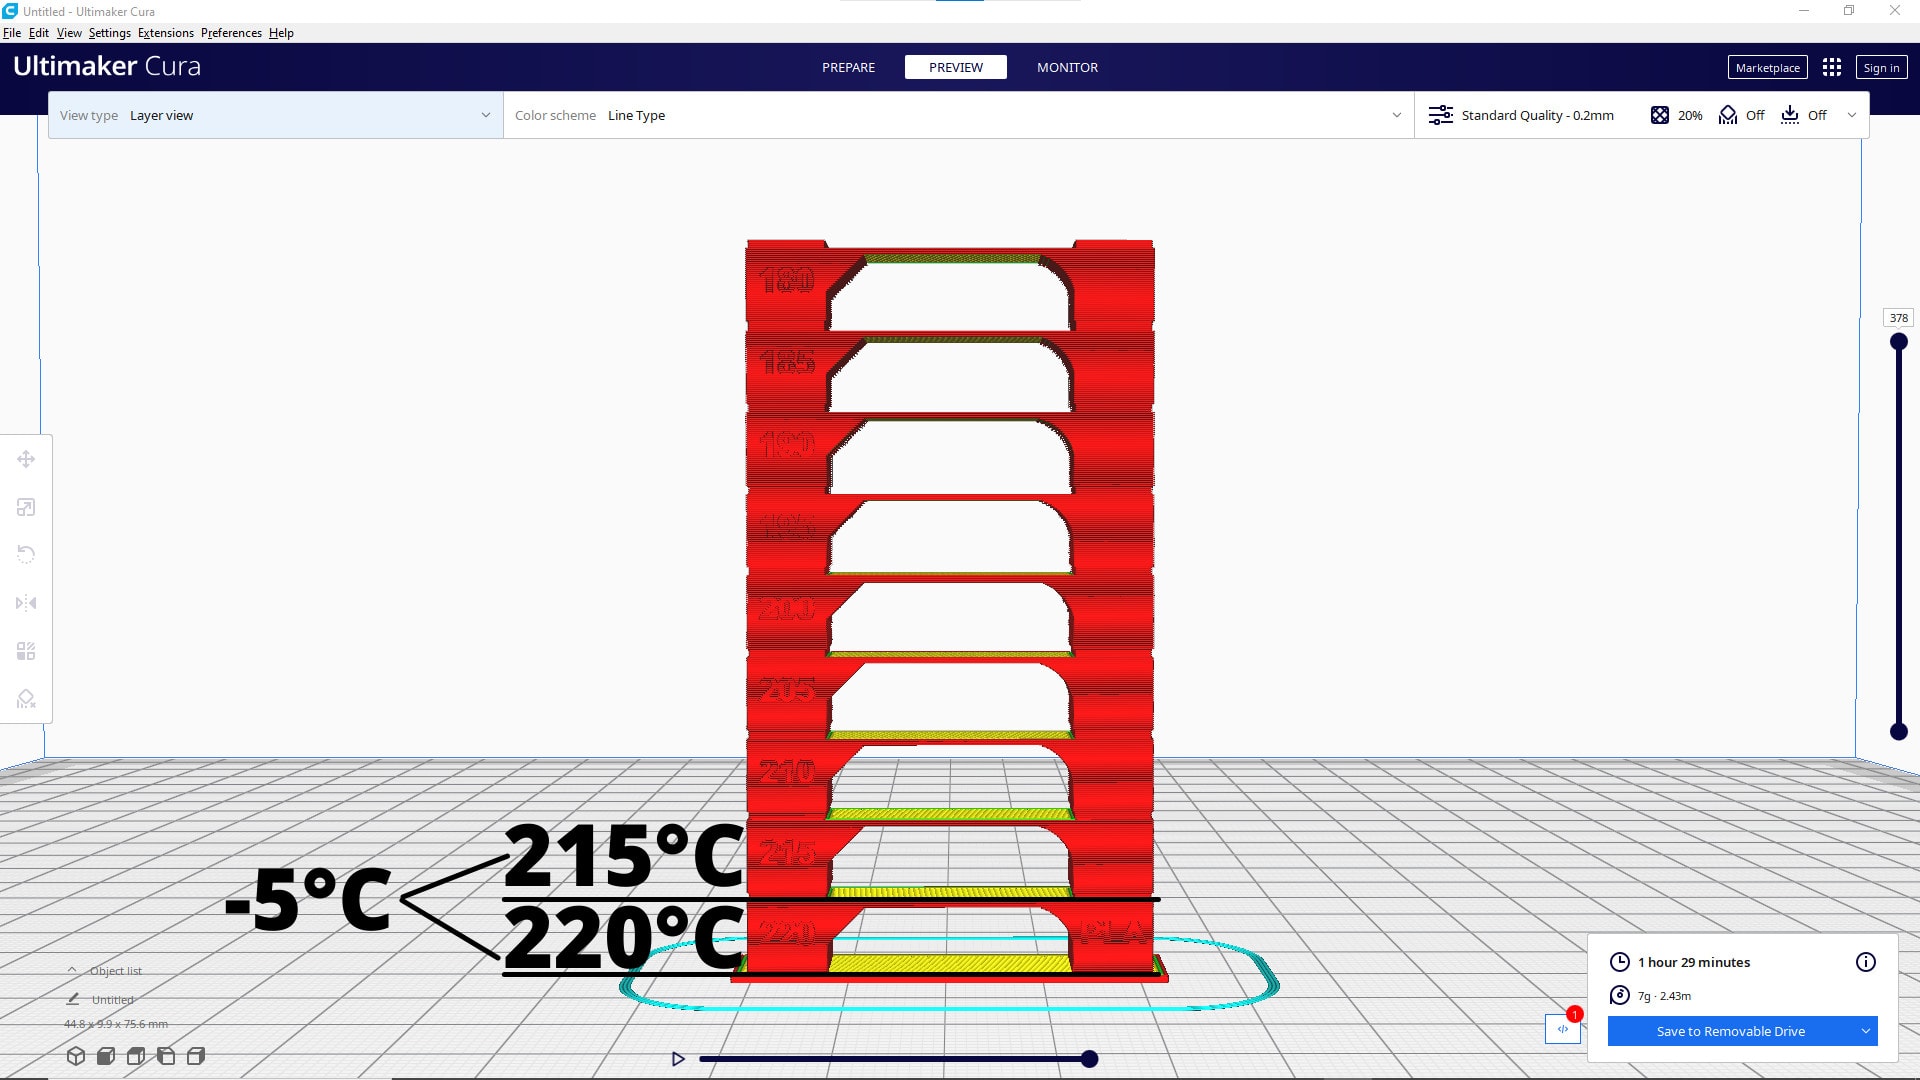
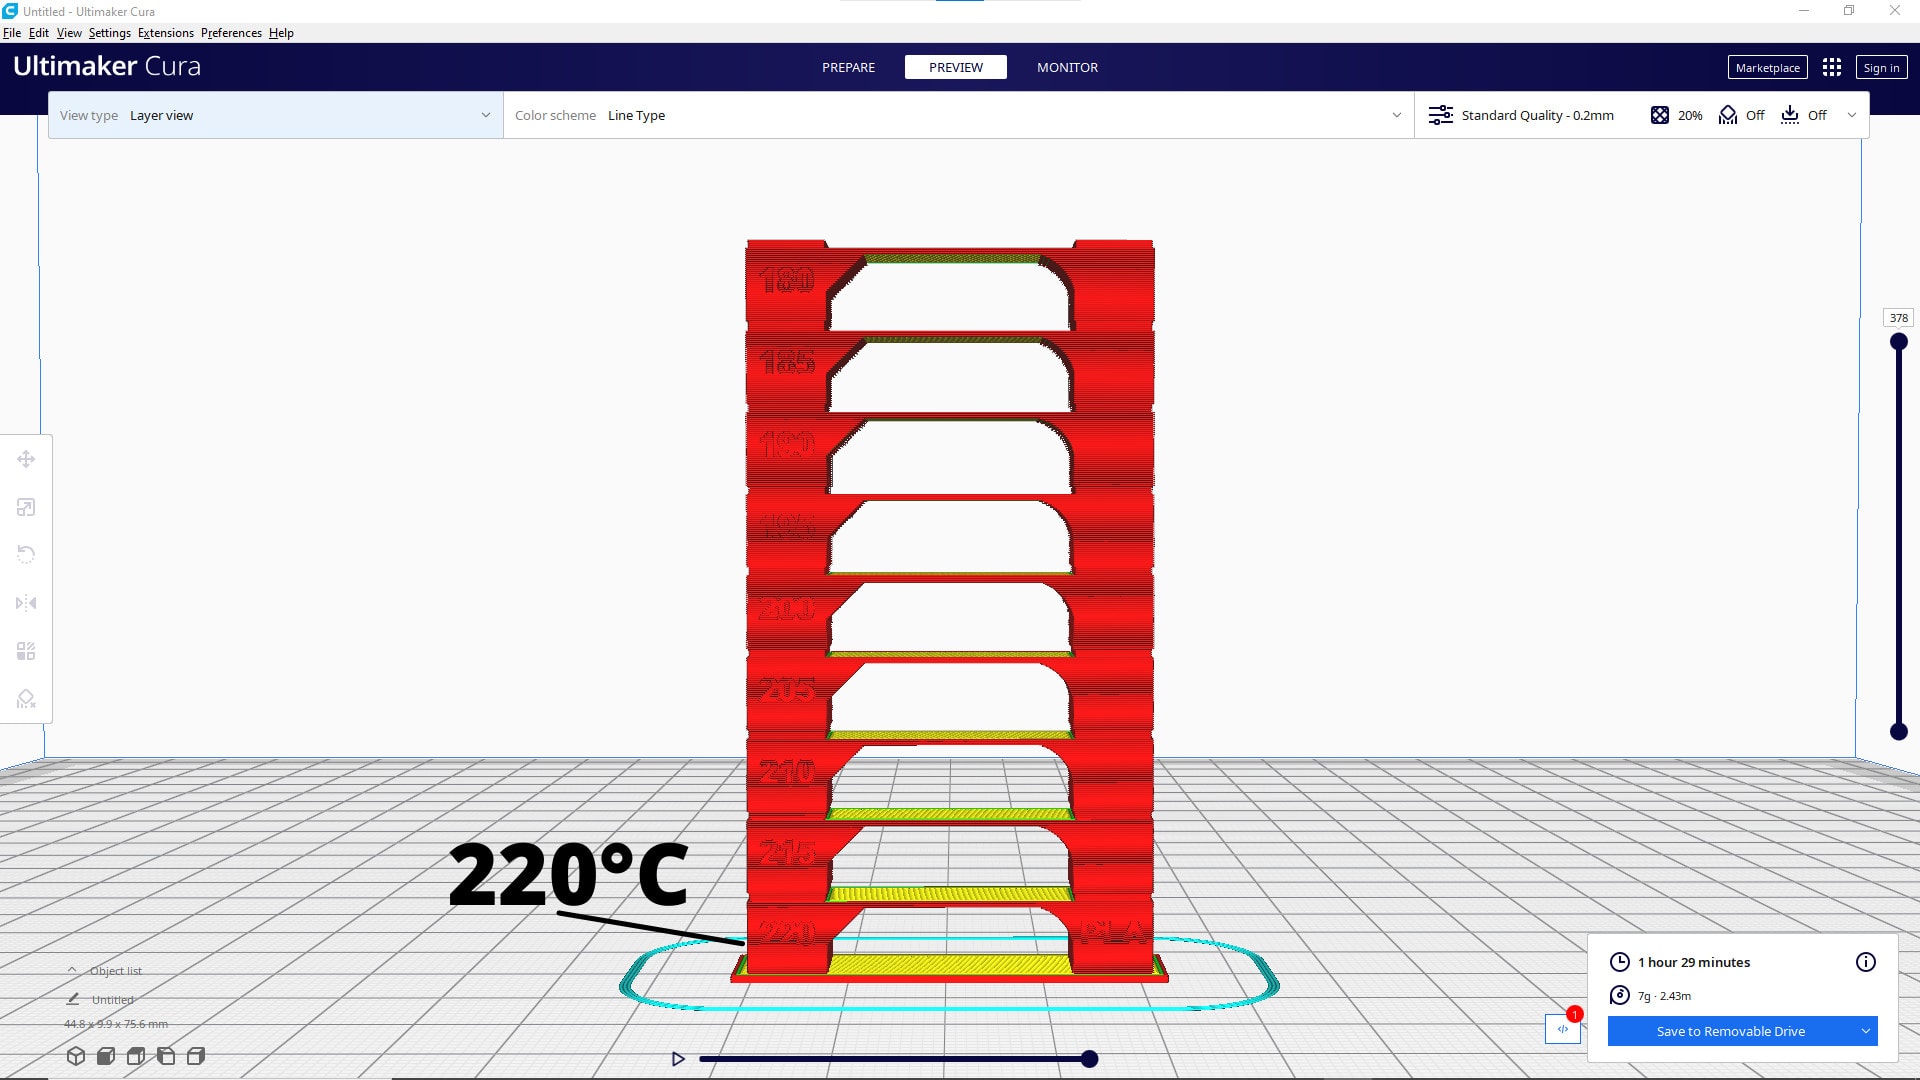
Starting Temperature
Just like Temperature Increment, to find this value all we have to do is look at the temperature of the first test block. The model I’m using starts at 220°.
For best results, there is an additional setting you’ll want to adjust. This setting is not part of the script, but adjusting it will ensure your test prints perfectly.
The setting is called “Printing Temperature.” and it can be found under the “Material” tab.
You want this setting to match your Starting Temperature. This will tell Cura to print the layers in the base at the same temp as your first test block. The reason this is important is that those layers in the base may start printing 20° or 30° less than your first test block. So by the time your nozzle reaches the correct temp the first test block might be half printed.
Enter Values, Slice, & Save
Now, all that’s left to do is enter those values into the script, slice your model, and save the file.
Leave the box labeled, “Active Fan Tower” unchecked.
Congratulations You’re Done!
Just don’t forget to remove the script and put the “Printing Temperature” setting back to its original value before you slice another model.
Hopefully, you now know how to use the Calibration Shapes plugin to create a temperature tower using any temp tower model.
If you have any questions feel free to post them below and I’ll gladly help.
Help Support Slice Print Roleplay
Support from this amazing community helps me keep making tutorials and other helpful content like this.
If you found this guide helpful then I humbly ask for your support.
Joining my Patreon is a great way to support my work and get some awesome rewards, too!
Or if money is tight you can always show support by giving my videos a thumbs up and sharing them with your friends.
Whatever you decide to do, your support is greatly appreciated!
Alright, now let’s go print something.