In this guide, we discuss why you might want to improve your 3D printer’s build plate adhesion and how to do it. If your prints have mysteriously started failing after previously being successful, this guide might help save you a lot of heartache and frustration. Keep in mind there are several reasons a print might fail. One reason that is often overlooked is the ability for your print to actually stick to the the build plate.
Protect Your Hoard
Never get lose, or get lost in, your 3D Printable Hoard again. With our cloud based storage and organizational tools, your hoard will always be ready for when you need it, where you need it.
Over time, some build surfaces will begin to fill up with tiny bits of resin/filament and become smooth. That means there’s nothing for your first layers to grip. Scuffing your build surface “refreshes” it by removing those old bits of resin/filament. It also creates a bunch of tiny imperfections that greatly increase bed adhesion.
When to Scuff Your Build Plate
You should consider scuffing your build plate if you start to notice an increase in prints detaching or not sticking at all. While there are a lot of reasons your prints might fail, these are tell tale signs that your build plate adhesion is an issue.
The first things to check are bed level and print settings. After those have been ruled out, scuffing your build surface is a great next step in resolving the issue.
Note that this process can be used for both FDM & Resin Printers. However, some build surfaces should not be scuffed. Check with the manufacturer of your printer/build surface before following this process.
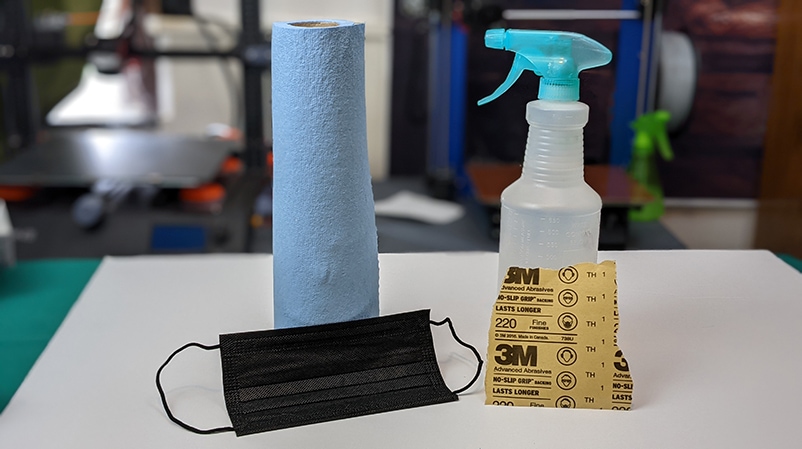
Required Materials
One piece of 220 grit sandpaper roughly the size of a playing card
Getting to Business - How to Scuff Your Build Plate
Before starting, let’s make a quick point. We use sandpaper in this process, but you shouldn’t think of it as “sanding your plate down.” Rather think of it as, “scuffing your plate up.”
You DO NOT want to make circular patterns on your build plate like you would when trying to smooth a surface. Instead, you want to scuff the surface so the resin/filament can get a really good grip. Also note that one pass in each direction should be sufficient.
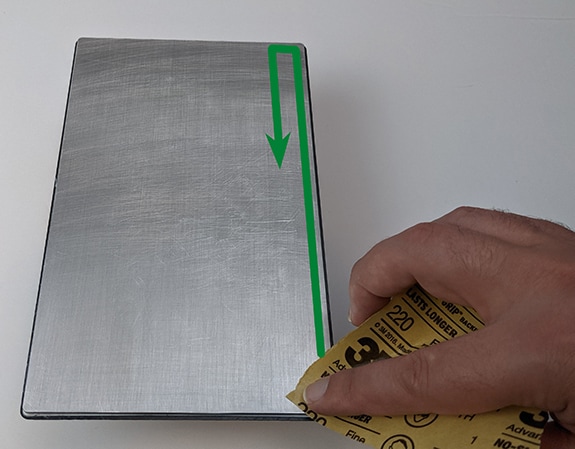
Step #1: Scuffing in the First Direction
Start at one corner of the plate and drag the sandpaper across the surface to the opposite corner. Then move forward roughly 3mm and move in a straight line back to the side you started on. Repeat until you have moved across the whole plate.
Scuff Strokes in First Direction
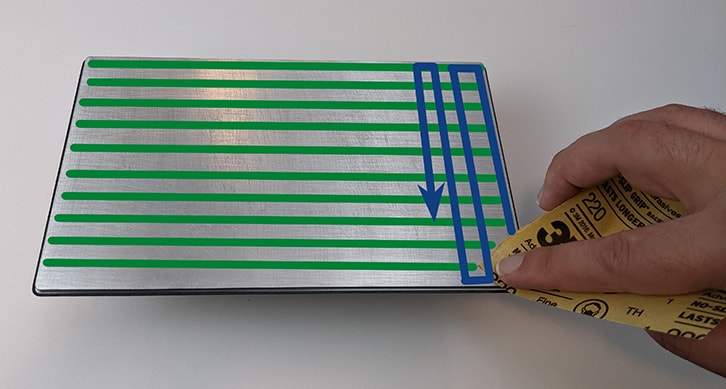
Step #2: Scuffing in the Second Direction
Scuff Strokes in Second Direction
Turn the plate 90 degrees and repeat the same process. You should be making intersecting lines that form a grid pattern.
Turn the plate 90 degrees and repeat the same process. You should be making intersecting lines that form a grid pattern.
Scuff Strokes in Second Direction
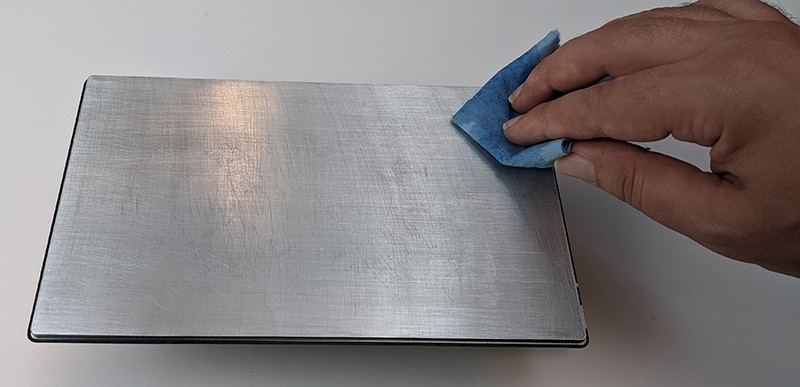
Step #3: Clean the Plate
Thoroughly clean the build surface using a paper towel with IPA or another cleaner. You want to make sure all dust has been removed from the plate before use. The last thing anyone wants to experience is going through the trouble of scuffing your build plate to increase it’s adhesion, only to have your prints fail because the build plate is covered in dust.
Note: Put your cleaner in a spray bottle for easy use.
Cleaning the Build Plate
Step #4: Printing Glory!!!
Victory!!!
Congratulations!! You are all done and ready to print!
Your build surface will now provide greater adhesion and should help give you a more reliable printing experience.
If you found this guide helpful please consider supporting me on Patreon. Support from patrons helps me make more great content like this. If you have any questions, please feel free to leave them in the comments below.
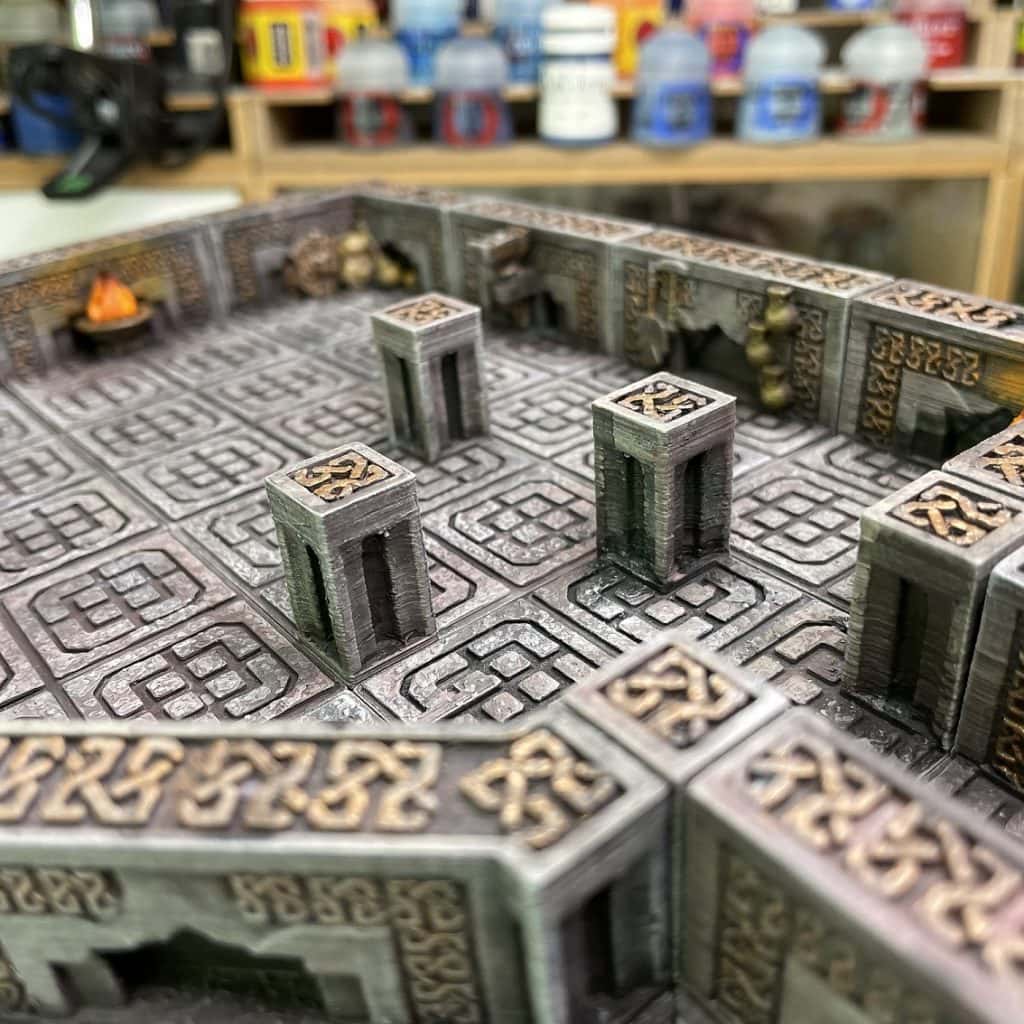
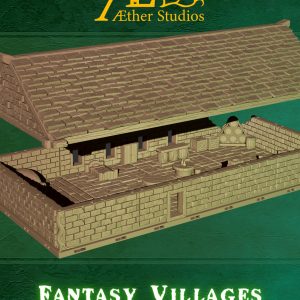
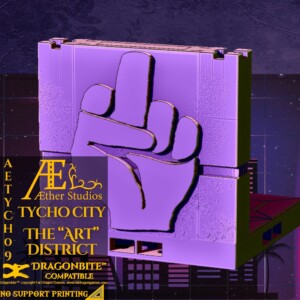
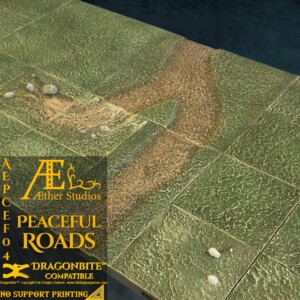
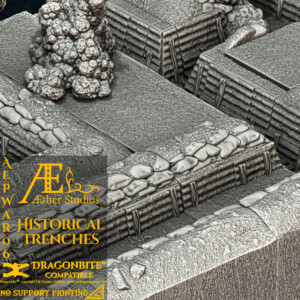
It’s a special month for us here at MiniHoarder, as we’re celebrating our first anniversary. A special event deserves a special Artist Spotlight, and we’ve certainly brought that to you today with the crew at Aether Studios. Aether Studios has an extensive history, has published hundreds of products, several Kickstarters, and creates incredible terrain pieces (often the form of Dragonbite tiles) and miniatures. Their work spans several genres, including fantasy, sci-fi, and steampunk. It was a joy getting to chat with the Will, Carl, Colin, and Nasos, and learn more about the individuals that make up the unit.
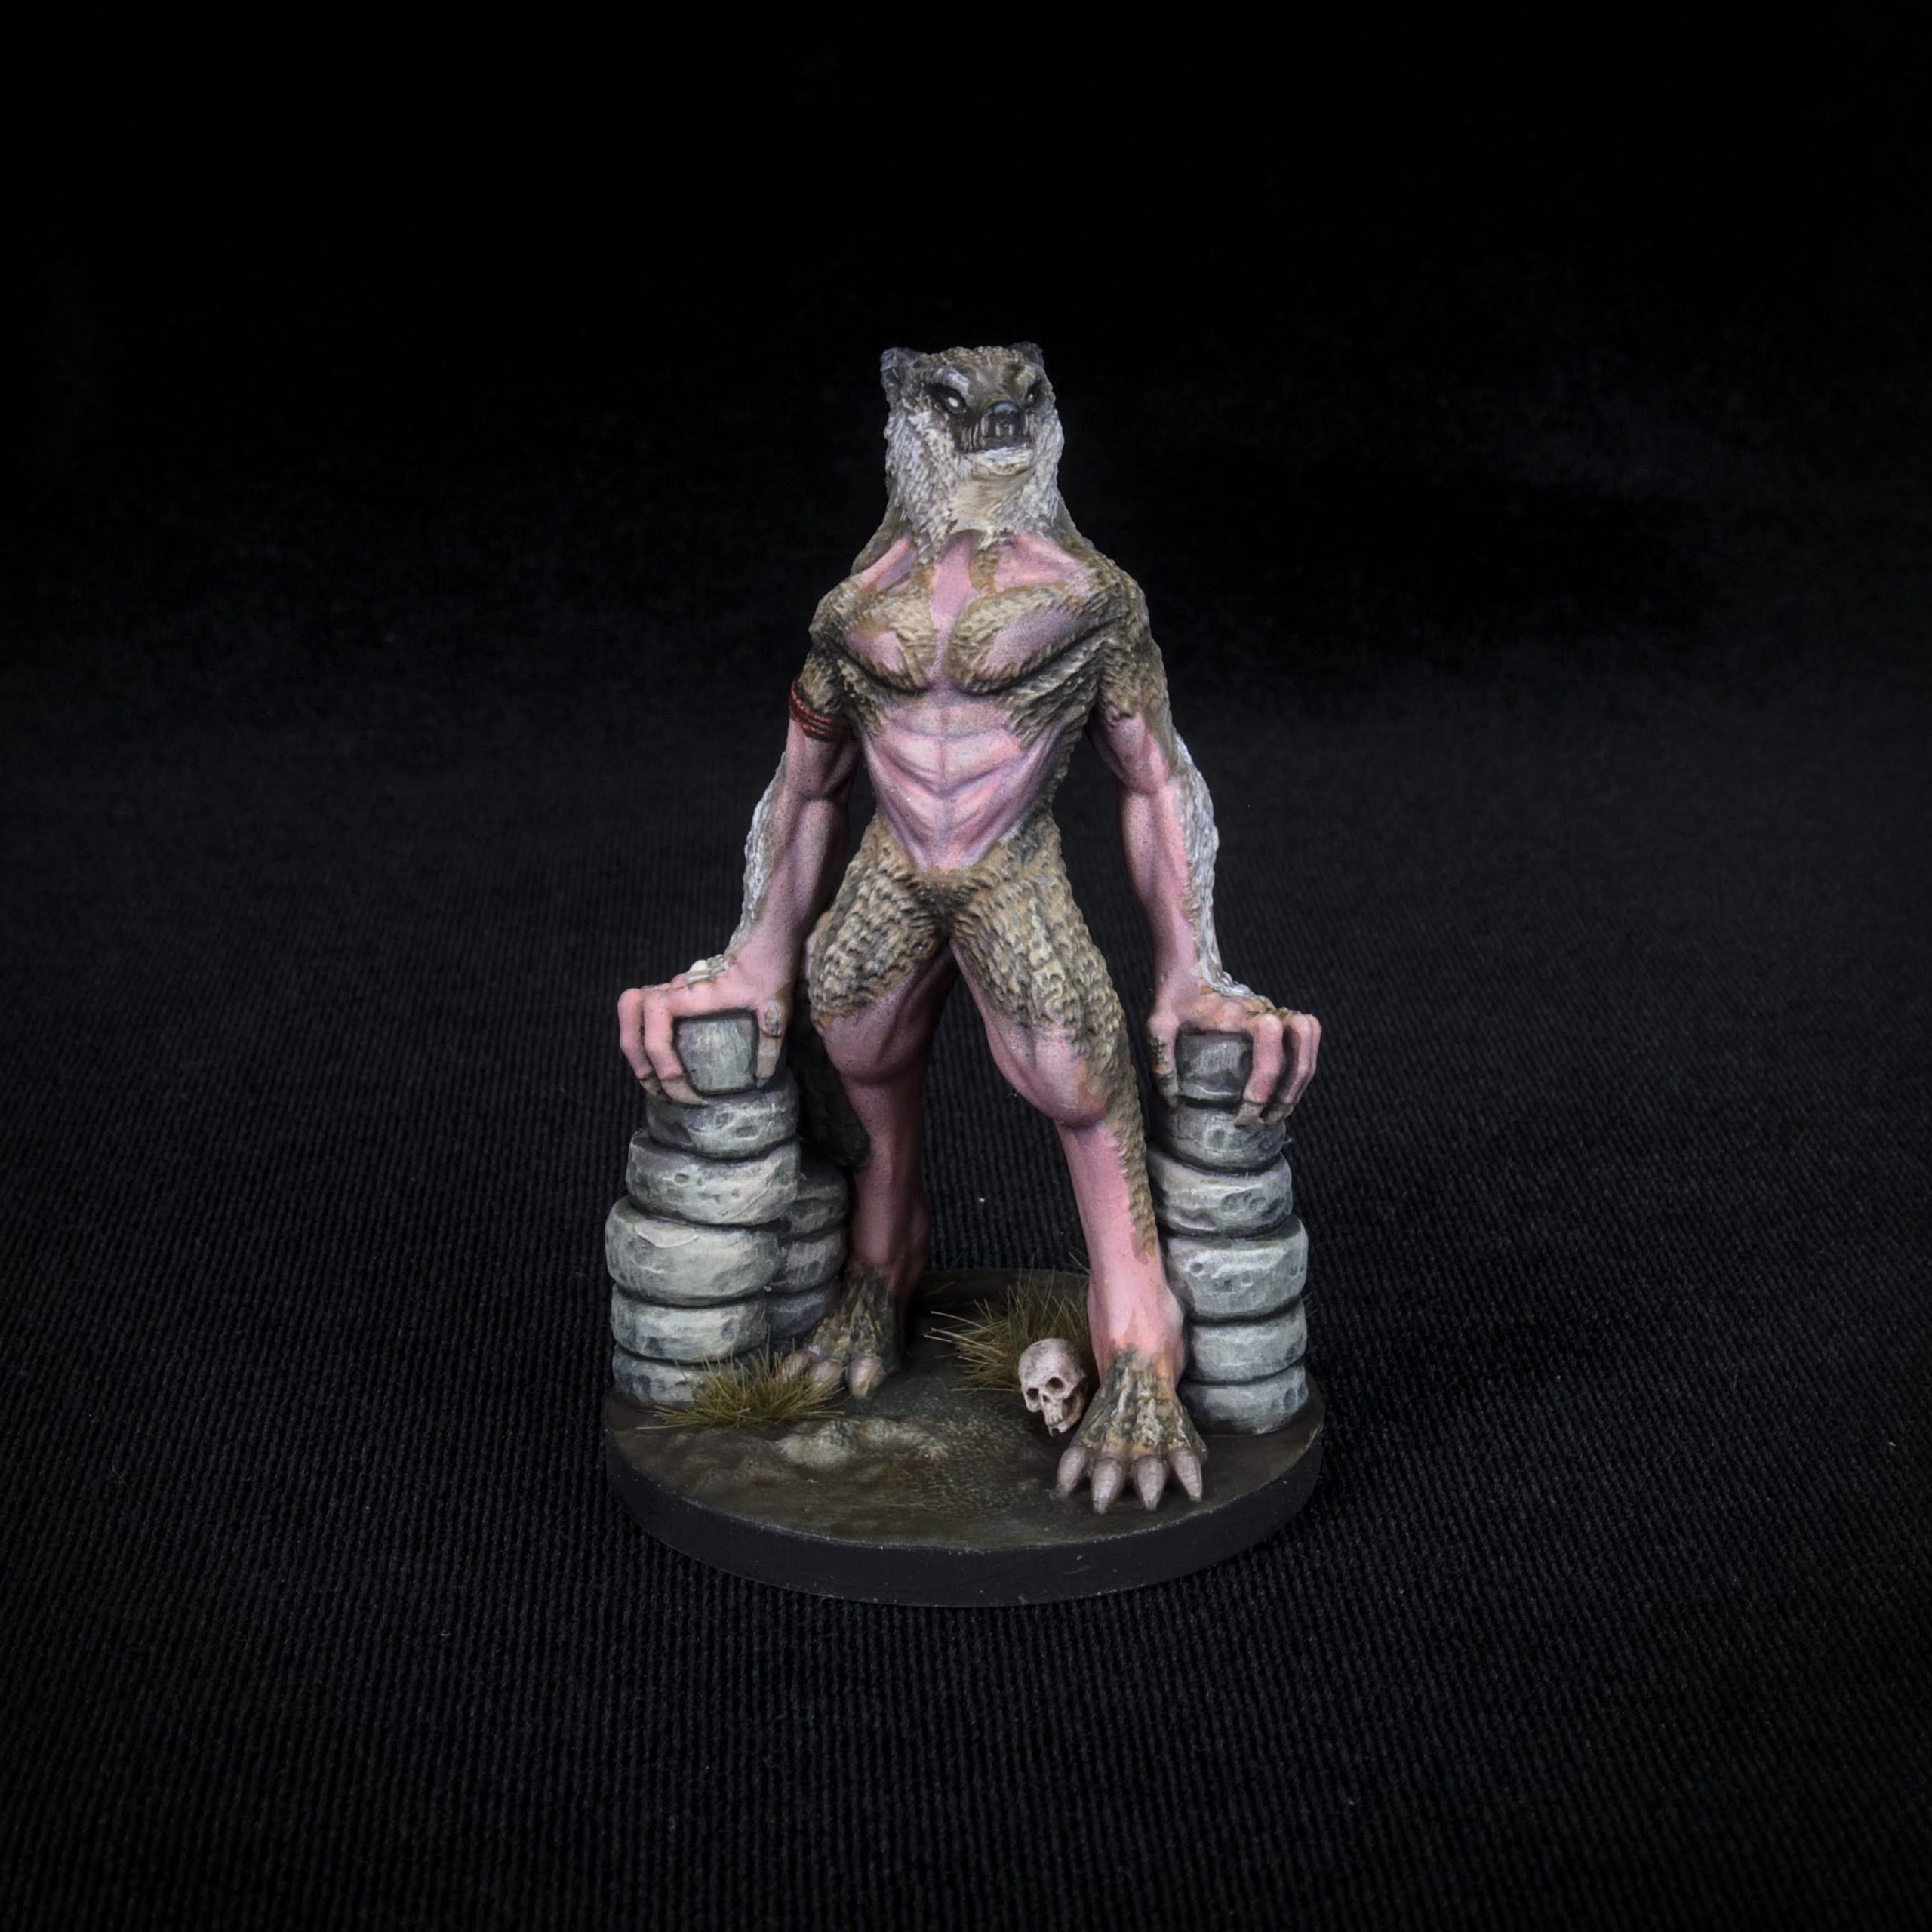
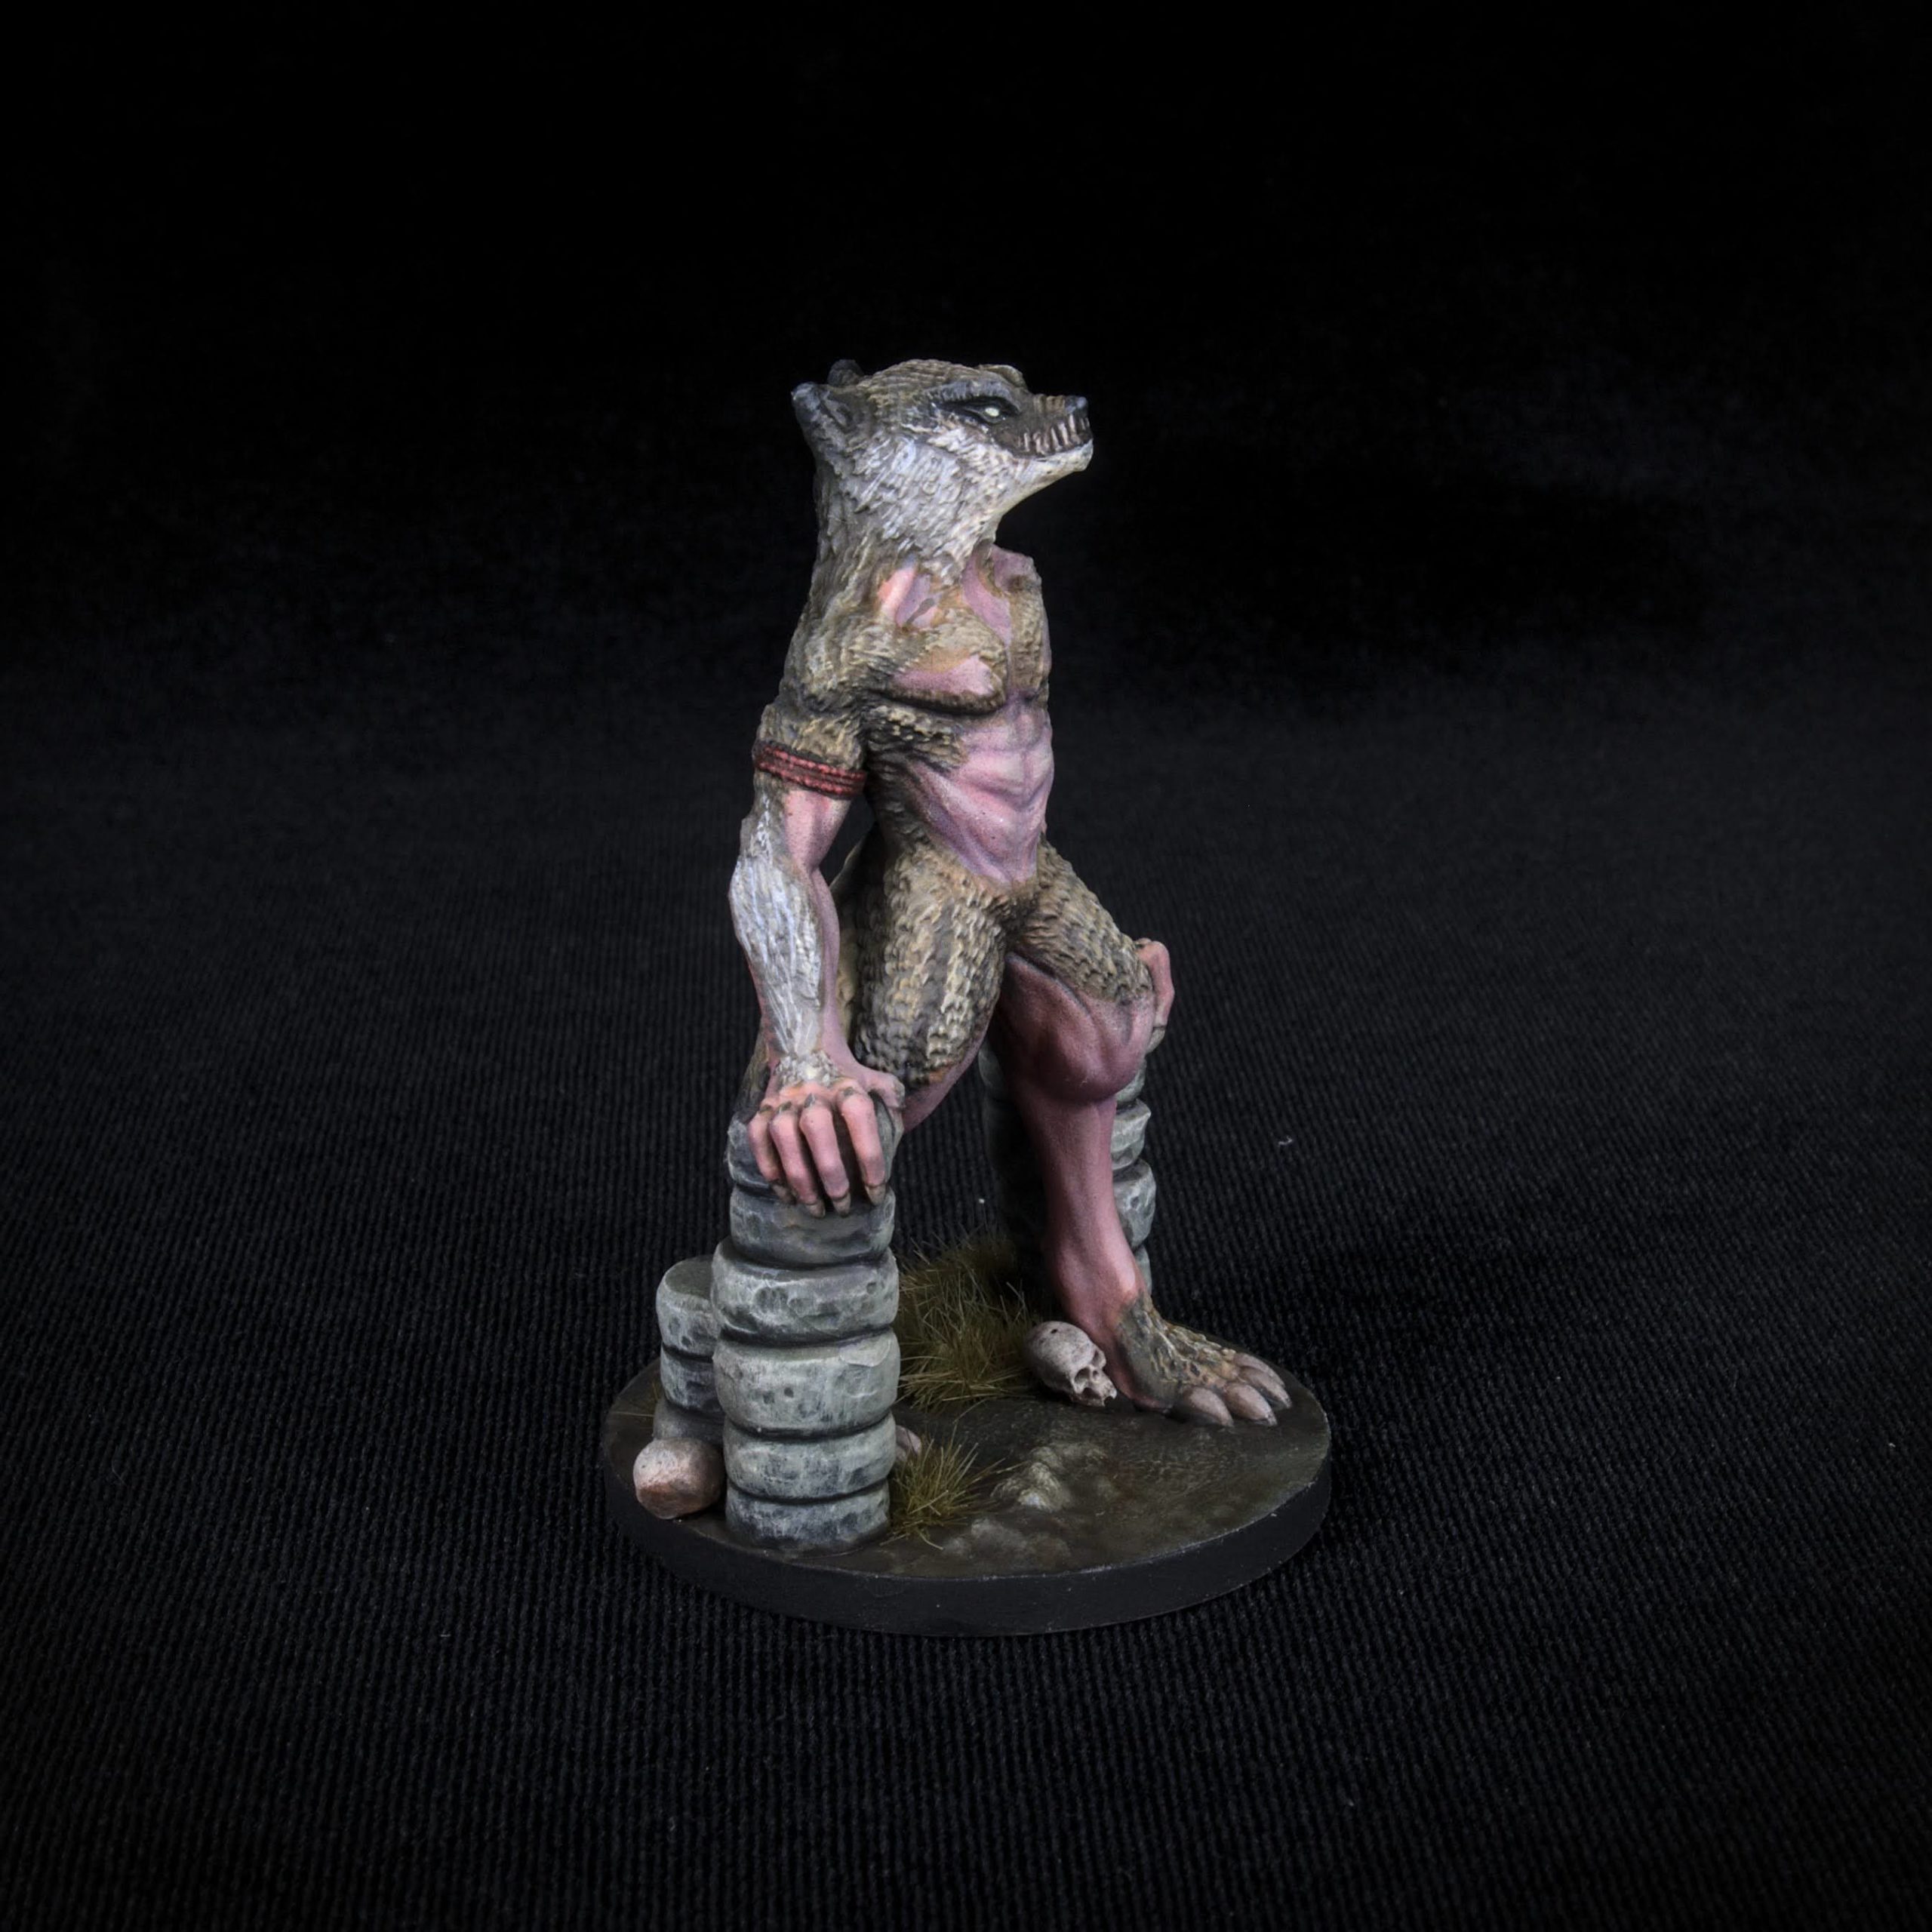
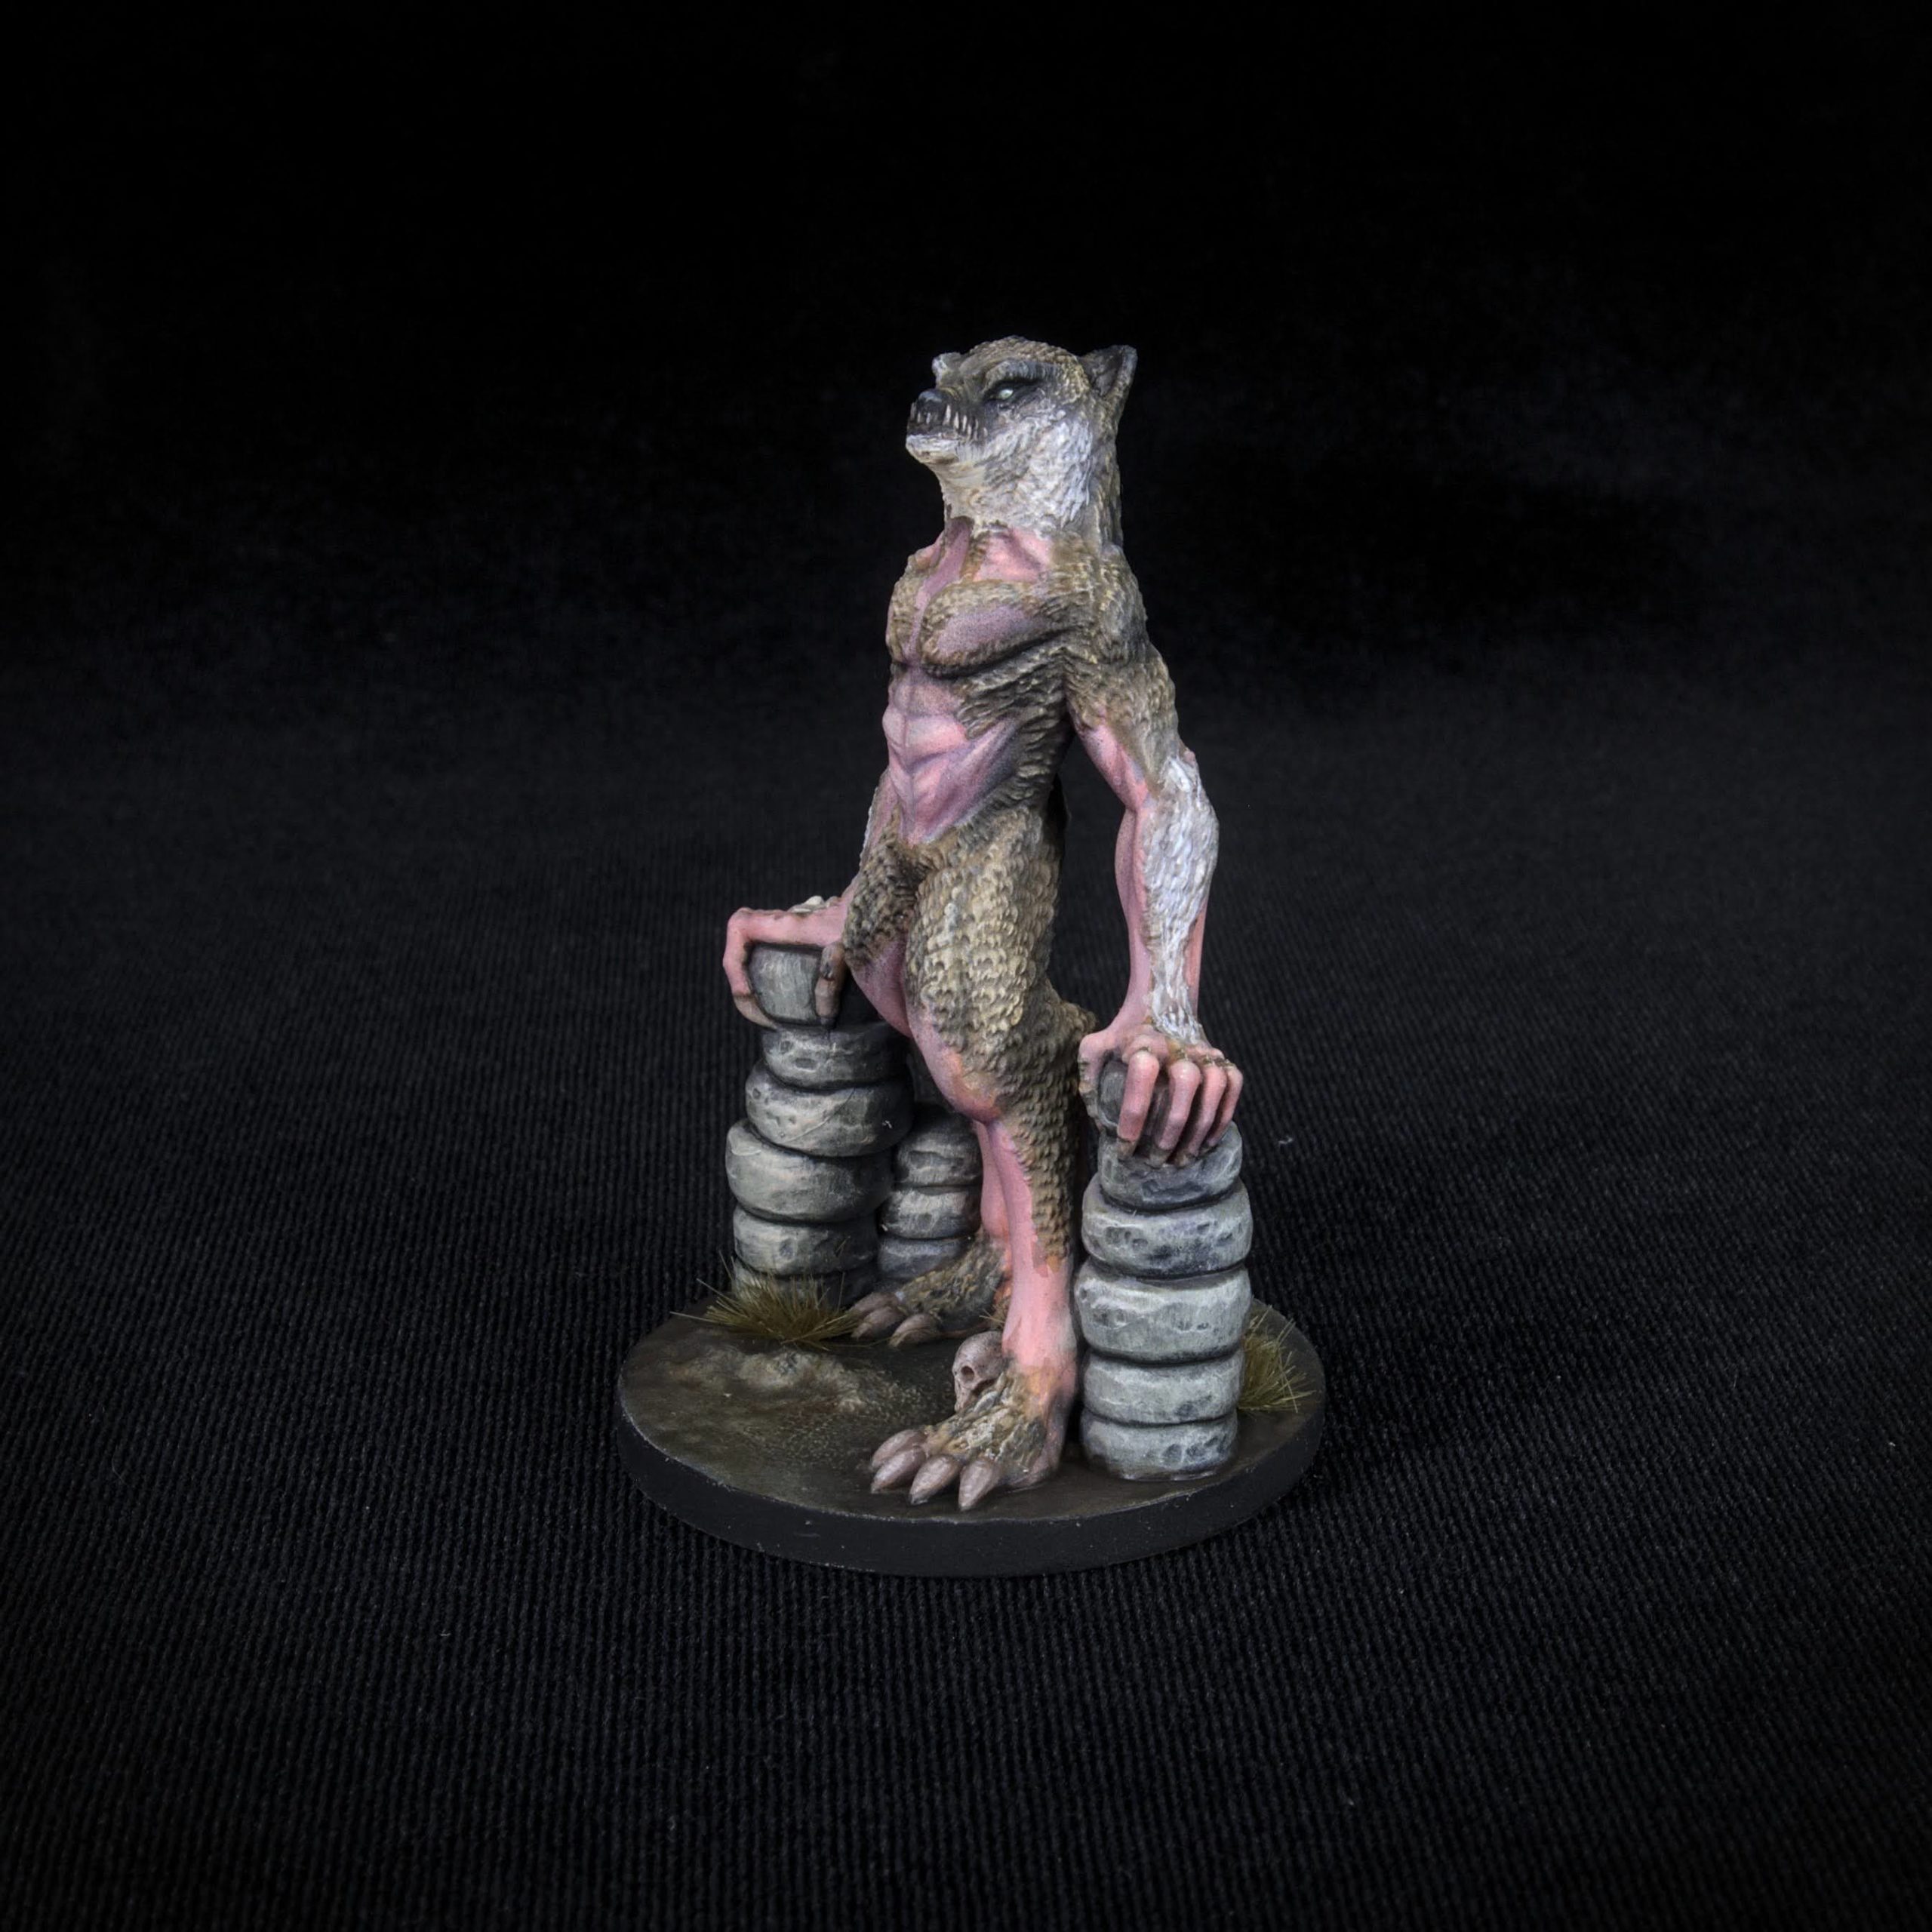
Will and the Aether Studio team have been exceedingly generous to MiniHoarder and our readers this month. They’ve decided to give out their spotlight miniature away for free, and exclusively on MiniHoarder. I’d like to attribute it to my sparkling personality, but really they’re just a great group of folks. We’re truly honored and humbled that they would offer this through our site. For a limited time, you can get the werewolf mini, officially named Sullivan Howle, here, completely free of charge.
For every Artist Spotlight, we have one of the artist’s miniatures professionally painted by our friend Chris at The Spotted Painter. Will chose their new werewolf model (a MiniHoarder exclusive!!!), and Chris turned out an impressive version of this frightening beastie. Above are the final images. You can find more work by Aether Studios on their store here.
MH: It’s been a tradition for us to start with the name of the artist, and we are not ones to break with tradition. How did you come up with the name Aether Studios?
Will: Colin Christenson, who co-founded the studio with me several decades ago in 2018, came up with the name. We were tossing around ideas when he suggested Aether Studios. We all instantly knew that it was the right one. Nebulous, but mystifying. Hard to describe or define, yet powerful. The discussion immediately ended and we went back to work.
MH: You happen to be the first traditional “team” that we’ve interviewed so far. Can you tell us a bit about how you all came together to start this adventure?
Will: Often It is hard to condense a question like “how you all came together” into a short answer or even a medium answer and have it be fully correct. However, in the case of Aether Studios it is quite easy to answer with the name of one person: Tom Tullis. Tom created the Dragonbite clip system and Dragonlock terrain. Originally Colin Christenson and I (Will Walker) were a part of a small group working on user requests from the old FDG Forums. The forum was a relic of the days when Fat Dragon Games was focused on Papercraft rather than 3d printing. Requests would come in for remixes of existing tiles, The Ruined Floor from Set 3 mixed with a Cracked Wall from Set 4 and a tentacle from Set 9, or some other mix and match remix work. Tom was very gracious in allowing us to chop up and rework things as requests came in. He also personally encouraged me to find quality people to work with. These were just the two most influential acts of kindness that helped form Aether Studios, but there were dozens of other smaller acts on his part that helped move us on our path.
Printed and Painted by Artist Peter Galeno
Eventually we started working on original designs: Egyptian, sci-fi, and steampunk themed terrain. We added more team members and we found that we were able to work together very well. Our team has continued to grow over time and we agreed on a few core tenants, long term projects and goals, and set ourselves to see their completion.
Printed and Painted by BJ Altman
MH: You and your team have been making some incredible looking terrain pieces and miniatures for quite awhile now. One of the most impressive things to me is the breadth of themes that you cover. How do you and the team come up with these different sets?
Will: We explore almost every idea we are given by our team of patrons, backers, fans, and supporters. Their ideas and inspirations allow us to deliver mountains of content for their games. We must because they are the most amazing and encouraging cohort of supporters that anyone could ever hope share a fellowship with. There has never been a limit to the imagination of D&D players and our art is without boundaries. The horizon has no end and the mountain no peak.
Carl: Be a player. Where would you like to play? Which setting can be made and can look amazing? What situations can the DM (Dungeon Master) toss at the poor unfortunate souls? What can work in tile system? What can work on scatter? Will I play on that terrain? Simply put: Brainstorm as a DM or player.
MH: What are some things you wish you had known when you first started sculpting? Is there anything you would pass on to individuals who are interested in sculpting, but might not know where to start?
Nasos: I wish I knew that I should be treating sculpting like drawing on paper from the beginning – ie, turn a hand around and focus each time on that side as if it was 2d, that way you achieve very good silhouette of something as well as detail. Also, I wish I knew there is no right or wrong way, there is my way, so not to try to copy another’s techniques. From Colin: I think setting your scale to inches if you are doing tiles and such would have been helpful when i started. Also write down your steps for sculpting something so if you want to come back later and make more you can remember how you made it.
Carl: Always start in low polycount, and build up from there. In lower polycount you can lay down the forms and bigger details much more easily. Big details, medium details, high details. Remember the order, or you’ll gonna have more trouble later. Start with DynaMesh, go as far as you can with the polycount you have. When you’re happy and on the detailing phase, ZRemesh, project details, divide. Never give up and always (!) ask for feedback. From more experienced artist, ask for real feedback. That is the only way to improve. If you don’t ask for feedback, you’re not going to improve, just doing the same shit over and over again.
Will:Meshmixer for Assembly, Zbrush for sculpting. Hardware is a custom tower (Ryzen Threadripper 1950, GTX 1060 6gb, 32gb of Ram).
Colin: I use Tinkercad to start building a model and for constructing the final piece. I transfer parts to Blender to do sculpting and texturing. Plus a few other programs for error fixing and such.
MH: Has the popularity of resin printers changed how you and your team approached your designs? With higher resolution and bigger build plates, it seems like FDM might not be the only option for terrain anymore.
Will: Yes, it has. We’ve begun to explore new resin friendly options for terrain tiles, and we’ve added additional monthly production capacity for resin related requests by our patrons. However, we still expect FDM to be the go-to choice for several more years. If resin does become the primary option, we’re prepared for it.
Printed and Painted by Steven Giguere
MH: Your team has covered so much terrain (see what I did there?) already with your massive sets and multitude of genres. Where can we expect to see you delve next?
Will: Atlantis Undersea Terrain is going to be one of our big pushes for 2022 with sunken ships and hidden temples. We’re also going to be launching a campaign for Roqom the Dragon Hellplane, a very evil mix of undead, lava, and dragon temple ruins. We’re also thinking about doing a few dozen other projects, but those are two that I am most excited about for 2022. For the next few months we have a pretty full schedule mapped out. October will feature a lot of Halloween themed terrain plus our Clip-On Nano Dungeons. November the Artists pick whichever set they want; the one they feel deserves an additional release this year. December is always space ships/sci-fi related. This year we are going to be finishing a Scout type Bird of Prey with playable interior and other projects cut short due to illness. We’re very excited for the rest of the year!
The Grande Finale
We’d like to thank you for joining us on another wonderful ride with our friends at Aether Studios. If you have any questions you’d like to toss their way, feel free to let them know in the comments below! If they’re better questions than what I’ve here, send us a message and lets get you involved in the next round!
As always, we’d also like to give a huge thanks to Chris Spotts for doing such a fantastic job on painting the intimidating Werewolf. Chris is the painter behind The Spotted Painter, runs a YouTube channel, and can be found via his FaceBook page.
If you’re an artist and would like to be featured in our Artist Spotlight, give us a shout at [email protected].
This month’s Artist Spotlight brings us another fantastic artist as well as some beautifully sculpted (and painted) minis. This time, we had the wonderful opportunity to spend some time with our friends at NovaMinis. NovaMinis is a husband and wife duo that not only puts out some very interesting theme based Patreon releases, but does so with a focus on tabletop gaming and usability. Walt is another artist with a varied and unique background, and we really enjoyed getting to hear more about his work, his process, and how he wound up in our special little corner of the gaming world.
NovaMinis has a store right here on MiniHoarder, as well as a monthly subscription through Patreon that is well worth the value.
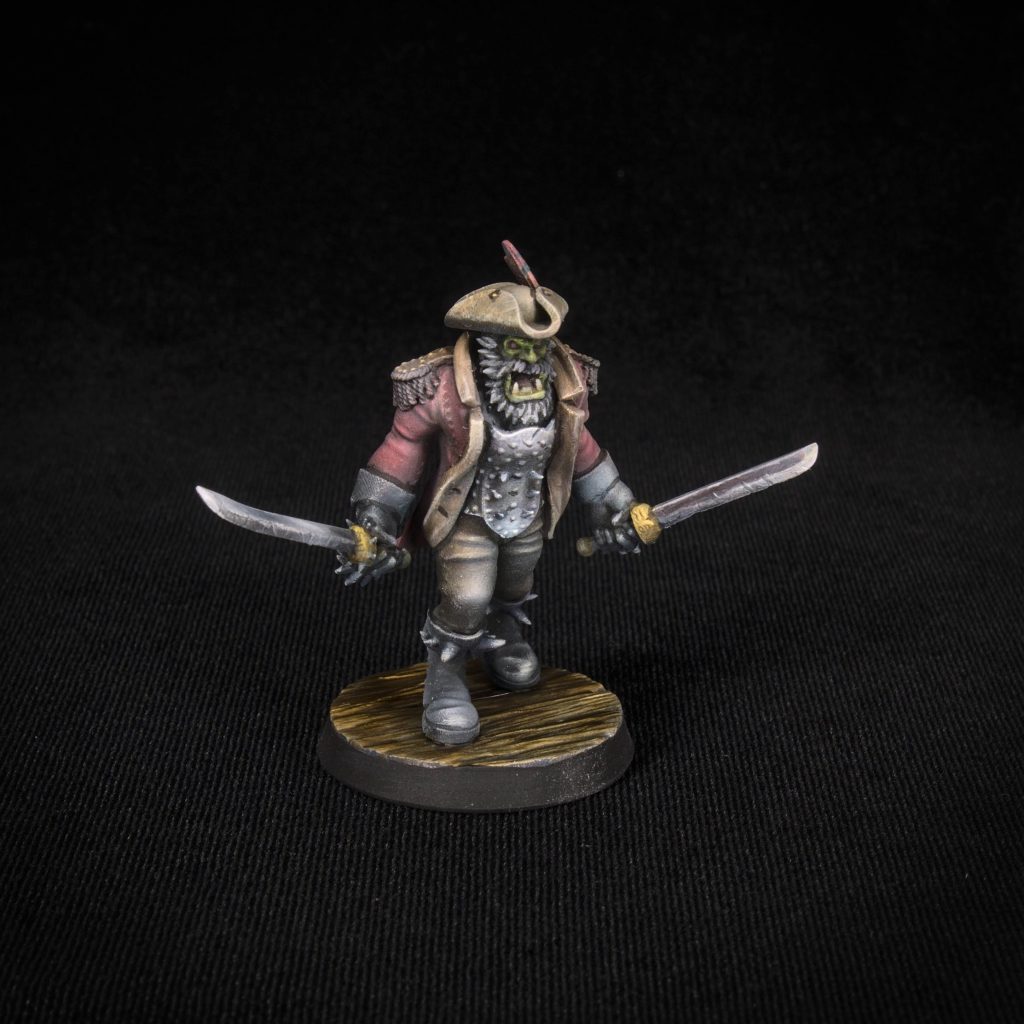
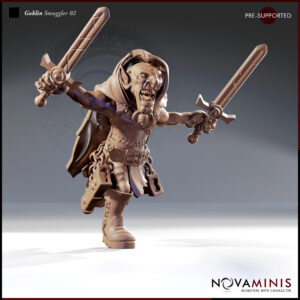
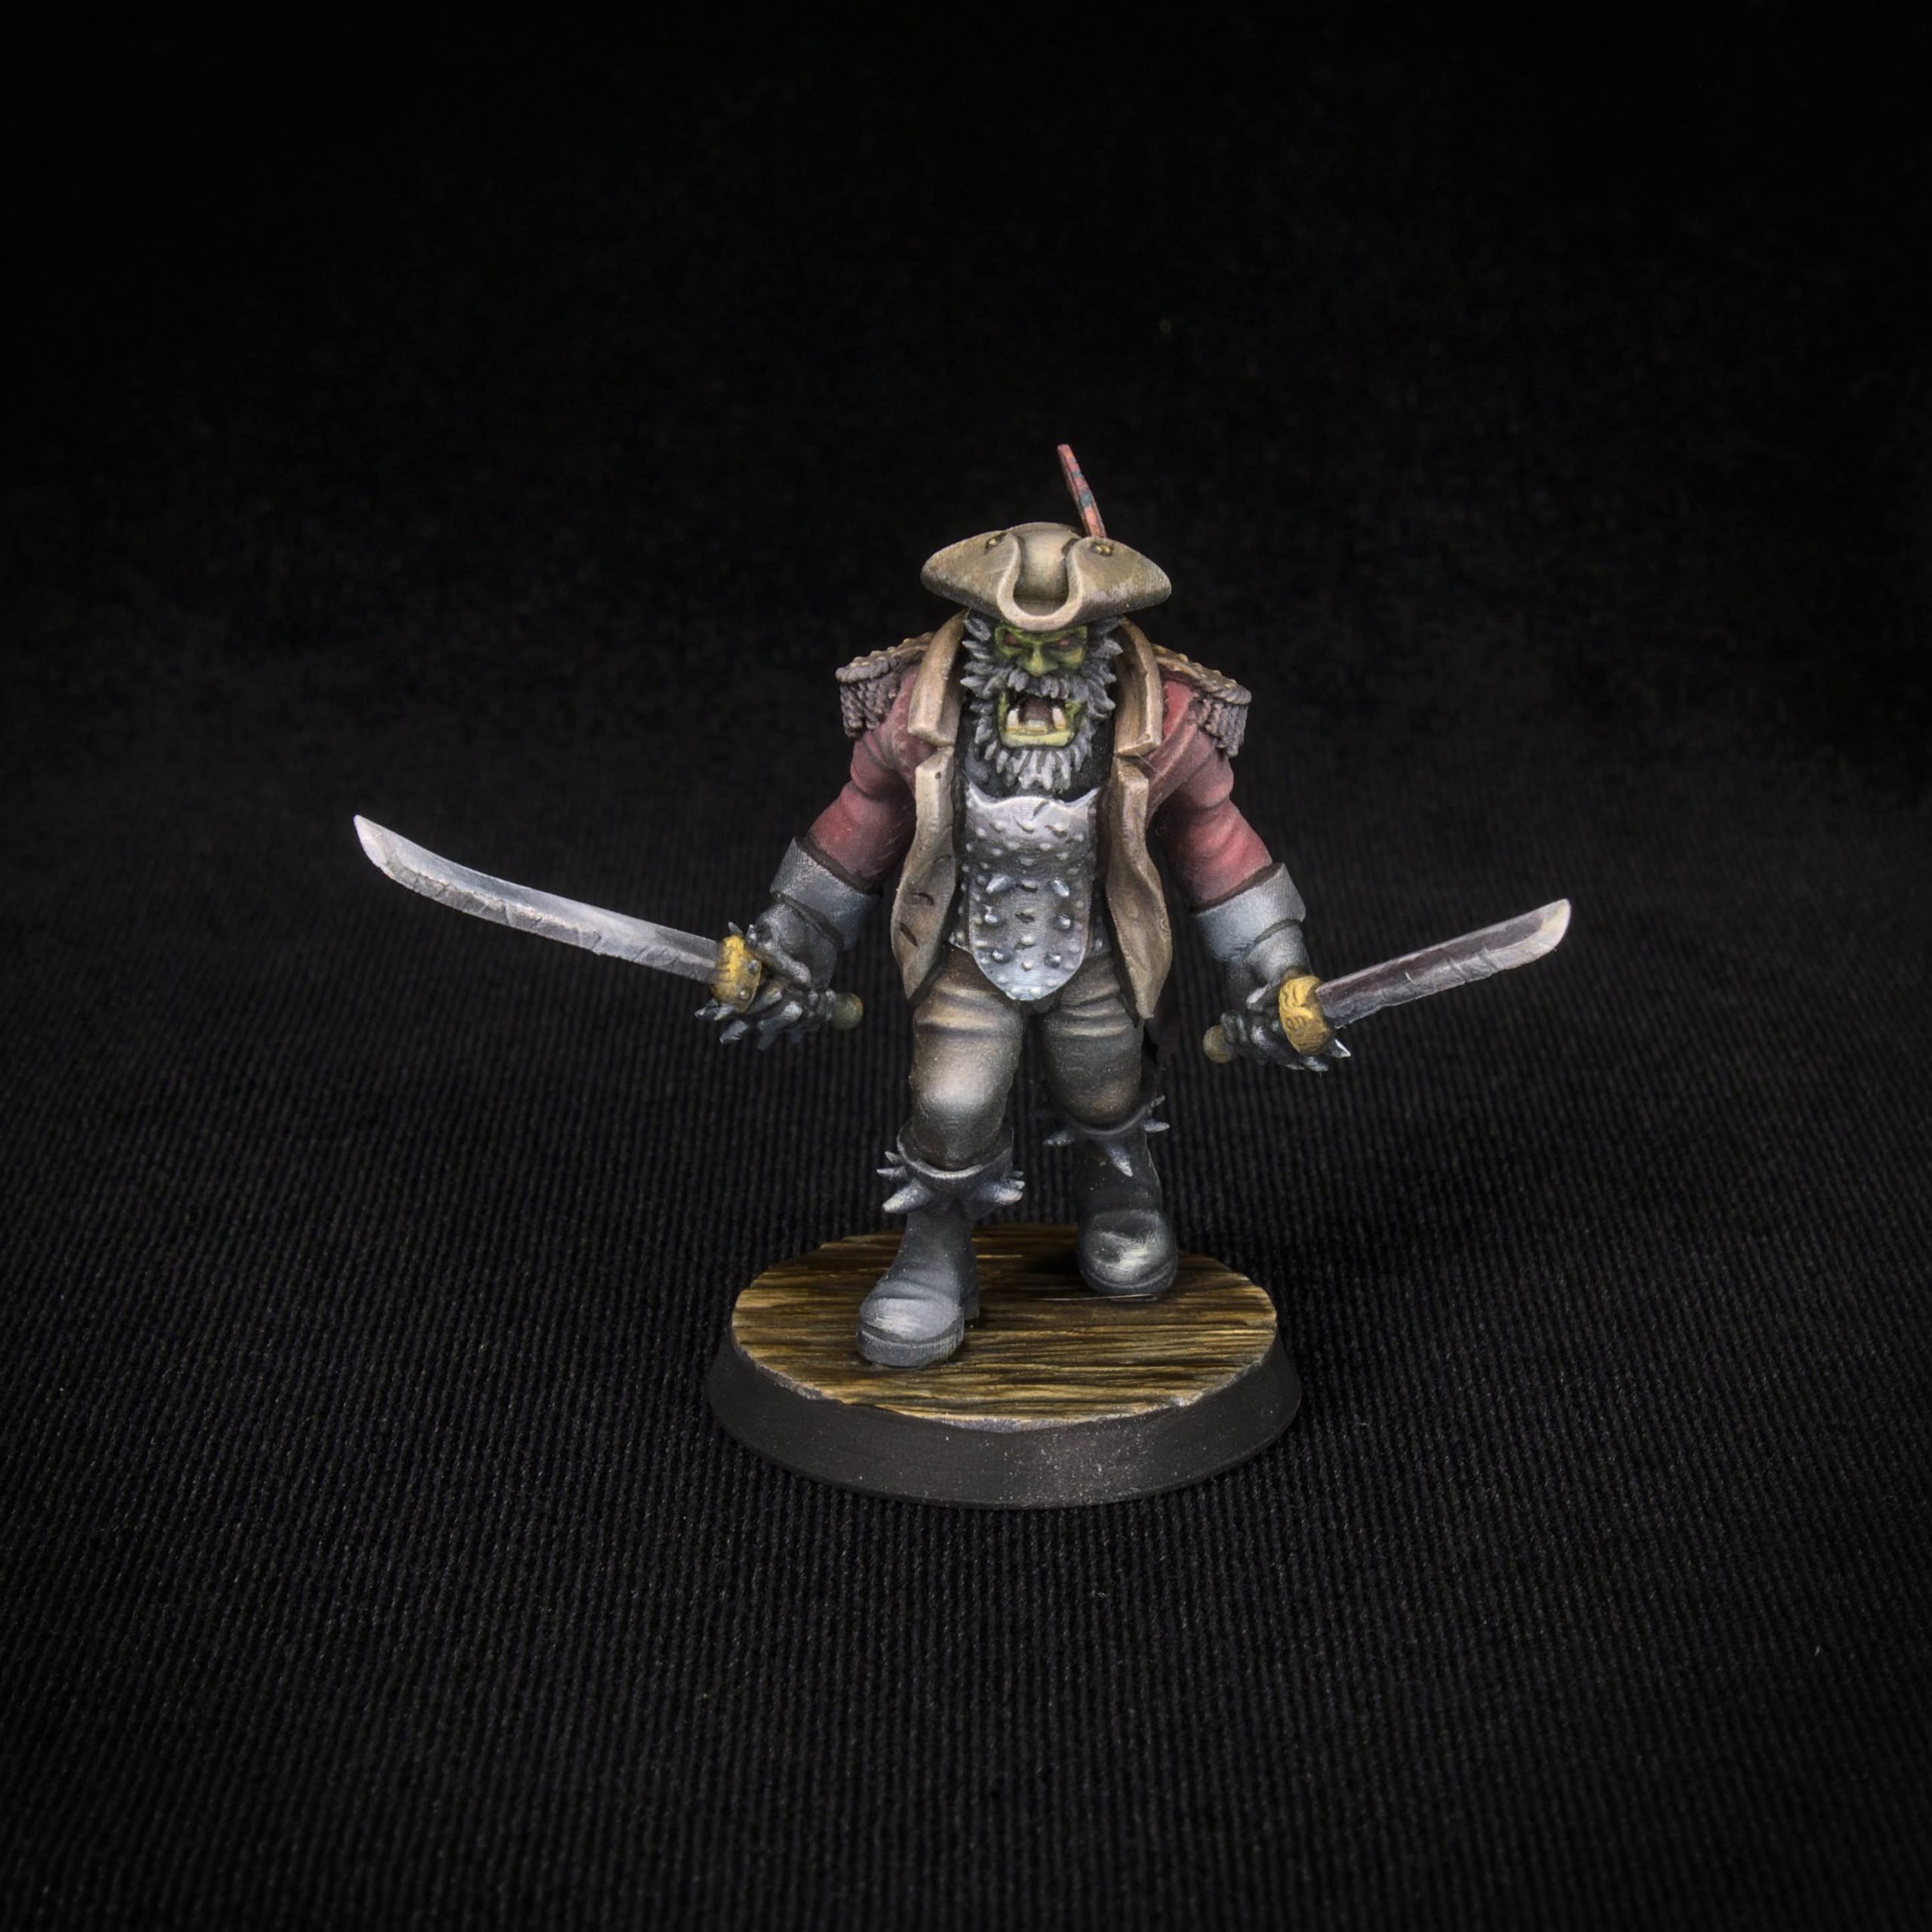
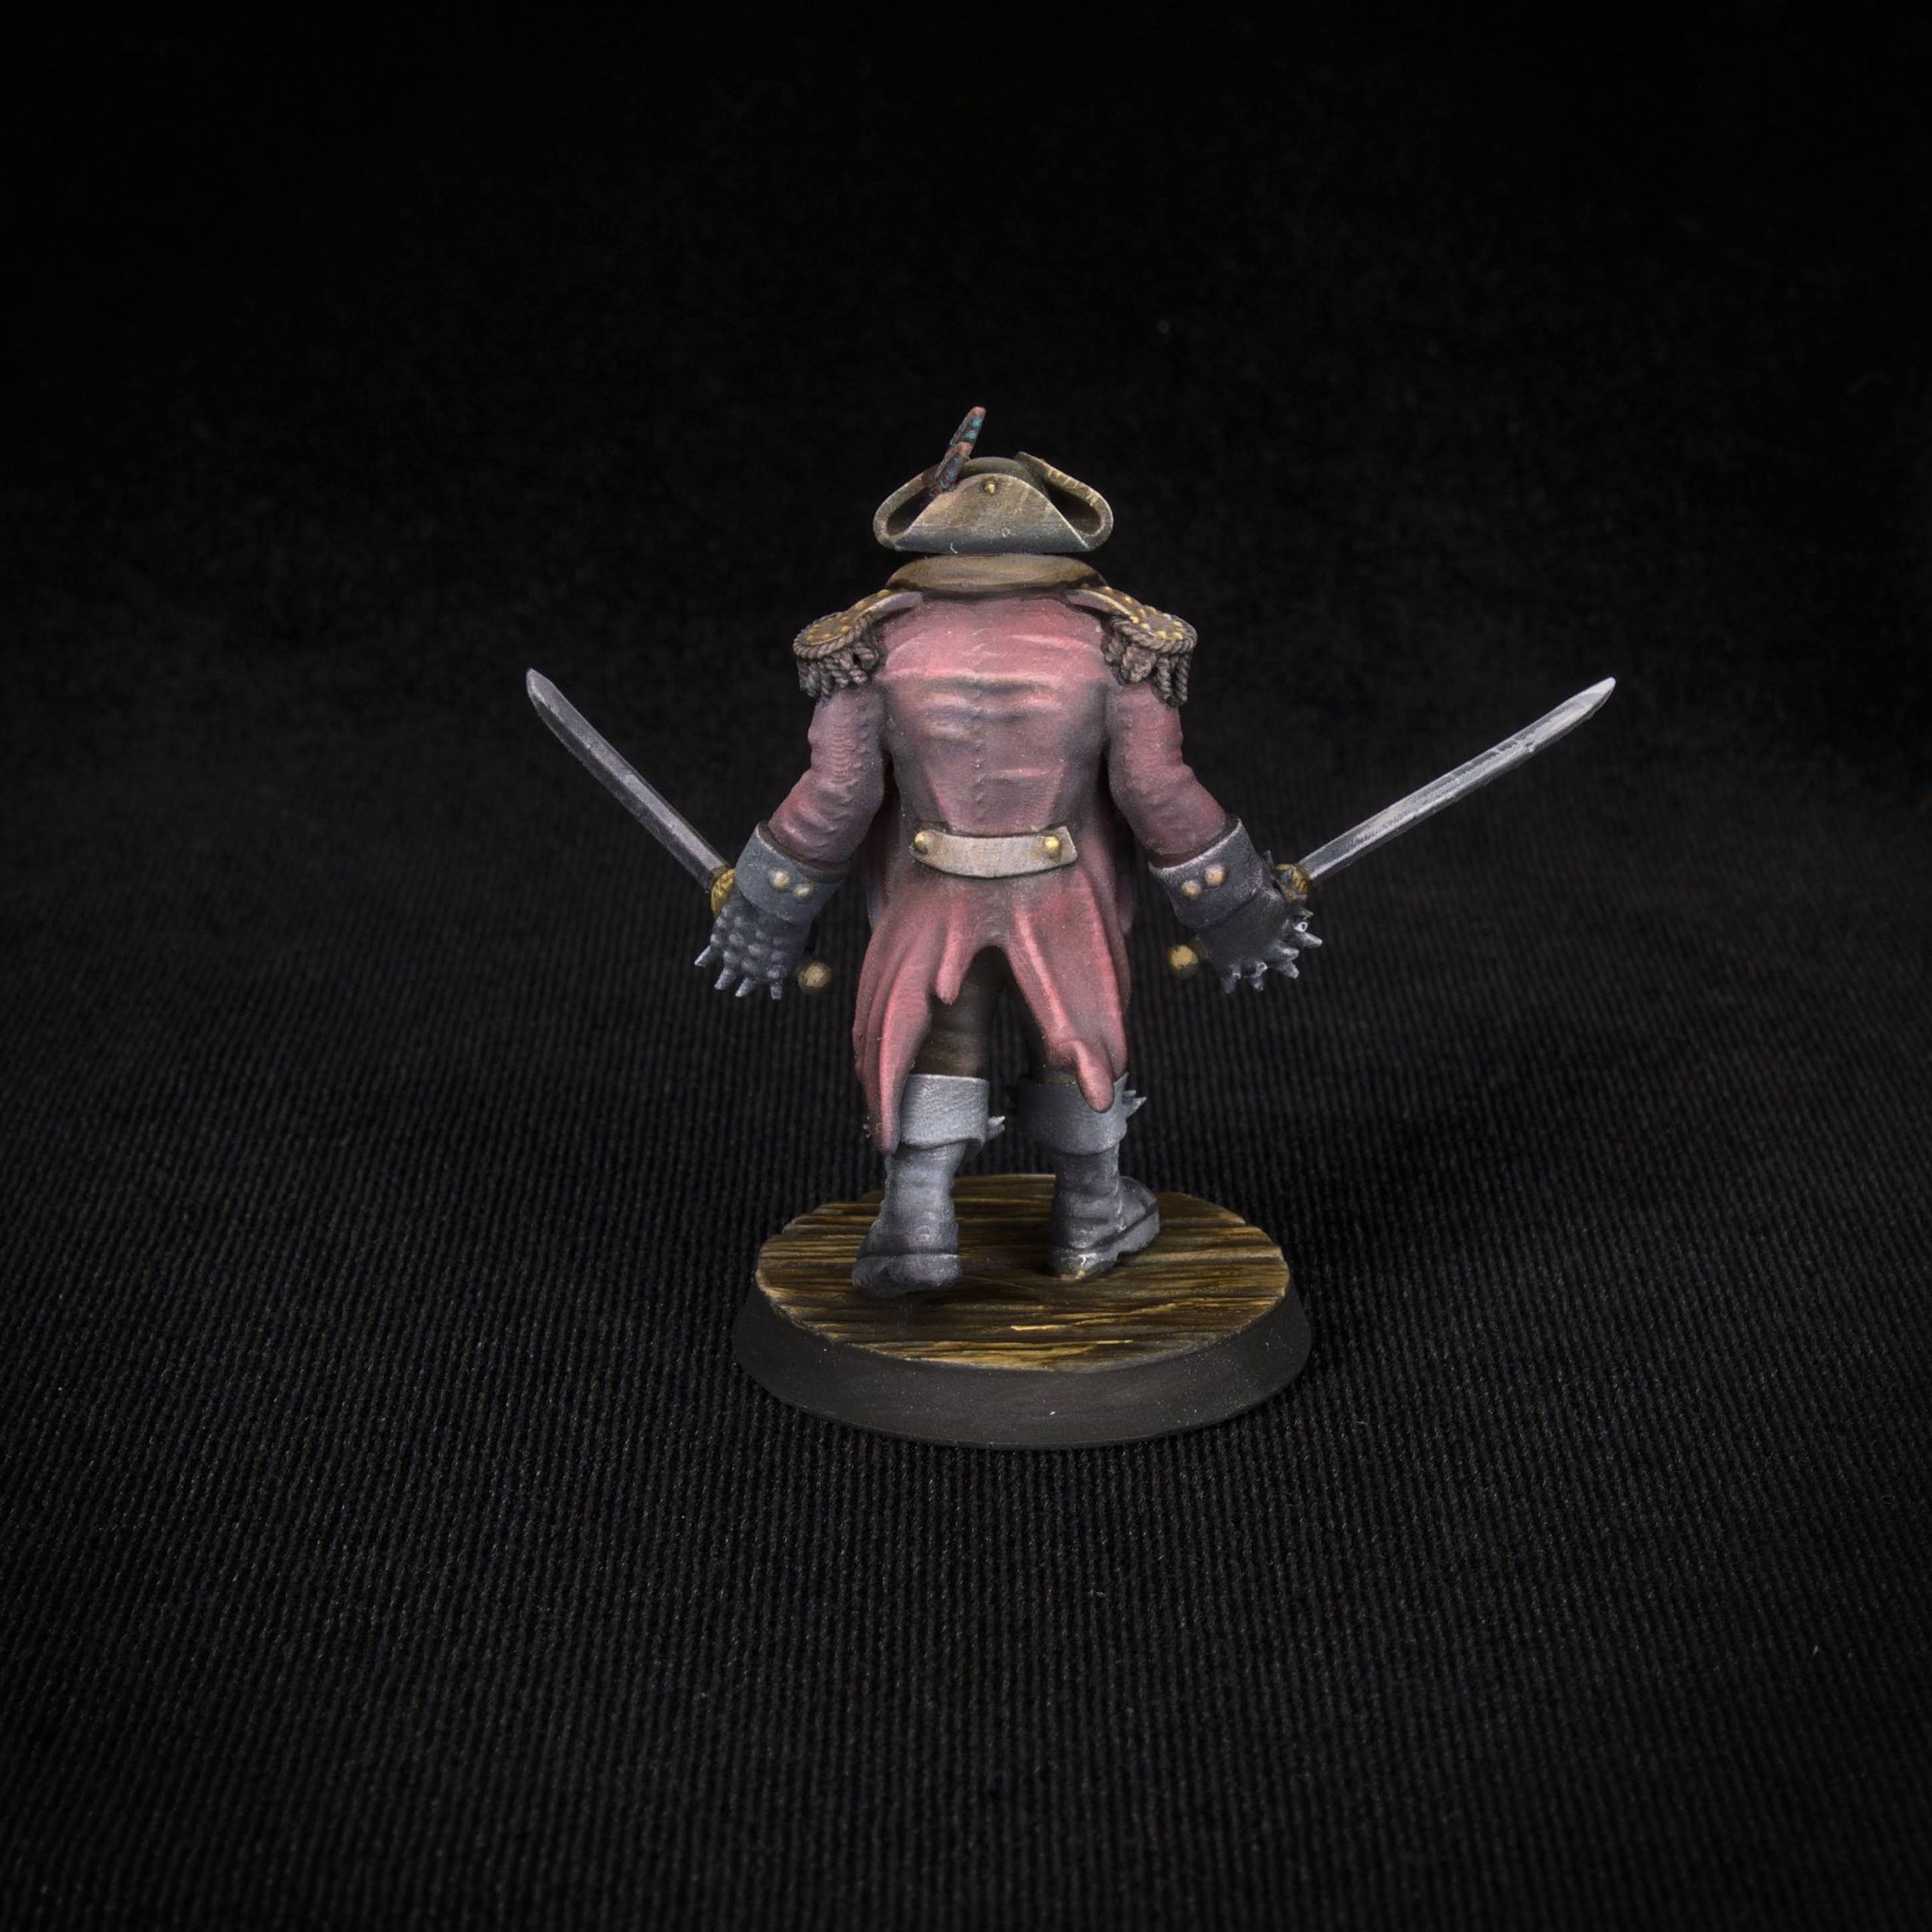
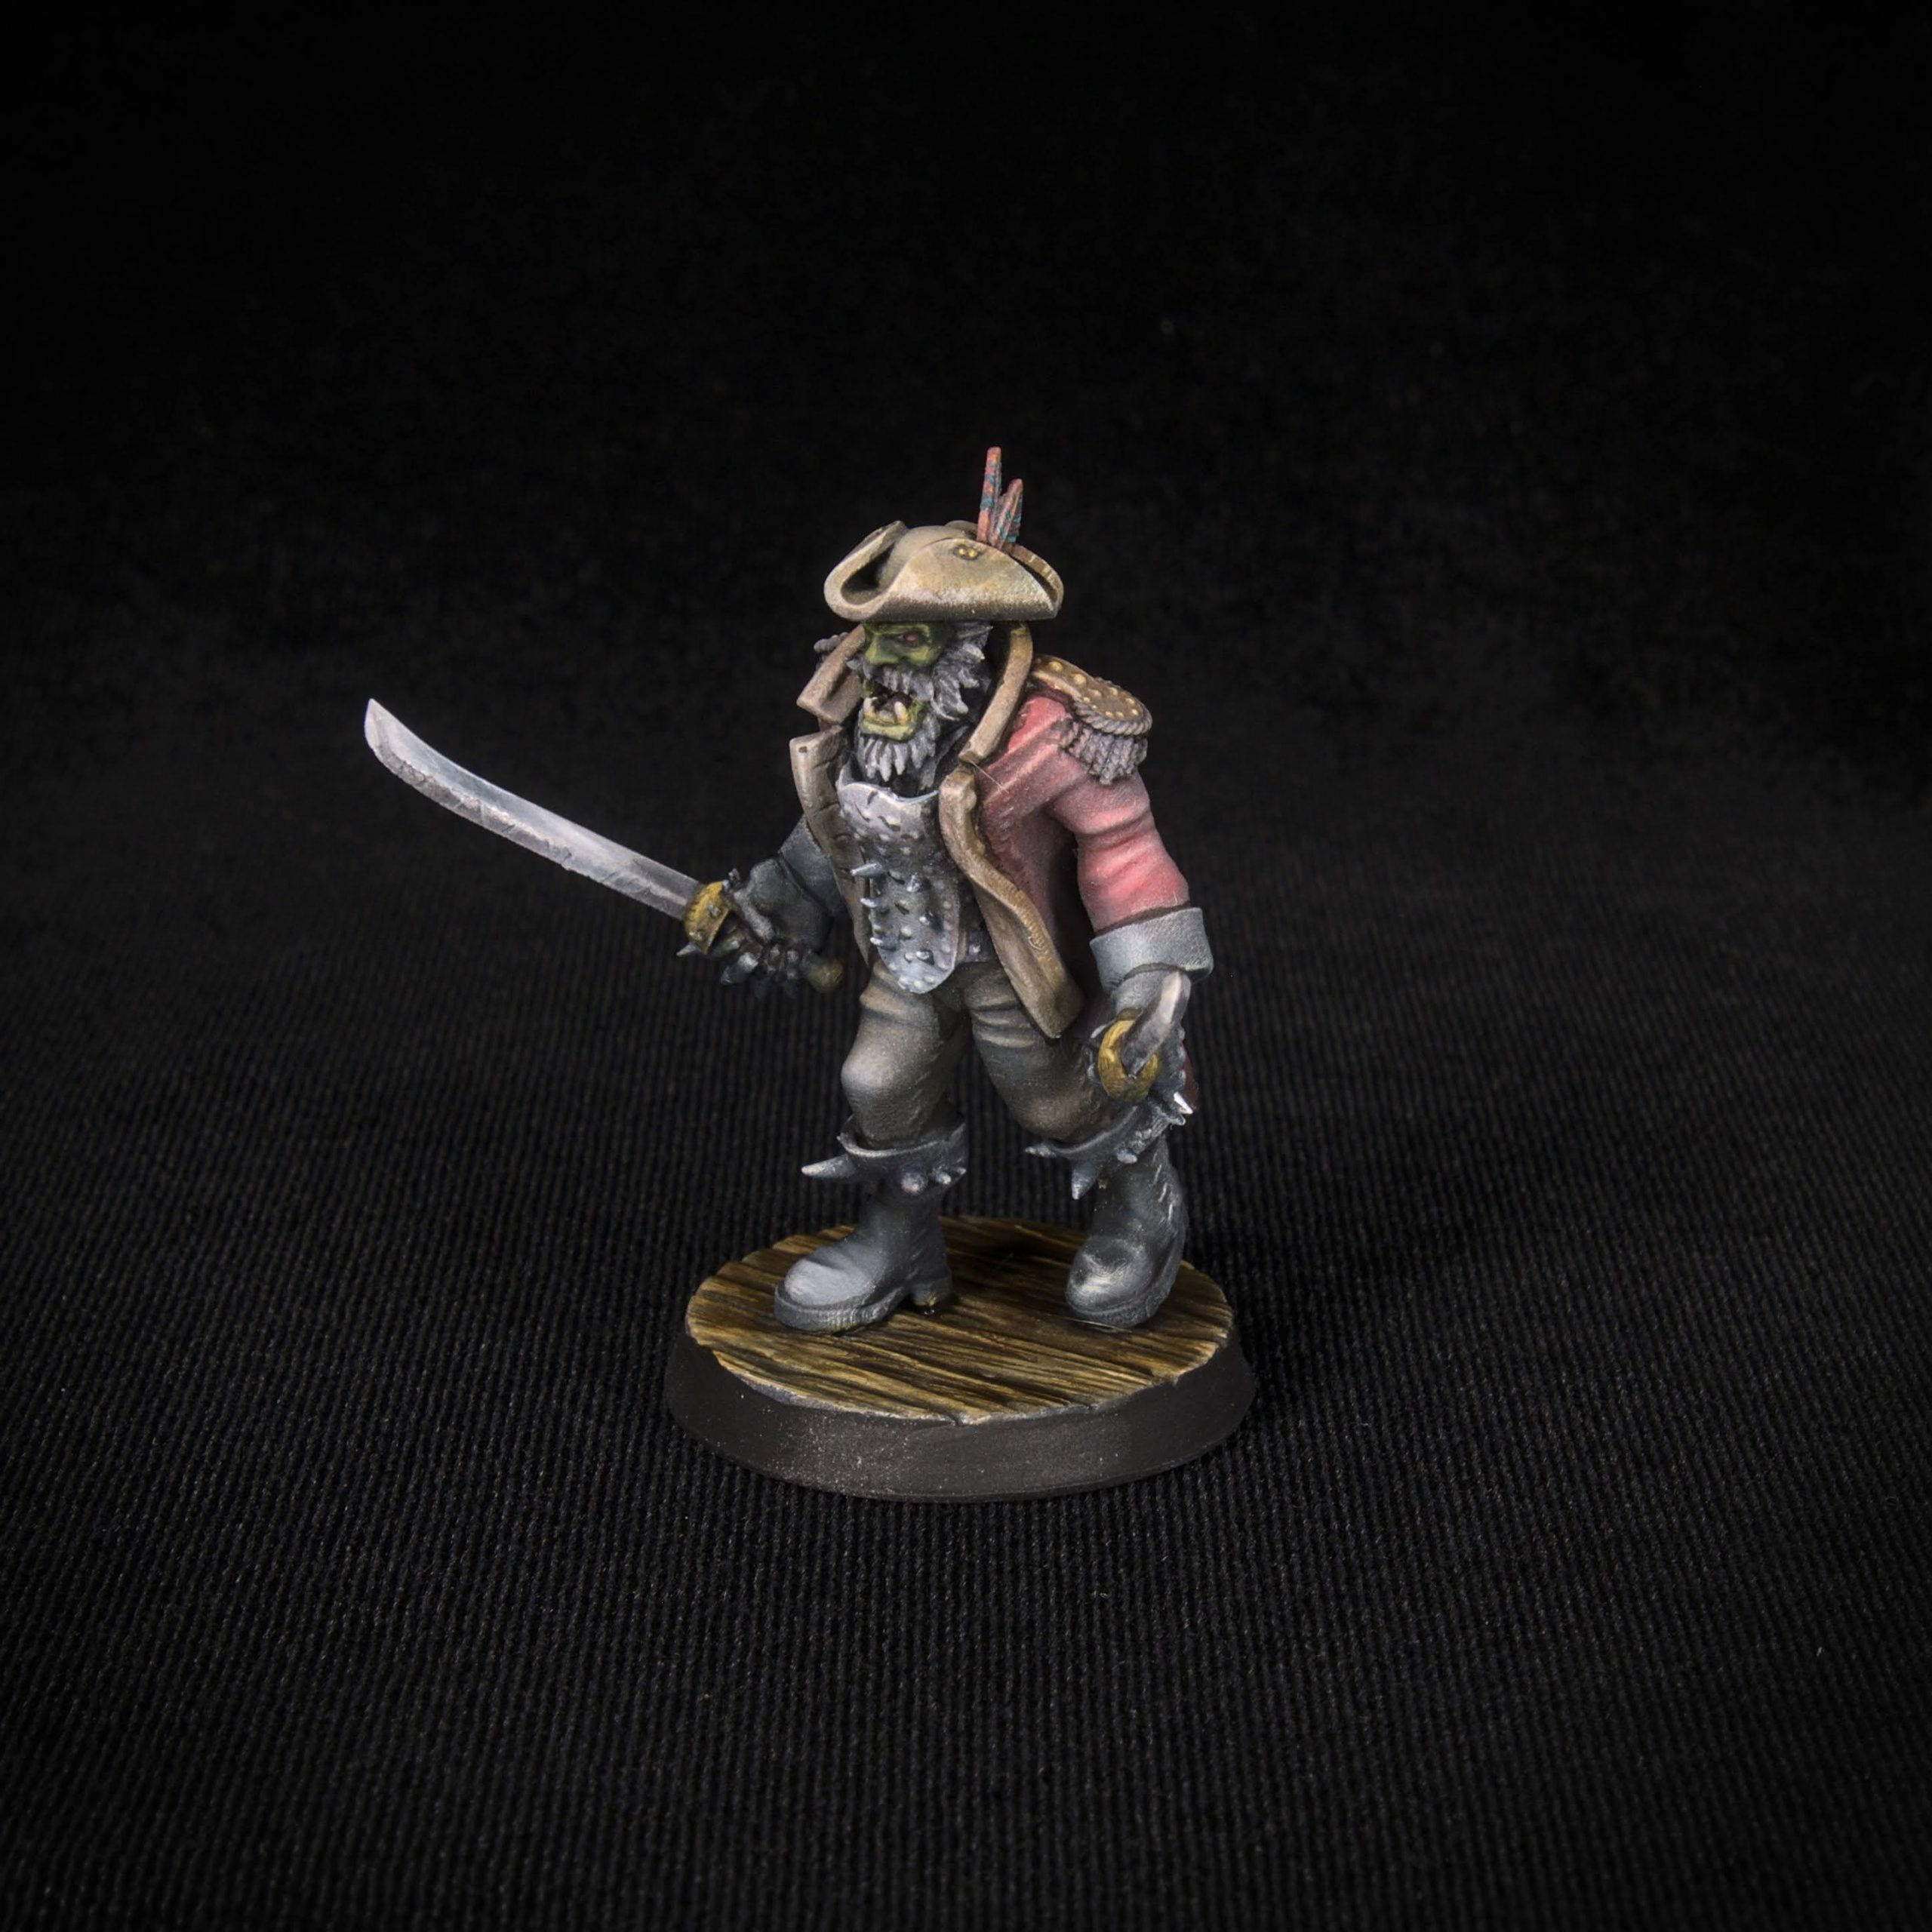
Miniature Spotlight: Orc Pirate Captain
For every Artist Spotlight, we have one of the artist’s miniatures professionally painted by our friend Chris at The Spotted Painter. Walt chose his Orc Pirate Captain, and Chris went to town. Above are the final images. You can find more work by Walt on his store here.
MH:It’s been our tradition to kick things off by asking about the creator’s studio name, and we’re certainly not one’s to break with tradition. Can you tell us why you chose NovaMinis and what it means to you?
Walt: My wife, Katia, and I started a company a couple of years ago. After much thought, we chose the name Nova Mentis (Nova meaning new and Mentis meaning mind). We wanted a name that would reflect the beginnings of a new way, a new approach of thinking and working. It was only natural to continue with attaching the prefix “Nova” to all our projects, hence “NovaMinis”. Additionally, we also liked the simplicity of the name and felt it carried the spirit of our intentions and work ethics.
MH: Before you jumped into sculpting, we have it on good authority that you spent some time writing for the video game industry. Can you give us a bit of that experience, and how you transitioned from that to sculpting?
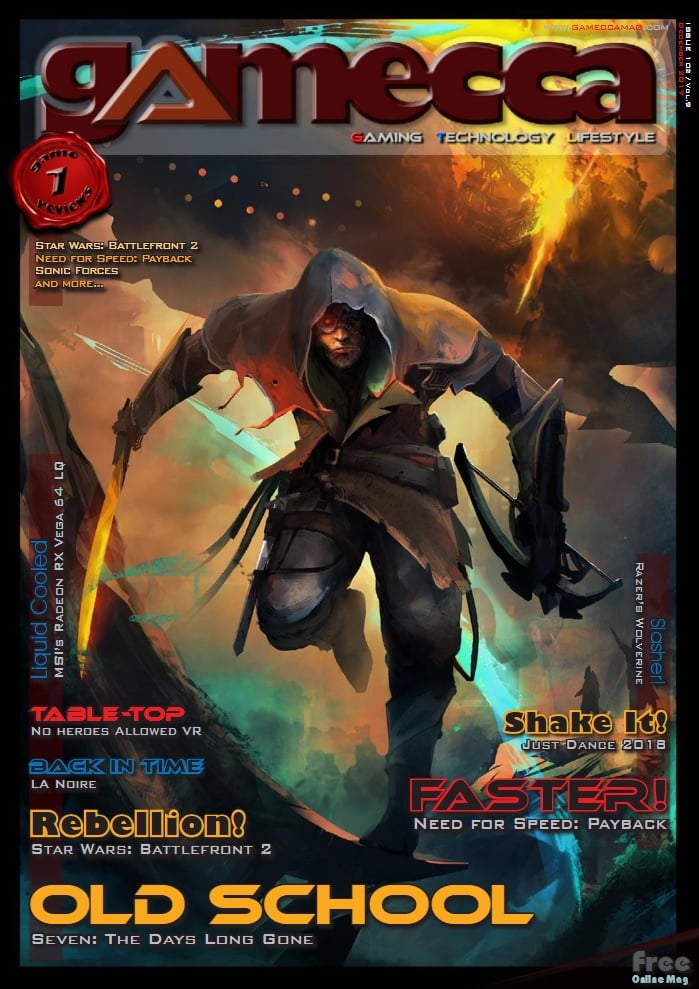
Walt: Yes, that is correct, I worked as a video game journalist for a couple of decades. I was involved with some prominent publications and learned a lot as well as had a lot of fun in the process. I mean, who doesn’t want to play video games for a living! In 2009 Katia and I pooled our skills together and started our own video gaming and tech digi-magazine, called Gamecca. Sadly, after almost 10 years, we decided to retire the magazine in 2018 as the video game industry was changing, and we had to adapt. With this decision we decided to follow other passions…
Sculpture was always part of our lives. I was fortunate to meet my wife Katia in the National School of the Arts, where we both trained in fine arts. I have sculpted on and off over the years but in around 2016 I started dabbling with 3D sculpting software. It started evolving into mini sculpts (something that I was keen on even as a kid, back in the early ‘80s) and so we started exploring online options.
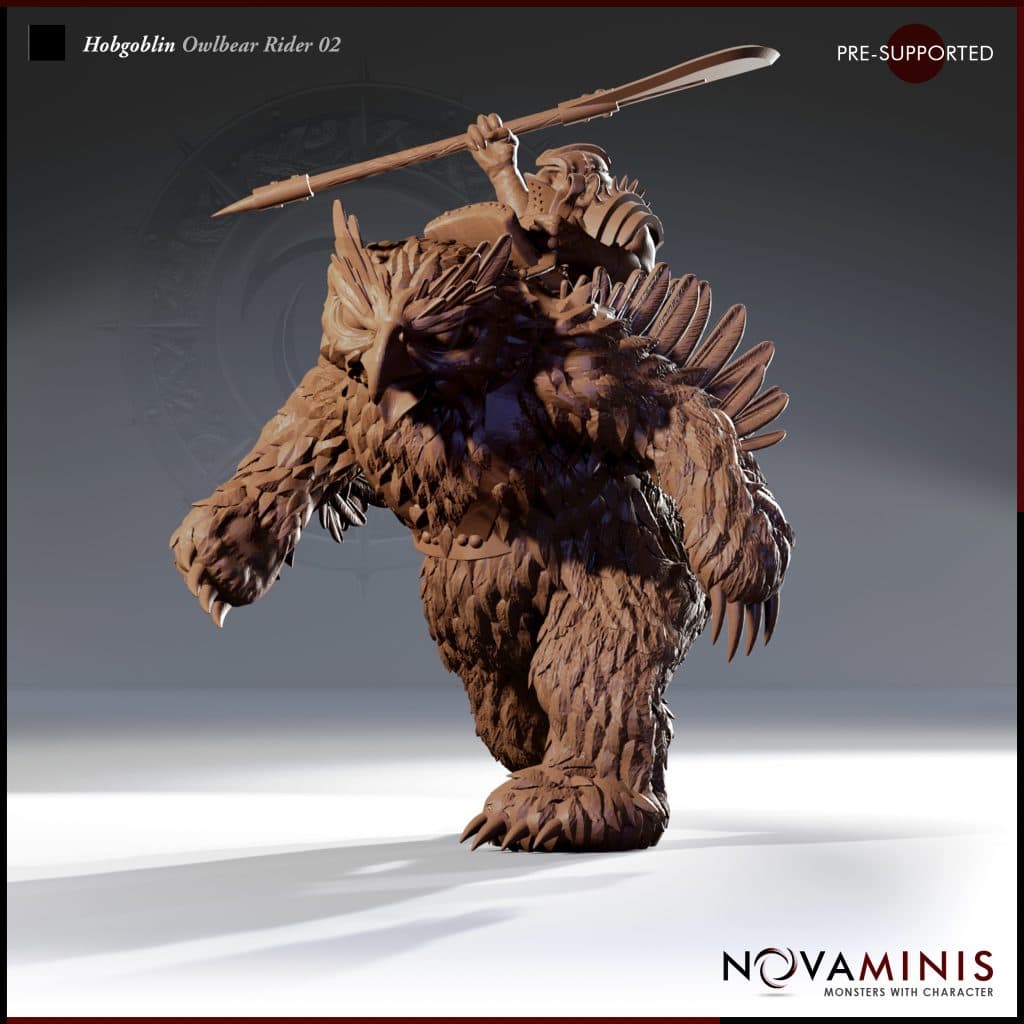
Hobgoblin Owlbear Rider 02
MH: Your sculpts definitely have a certain feel and aesthetic to them. How has your style evolved and changed over the past year or so, and what would you say are your hallmarks?
Walt: In terms of evolution, I think that the minis have become far more expressive. We’ve been putting a lot of work into posing and expression, as well as into the humor that sometimes makes its way into our minis.
As far as hallmarks go, I think I would definitely define what we create as… versatile. When it comes to designing a mini, becoming very specific with that mini doesn’t really work for me; personally I feel that any particular mini needs to be able to fill a number of roles for it to be truly useful to a gaming group. There are some that are more specific than others, of course, but some degree of adaptability is very important. I believe it also comes into play when you look at how the minis interact with other items on the table-top. They need to be able to ‘fit in’ with whatever else is happening on the table, and to that end we try and fit into a style that blends well with other products that are out there.
MH: There are a ton of artists doing sculpts now. How have you adjusted your style and content to stand out among some of the others?
Walt: Yes, there are a great many amazing artists out there. We have chosen to focus on the table-top. While some folks have sized some of our minis up and painted some of them as display pieces, we are about gaming minis, primarily, and while our intention is always to create something that works in a 28mm or 32mm environment.
We have also chosen to look at strong themes and ideas for each release. I like to think of each release as a play-set… whenever possible, the elements all need to work together, and hopefully inspire great stories for those that use them. Those packs form part of larger themes, too, some of which have more defined ideas, and others being a bit looser… ultimately, it’s a world that we are crafting, and those themes and pack ideas all tie into it.
Funeral Bell
Lastly, maybe most importantly, is the idea of print-in-place objects. When I first started designing for print, I did what I tend to do with new projects… jump and build my wings on the way down. When I first started printing with my trusty Elegoo Mars (which is still churning out test prints) I wanted to see what parts could be made movable. I knew that some folks were doing it with FDM, but I wanted those results in resin. It took a hell of a lot of trial and error, but we got there eventually. Being new to the industry, I believed that this was more common, but I was quite surprised to find that it is not. We like to strive to have at least one print-in-place piece in every pack, even if it is just something simple. But I really enjoy the more complex pieces, like the cages and wagons, because they add a fun logical challenge to the creation process for me.
MH: I have to say, your latest set was reeeeeally impressive. Especially the ship! We can’t wait to print that beast out. You also have several characters that really caught our eye. Can you tell us a bit about the set, and about the captain in general?
Walt: Thank you! That ship was a great challenge for me, being the biggest piece we’ve released to date. And it needed things that open and close and swing and wobble (because that’s how we roll, right?), so there was a lot of tinkering that went into it.
As for the captain, well… there’s a bit of a process to this, so bear with me!
The first decision was to make the ship which, because we like to present the themed packs, needed a crew. And because we do monsters exclusively (except for the odd slave here and there so far) the crew needed to be some kind of creature. I think orcs were the obvious choice here.
So we set about designing them and decided that we needed options for people who do, and do not, use black powder in their campaigns. Because versatility…
While researching various cannons and flintlock pistols, I started looking at the dress from the high age of piracy…. Tri-corn hats, long coats, that sort of thing. The idea of orcs wearing tri-corn hats was great, and I kind of ran with a very traditional pirate wardrobe for the orcs.
The captain was the last design, and he needed his long coat, epaulettes, hat and beard to really be worthy of the title. He’s around ten percent bigger, too…
We tend towards an organic fluidity when we put together our packs, and that really was the case here. While there are plenty of ideas and concepts at the outset of our design phase, nothing is set in stone; the original ideas were quite different from our final product with this set, and the captain is a good example of that process.
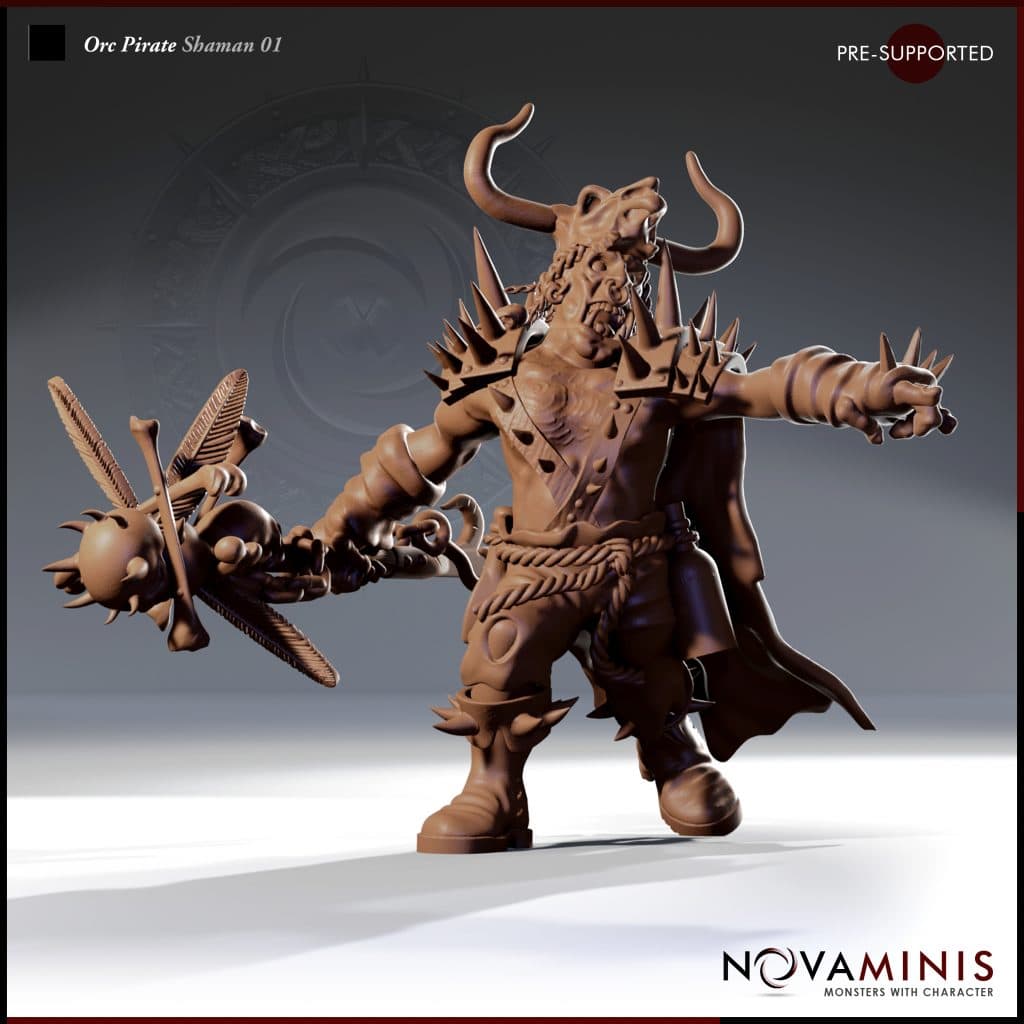
Orc Pirate Shaman
MH: It’s been a huge privilege of ours to know you since you started, and the progress you have made over the past year has wonderful to see. Any tips, tricks, or general advice you have for other artists who are just getting started with trying to sculpt 3D printable models?
Walt: Quite simply, do your research and don’t let anyone tell you what can and cannot be done. Be prepared to try and retry ideas often, and always put in the effort to tweak a good idea into a workable form, rather than getting disheartened.
If you have a good understanding of the tools and techniques involved, along with imagination and ambition, you will get some pretty incredible results.
MH: If you could only listen to three bands for the rest of your life, who would they be, and why?
Walt: When I first read this question I though “only three?” but then I realized that, yeah, I could do that.
The first would be Tool, because they never cease to amaze me with their complexity and excellent musicianship.
The second – still sticking with the prog thing – would be Porcupine Tree. Once again, this band is thrilling to me, because they push boundaries and do things that are normally not done, particularly in their last few albums… I wish they would reform!
Lastly, Pink Floyd (before Roger Waters left…) Part nostalgia and part emotion here. Pink Floyd has always been a band capable of moving me. And their guitar work is simply sublime! If it isn’t cheating, I would include some of Roger Waters’ solo stuff, but that might be pushing my luck, right?
As always, we really enjoyed the opportunity to sit down with an artist and hear more of the story that inspires their work and how they got where they are. We really appreciate Walt taking the time to answer our questions and share his experiences with us. If you have any questions you’d like to ask NovaMinis, feel free to let them know in the comments below!
We’d also like to give a huge thanks to Chris Spotts for doing such a fantastic job on painting the Orc Pirate Captain. Chris is the painter behind The Spotted Painter, and runs a YouTube channel and can be found via his FaceBook page.
If you’re an artist and would like to be featured in our Artist Spotlight, give us a shout at [email protected].
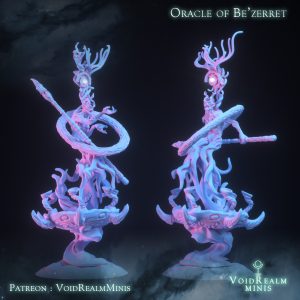
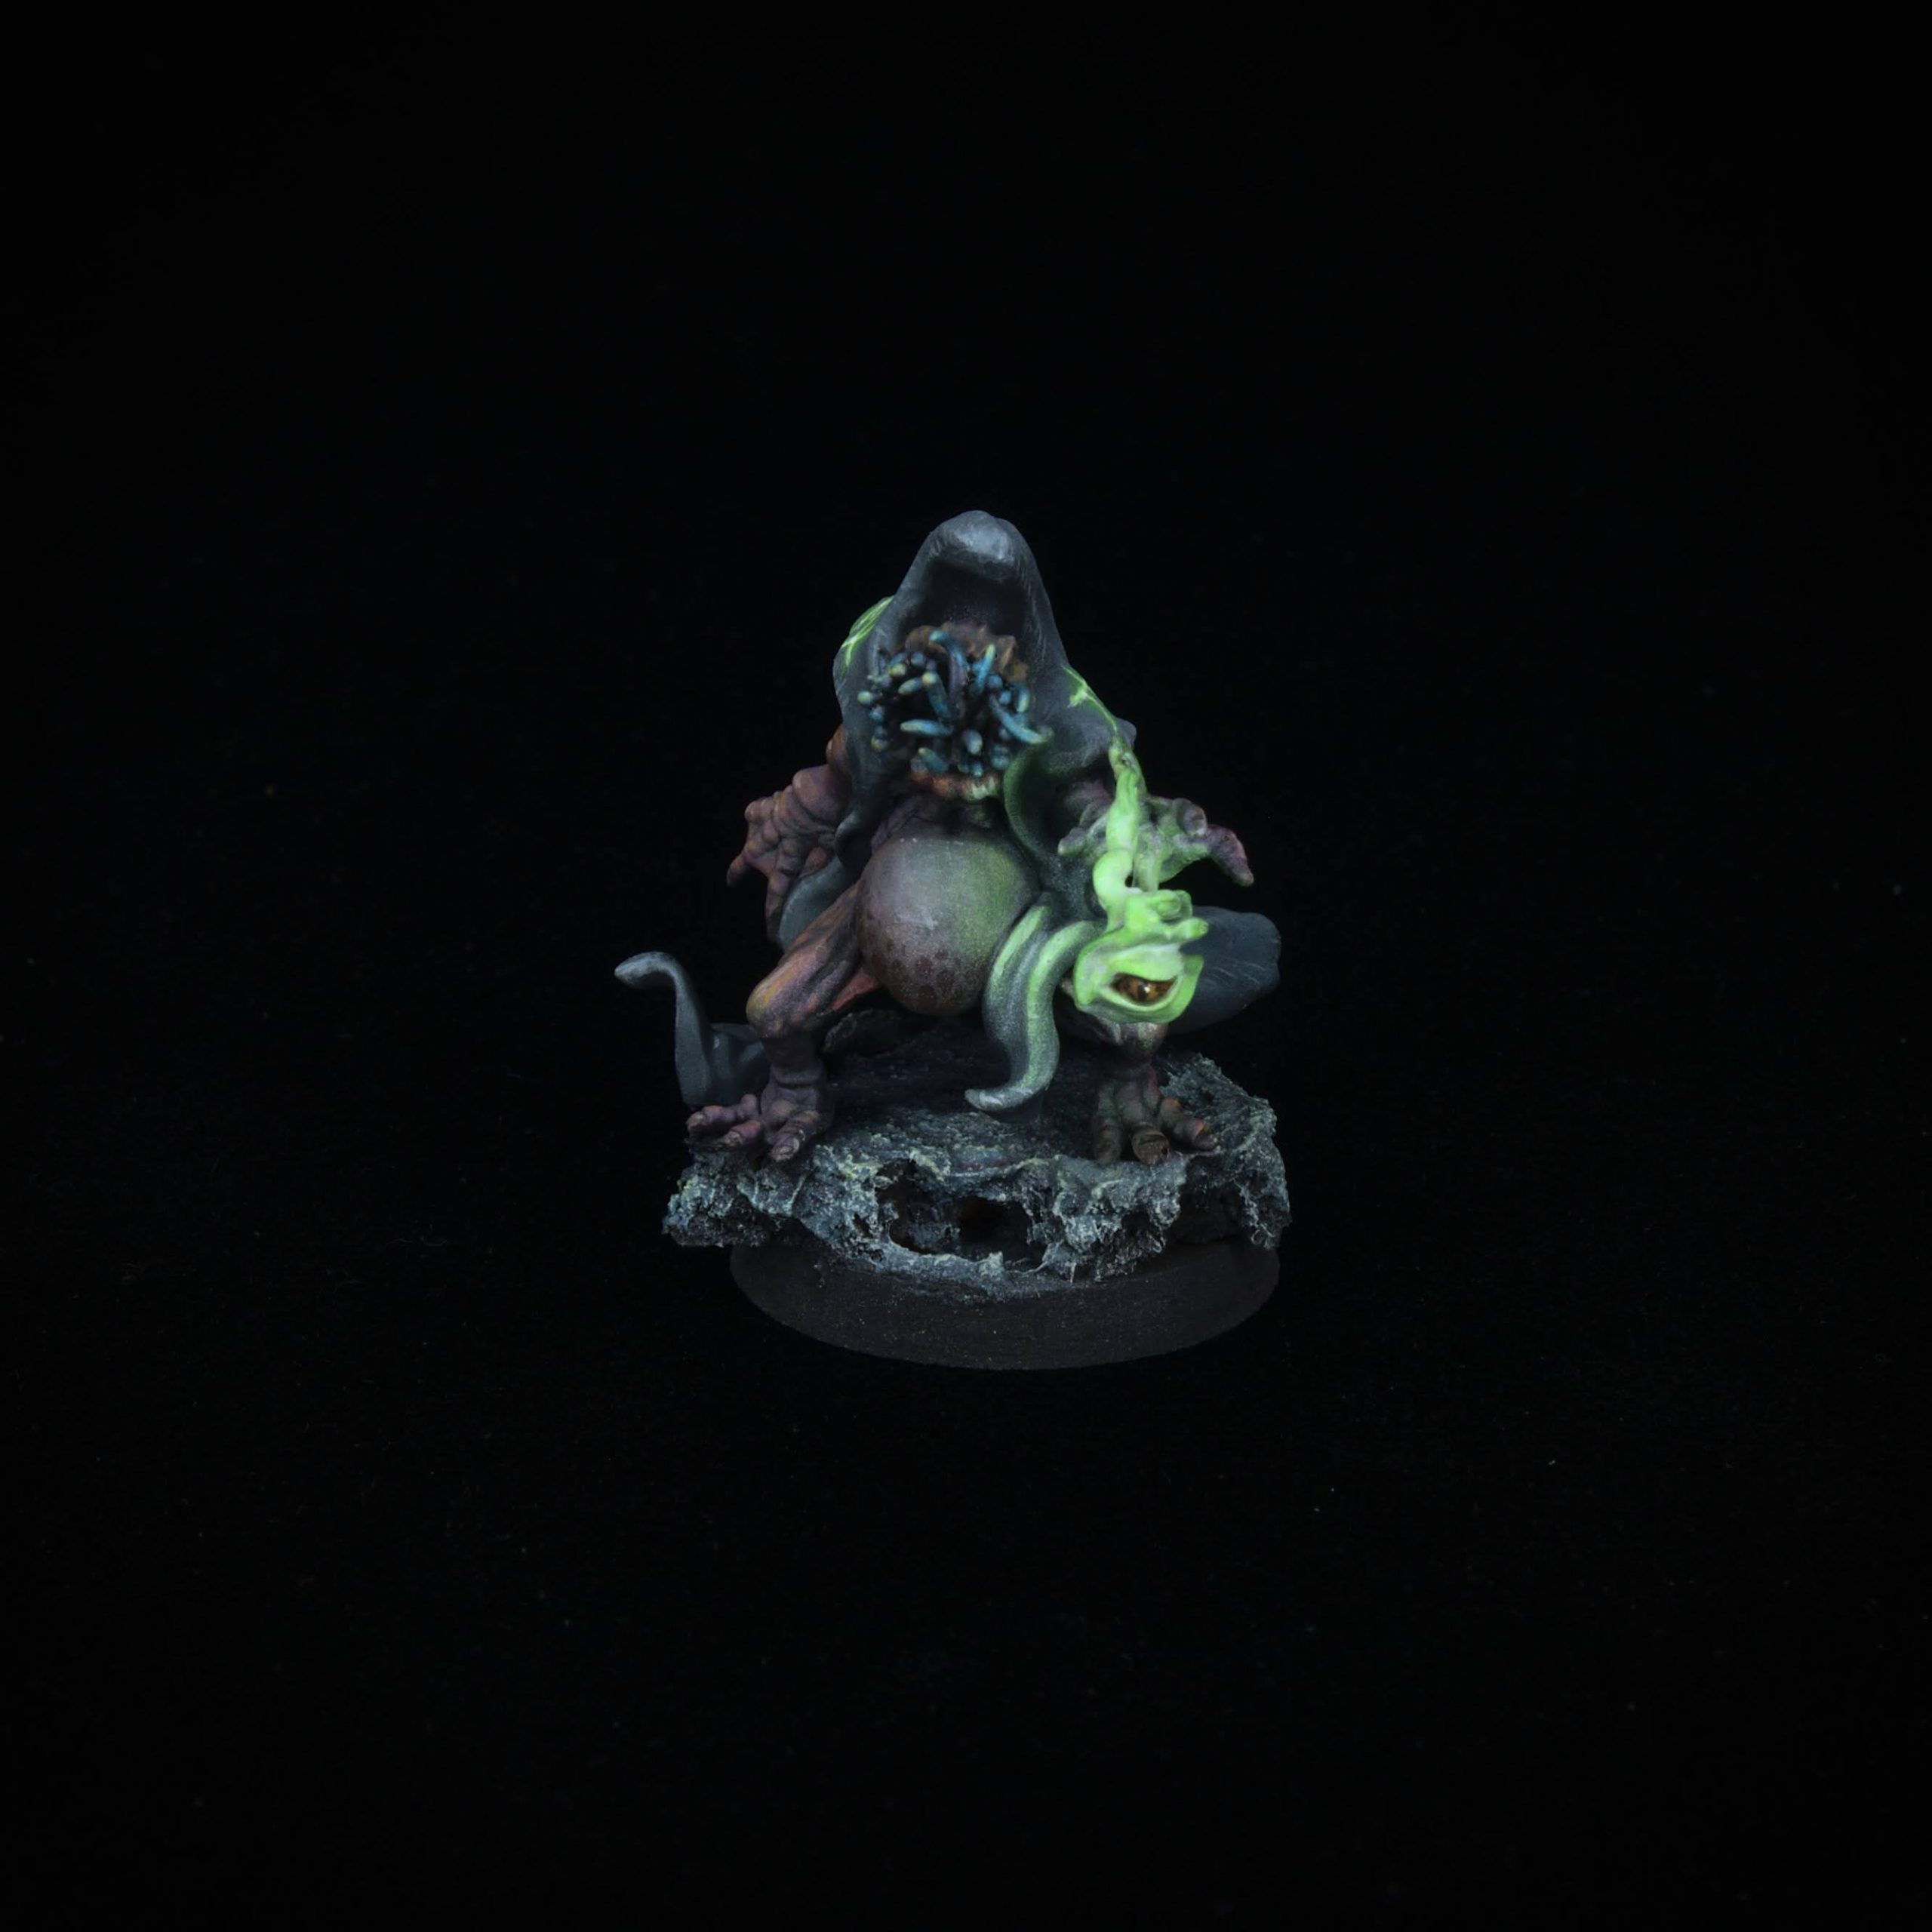
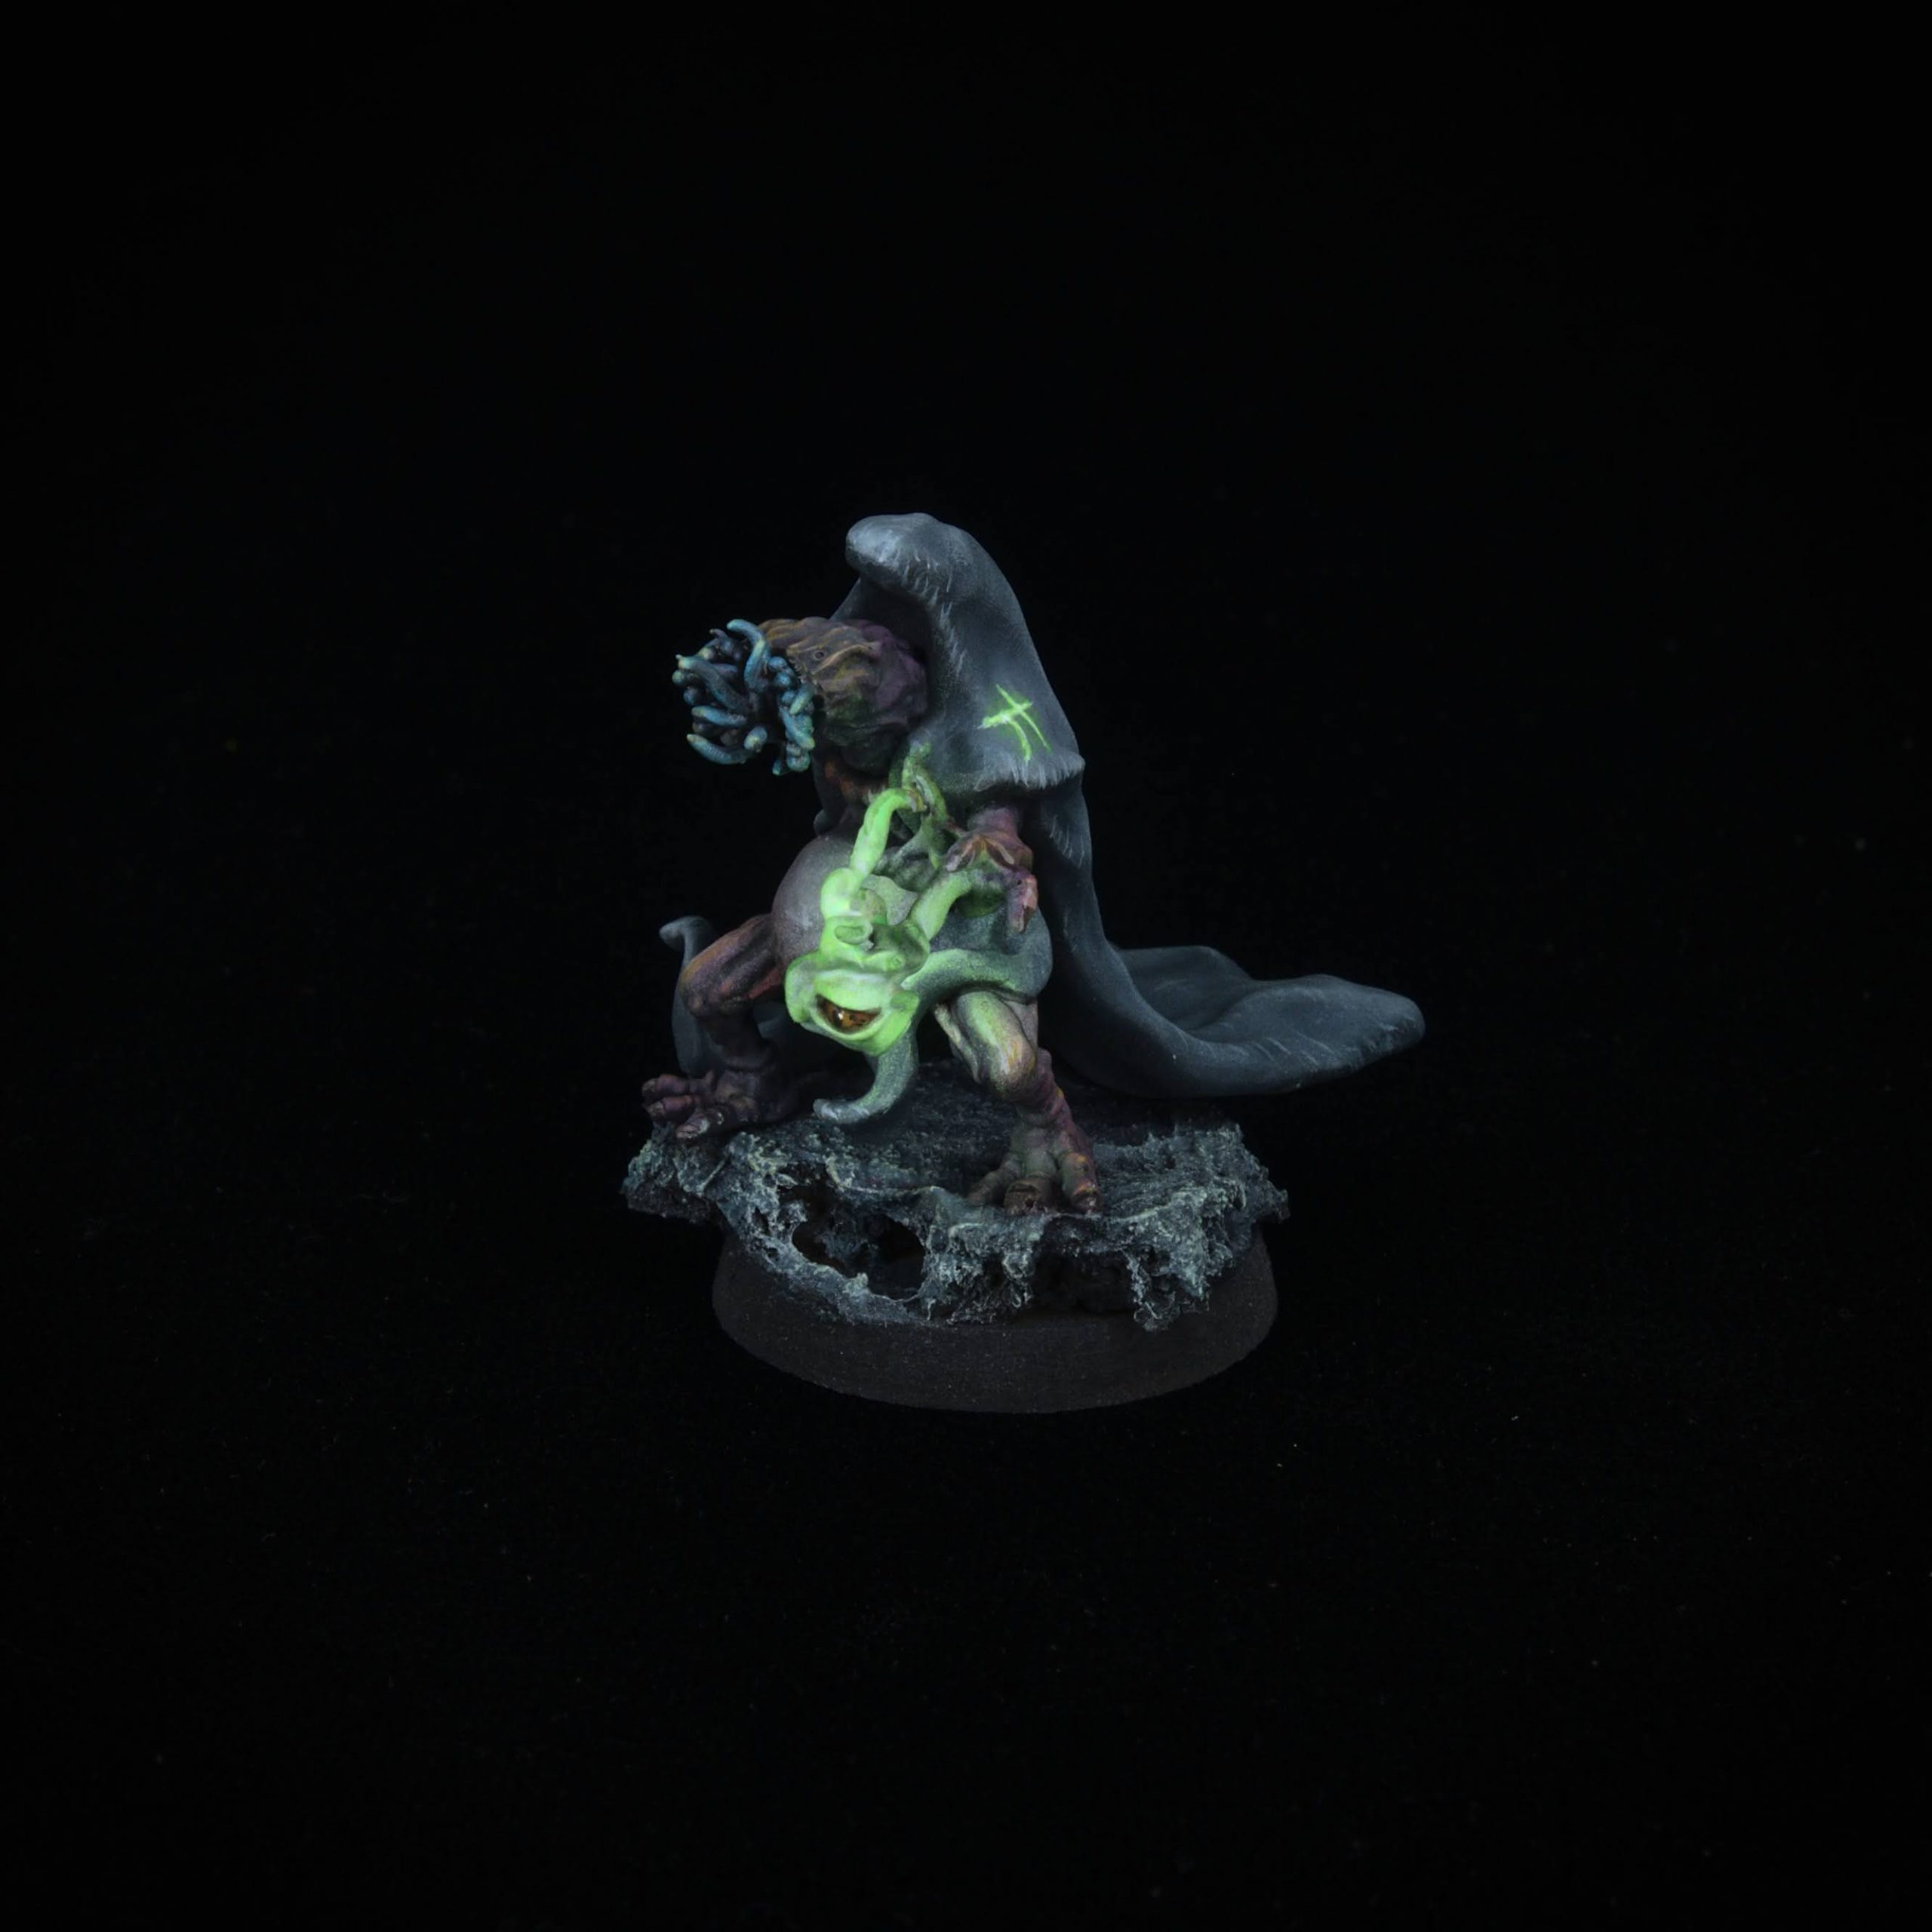
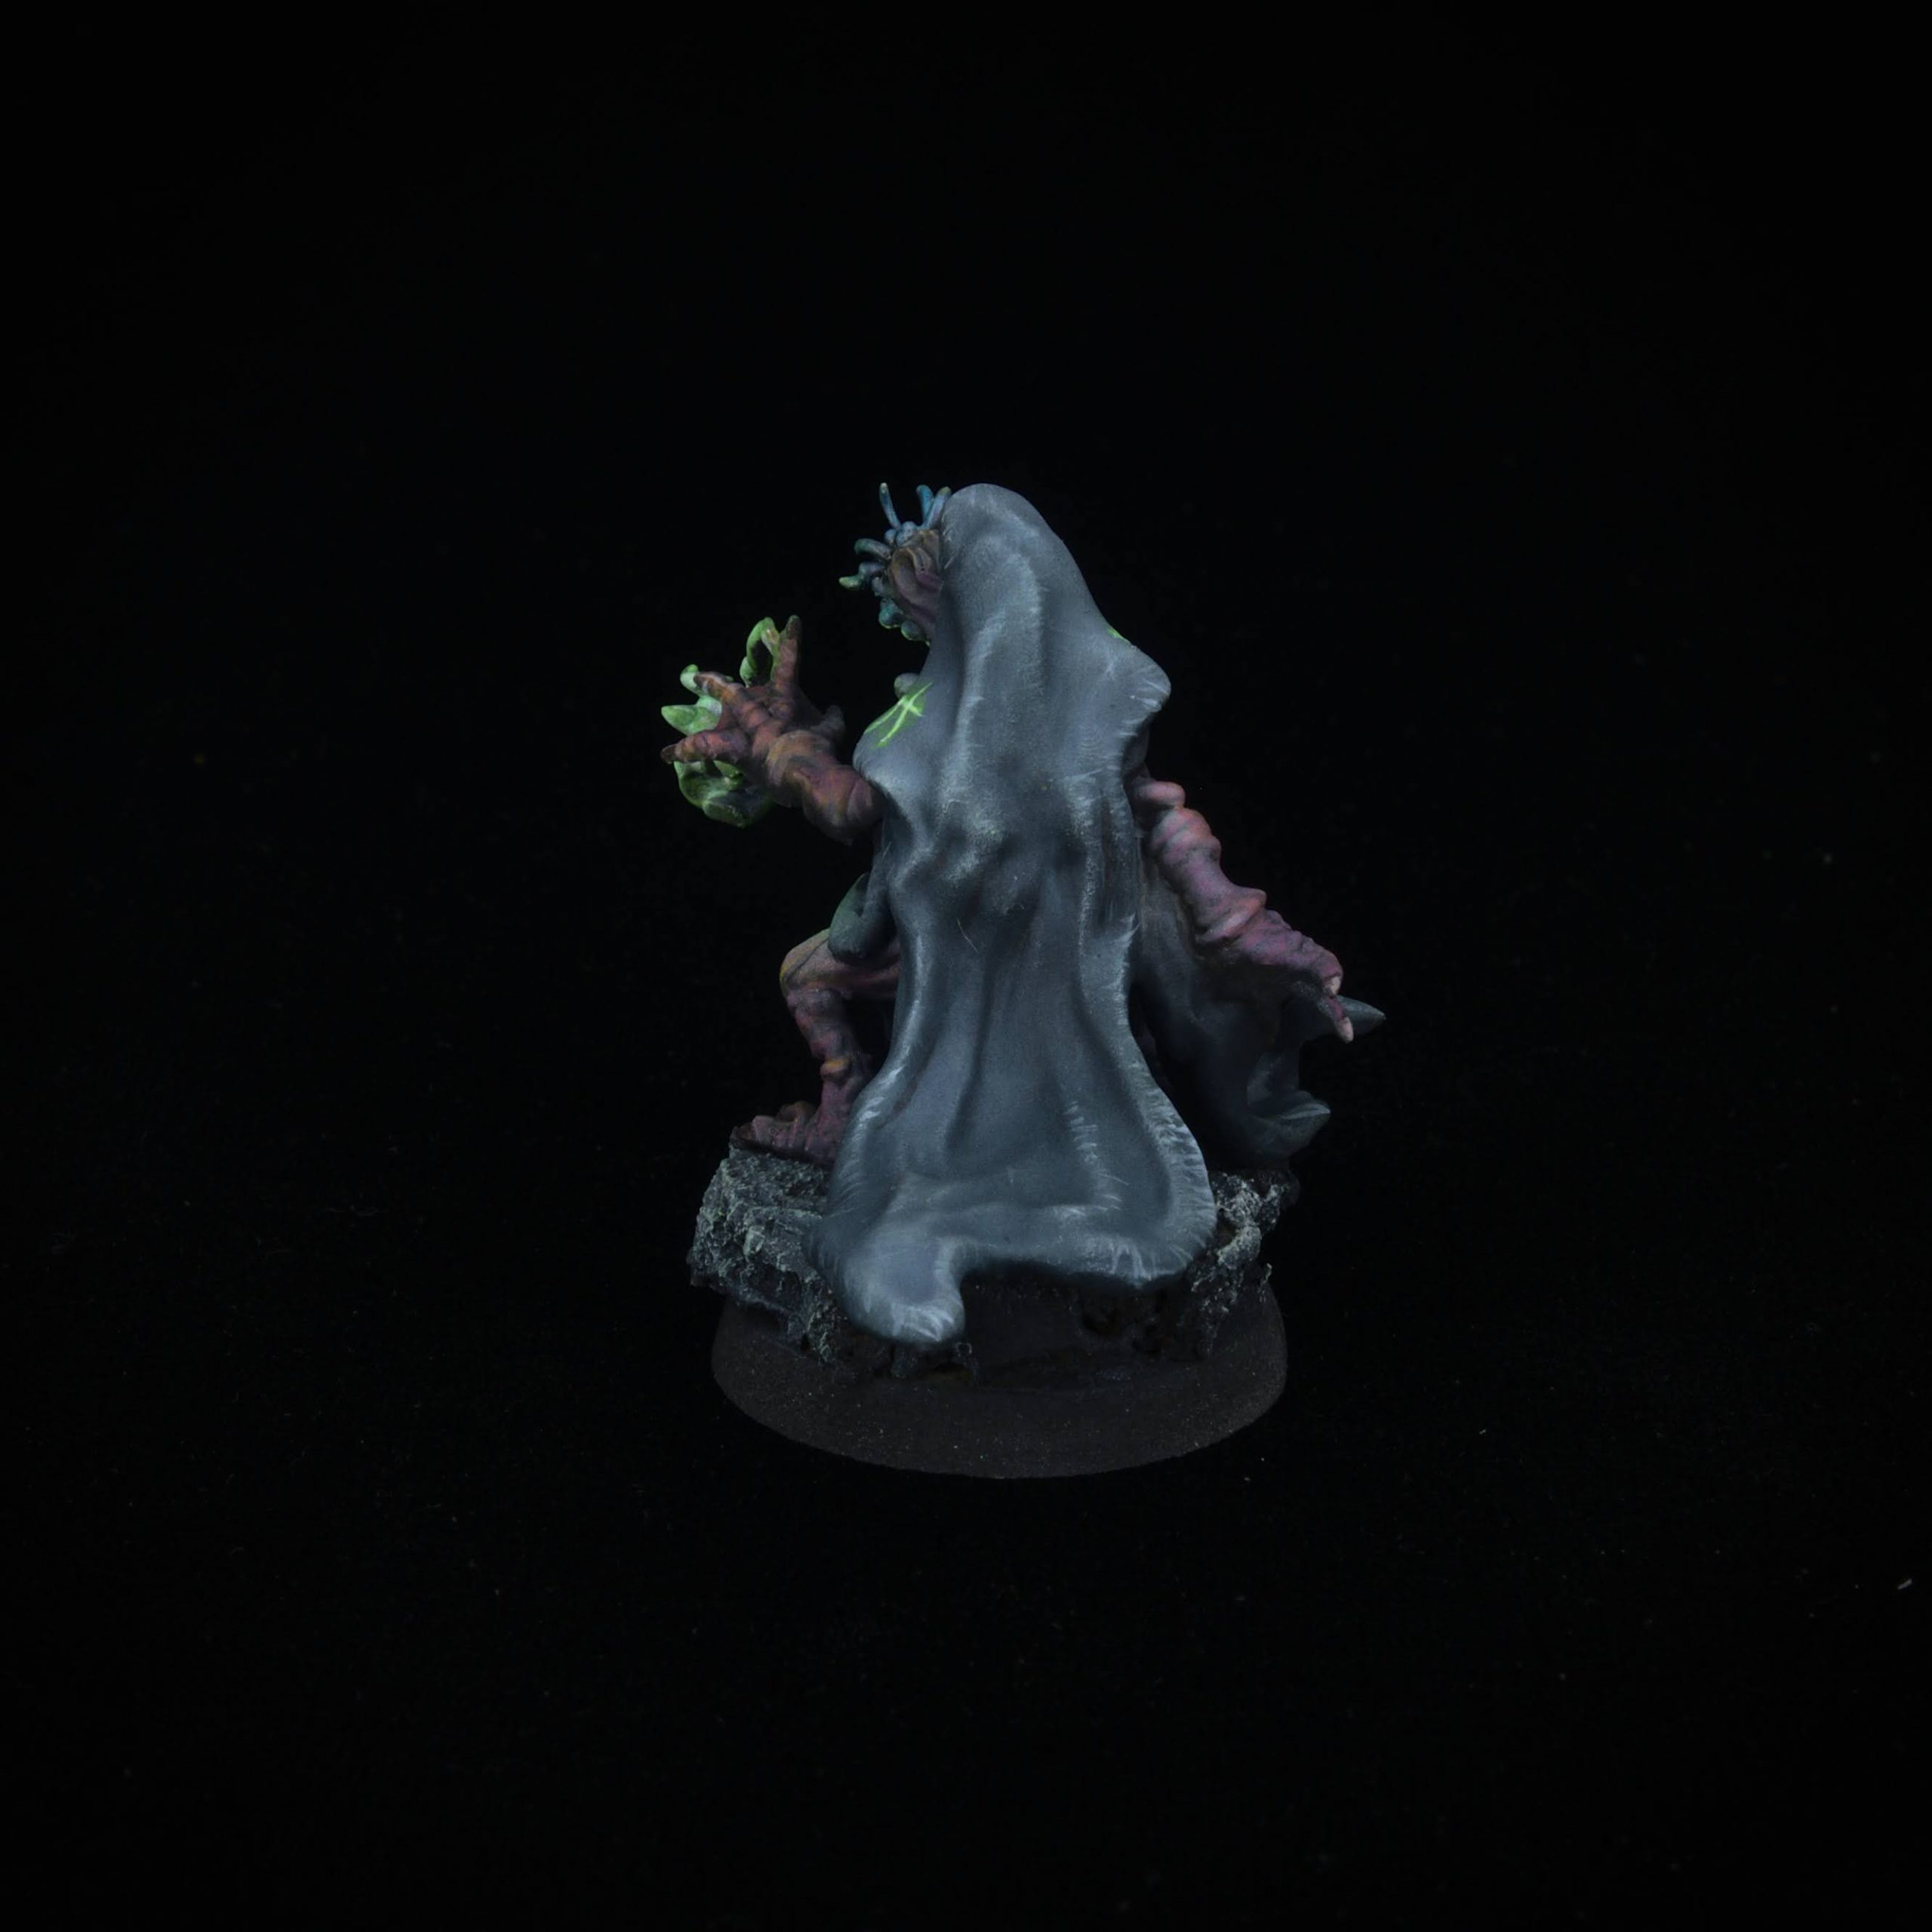
This month in our artist spotlight, we had the chance to sit down with the man behind VoidRealm Minis, Kent Caldwell. If you follow any of the FaceBook groups centered around 3D printable minis, you’ve likely run across his work. He has a very distinct (and often creepy) style centered around cosmic horror. With an extensive background that spans through everything from acrobatics to dioramas, we really enjoyed our time getting to know Kent, and his work a bit more. In addition to selling his work on MiniHoarder, he also runs a Patreon account. We encourage everyone to give them both a look.
For every Artist Spotlight, we have one of the artist’s miniatures professionally painted by our friend Chris at The Spotted Painter. Kent chose his new moon beasts, and Chris did a phenomenal job painting it. Above are the final images. If you’d love to print this beasty out and give it a paint job of your own, you can find it here.
MH: Last week we started of with a question about the origin of the studio name. It seems only fitting to start there again. Where did you get the inspiration for VoidRealm Minis?
Kent: The pandemic in 2020 changed my life overnight; I went from performing nightly with Cirque du Soleil in Las Vegas (I’m an acrobat) to finding myself unemployed and my industry decimated in what seemed like the blink of an eye. I always knew one day my career would move away from performing, but I never expected it to happen so suddenly, nor that the entire live theater industry – where I had my professional network – would essentially disappear. I felt, quite literally, thrown into some Void or alternate dimension. In Spring of 2020, I was starting to realize that I could channel my decades of experience as a Fine Artist into a creative practice that was potentially sustainable for me, while also allowing for a large degree of creative freedom. In trying to brand something from the ground up, I liked “VoidRealms” because it implies a landscape or cosmos that is unknown and mysterious. It’s also a subtle tip of the hat to my workflow, since I sculpt in Virtual Reality (VR… VoidRealms… get it?!).
Kent with his Chinese Poles team, backstage at Cirque du Soleil during their final show before a 14 month layoff.
MH:You have a very unique style to your sculpts. What inspires your designs and creatures?
Kent: I get this question a lot, and I think there are several driving forces that give my sculpts their style and flavor:
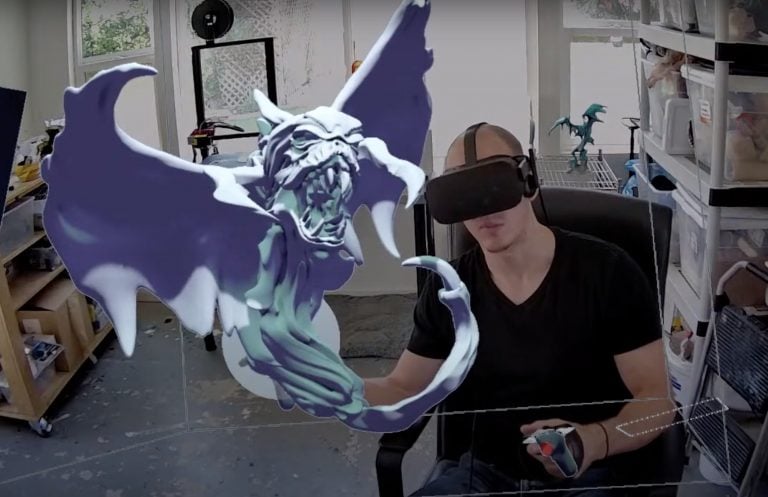
Firstly, sculpting in VR gives my work (ironically) a very handmade feel in a way that Zbrush does not. I still use Zbrush for surface refinement and tooling, but I do most of my sculpting in VR. Being able to “hold” the object in your hands, spin it around, and extrude / carve digital clay in 3D space is incredible. When I want to make a curving tail or a nasty tongue, I’ll stand up and make a sweeping gesture with my shoulder to draw out the curve.
Holding a VR monster up for the camera
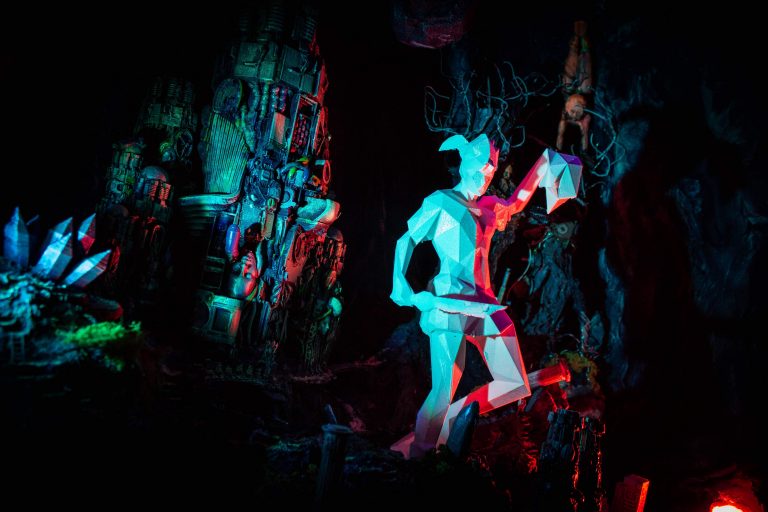
Also, my Fine Art (dioramas) are all about world building but in a way that is very suggestive, almost poetic; I like to imply deeper narratives without spoon feeding it to the viewer. I adore video games like Hyper Light Drifter and Blasphemous, which both do this quite well. I love creating characters and monsters that have these rich narratives implied in their design.
Kent's Fine Art work - "The Abandoned Dimension" - Meow Wolf / Omega Mart installation, 2019
When I work, I like to surprise myself and let the sculpture “speak to me” in a way as it takes shape. I have a lot of traditional fine art training and have studied anatomy a fair amount, but I do not come from the concept art / movie art / character design fields. I’ve been designing concepts for myself for years without answering to art directors or using that traditional industry pipeline. I treat the initial sculpting phases as part of the sketching / design process and do very little sketching. I’m constantly looking for opportunities to take the sculpt in new directions that I wasn’t expecting while I’m building it.
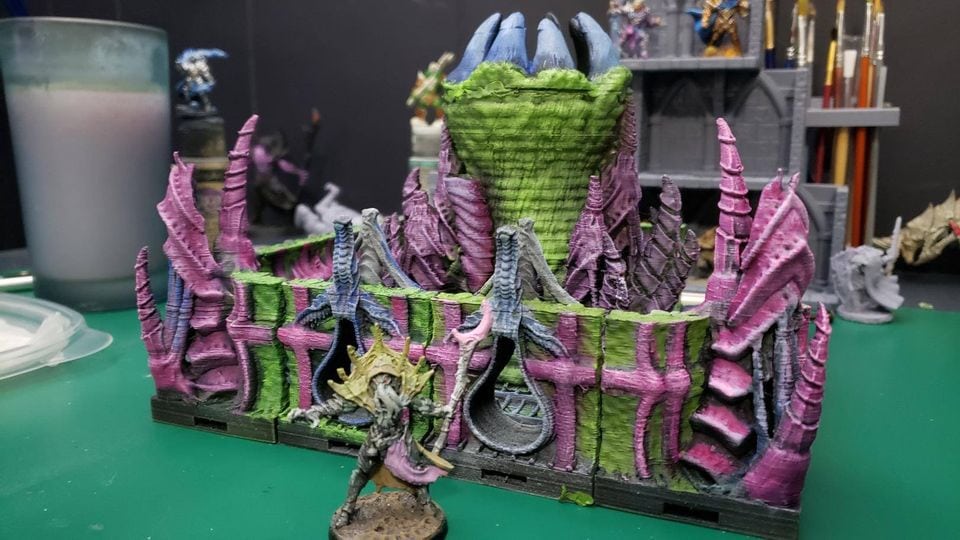
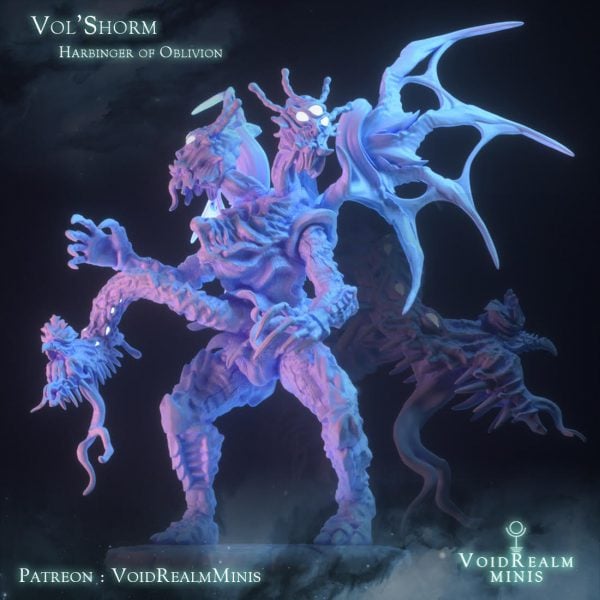
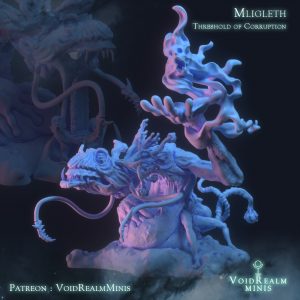
Vol'Shorm, Harbinger of Oblivion
A good example of this is the model “Vol’Shorm” from my current Patreon bundle. Vol’Shorm was designed almost entirely in 3D. I originally had him flying / elevated and balanced by a tail, but felt he worked better grounded, like a lot of the old 60s Kaiju from Japanese series like Ultraman. The “head” of the strange serpentine thing in his belly also went through several iterations and the silhouette changed until I landed on the final form. This keeps the process exciting and fresh for me, but without a clear sketch or direction, you have to rein yourself in from time to time and be willing to make decisions and nix elements that you may have initially liked a lot – definitely a balancing act.
MH: Just as unique is your method for doing sculpts. You’re one of the few artists we know to work almost solely with VR. Can you tell us more about your setup, and how you got into that as opposed to a more traditional work flow?
Kent: I use an old Oculus Rift CV1 (first generation!) that I got back in 2016, tethered to a PC with a strong graphics card in my home studio. I downloaded a couple of games, but took pretty quickly to the software “Medium,” which I still use to sculpt to this day. Using Medium was like discovering drawing as a child; suddenly I was putting on the headset and “sketch-sculpting” every day, ravenously. I couldn’t get enough – I didn’t have to motivate or discipline myself or force myself to create daily habits, it just flowed so naturally to sculpt in VR and brought me so much joy. My output became quite prolific, if unrefined.
One of Kent's very first sketch-sculpts in VR in 2016
The Crawling Chaos, designed almost entirely in VR, March 2021
MH: It should be noted that you’re an artist of many different formats, and that you are trained as a Cirque Du Soleil performer. How did you make the jump from that to digital sculpting, and has it had any sort of impact on your art?
Kent: When I went to the University of Michigan (2010), I competed on the varsity NCAA gymnastics team and earned a BFA in Fine Art. I’ve been a gymnast my whole life, as well as a visual artist. It was really the pandemic and the job layoff that pushed me to consider how I could monetize my skills as a sculptor in a field that would give me a lot of creative freedom.
MH: We are so thrilled to be able to celebrate your one year anniversary with you. What are some of the biggest takeaways or lessons you’ve learned over the past year as a digital sculptor?
Kent: I still get so much joy when people discover my work and are excited by it. Nothing is more thrilling in this field than when a happy Patron takes the time to print one of my pieces and personalize it by painting it in their own style. This is a really humbling lesson in reminding me that I am sharing my work with many other people, and inspires me to constantly push myself and my sculpts to new levels.
Probably the biggest lesson I’ve learned through the VoidRealm Minis endeavor is the strength and importance of consistency and iteration. The more you sculpt in a particular format (like mini sculpting) the more you find ways to push the technical execution and aesthetic quality of the sculpts. My sculpts 1 year ago for VoidRealm Minis are almost embarrassing for me to look at now… my current stuff is much more refined, smartly designed, and visually stronger. However, my skill level and knowledge as a sculptor really hasn’t changed at all in the past year. The difference is that I now understand how to really push my sculpts merely from the act of having made dozens (hundreds?) of them for people over the past year.
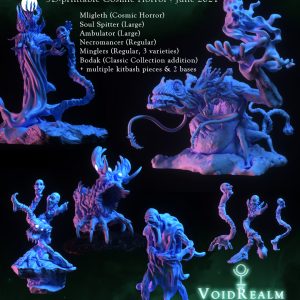
MH: This past month has included some really incredible looking sculpts. Would you mind describing these a little more, and telling us about your inspiration for them?
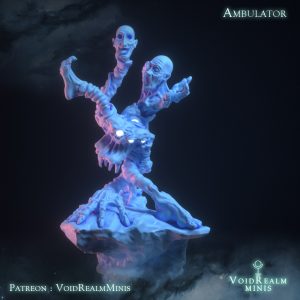
Kent: I decided to create a bit of a mixed-bag for the lineup in July with several gargantuan monsters as well as some smaller creations. I decided to pull directly from the Cthulhu Mythos a bit, settling on the “Dreamlands” as a theme and do a take on Moon Beasts and the Hound of Tindalos. Both are statted in Sandy Petersen’s “Cthulhu 5e” book – a wonderful 5e sourcebook that’s so much more than a mere monster manual.
Rather than simply reposing the moon beasts to make variations, I decided to use some of the same components – heads, hands, etc., but to re-morph the bodies between varieties since, in the Lore, they have shapeshifting abilities. With the Hound, I wanted to do something a bit more enigmatic as it technically lives “in the angles of time” – whatever that means! There have been several great Tindalos hounds done by other designers before, so I settled on a simple design that would be easy to print, recognizable, but somewhat unique.
I absolutely love “Kaiju” in all of their strange, bizarre forms. There’s nothing like a bizarre titan to really spark that feeling of childhood joy for me, and so I had a lot of fun sculpting the larger guys. “Vol’Shorm” is inspired directly from the Kaiju in old Japanese action series like “Ultraman.” You almost get the feeling that he could be played by a human wearing a costume on one of those sets. I needed to create a Guardian or counterpart to Vol’Shorm, so I conceived “Batan Hisnu,” an original concept as a protector of death. I had fun in my head playing with the idea of this angelic figure residing over death as an essential part of Universal harmony, while Vol’Shorm – being very other and destroying matter via “obliteration” – was the “real threat” so to speak.
The Corrupted Purple Worm was a collaboration with Chris Sigler from the 5eMagic.shop. In designing the tail, I thought it would be fun to make it its own, sentient entity with the ability to spawn these flying demon serpents – this is an example of me riffing while I sculpt to try and come up with something novel for the tabletop.
I also had to throw in an Astral Dreadnought because, you know, how can you NOT sculpt something so iconic when doing a series of inter-dimensional Kaiju?
Overall, I felt it was fun to celebrate my anniversary month with more of a “random” variety of beasts rather than linking them so closely together. Hopefully this will be well received, as it could be the start of a fun annual tradition for VoidRealm Minis!
MH: Do you have any advice or folks who might be just starting out with digital sculpting?
Kent: I could probably write a novel answering this question, but here are some quick tips:
Study the figure – figure drawing AND figure sculpture. Get books by George Bridgeman and Phillipe Faraut.
We had a fantastic time talking to Kent and really appreciate him taking the time to chat with us. We’d also like to give a well deserved shout out to Chris Spotts for doing such a fantastic job on painting the Moon Beast. More of Kent’s incredible work can be found here on MiniHoarder, and for those who want access to his monthly sculpts for a single low price, you can do so via his Patreon.
Chris is the painter behind The Spotted Painter, and runs a YouTube channel and can be found via his FaceBook page.
If you’re an artist and would like to be featured in our Artist Spotlight, give us a shout at [email protected].
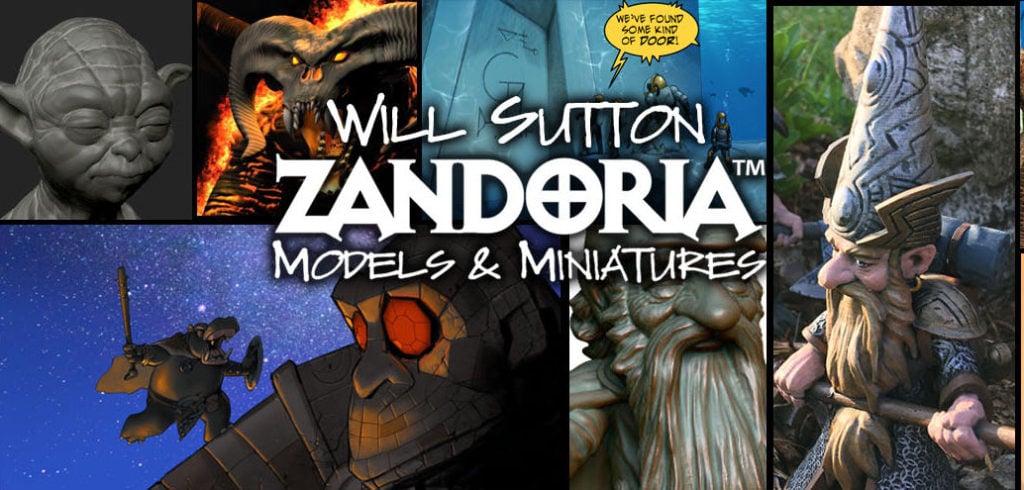
Welcome to our first ever Artist Spotlight! Here, we take a moment to get to know some of the artists behind the sculpts and models that have changed our hobbies and game tables so dramatically over the past few years. We’ll laugh, we’ll cry, it will be an all around great time. We’re going to kick off this parade of grand artistry with Will Sutton, the artist for and owner of Zandoria Studios. For those that might not know, Will is the master of all things gnome related, though he also makes a lot of terrain using his PuzzleLock system and branches out into other minis as well.
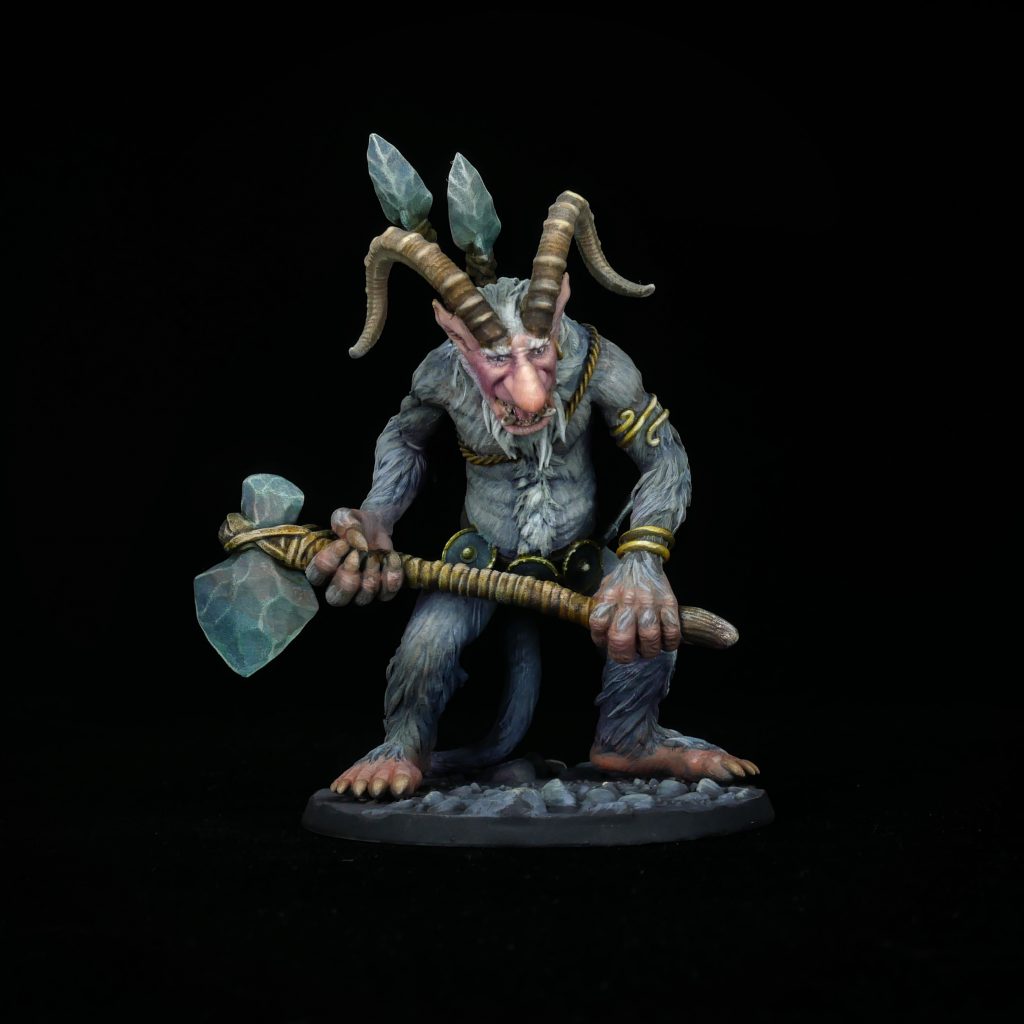
For every Artist Spotlight, we have one of the artist’s miniatures professionally painted by our friend Chris at The Spotted Painter. Will chose one of his new troll miniatures, and we are were blown away at how it turned out. Above are the final images. If you’d love to print this beasty out and give it a paint job of your own, you can find it here.
MH: It’s always interesting to hear where artist’s come up with their studio names. Where did Zandoria come from?
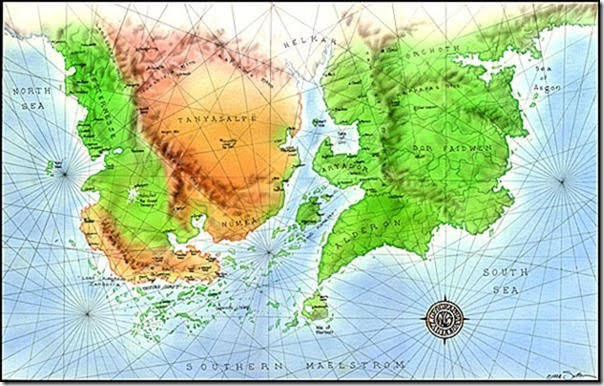
Will: “Zandoria” was a name in a shared campaign world that my friends and I used for our D&D games years ago… We took turns DMing and had a different part of the world that our game took place in. Part of the map, I noted “the lost kingdom of Zandoria”… In 1999 I started using Zandoria Studios for a business name. Because it is a unique name, it doesn’t get lost on the world wide web!
I also used the name/setting for my story of a wandering hippopotamus Barbarian named TAR. This was a character that I created in Animation:Master with the plan of making a series of animated shorts.
Map of Zandoria
It is a kind of Zatoichi/Conan character in an anthropomorphic world… I only made one short before I realized that my story would take me a hundred years to finish as an animation! When you watch the credits in any Hollywood animated movie, you will not only see hundreds of artists involved, but it also take a lot of computers to render all of those frames! I started thinking that I should make it a graphic novel instead.
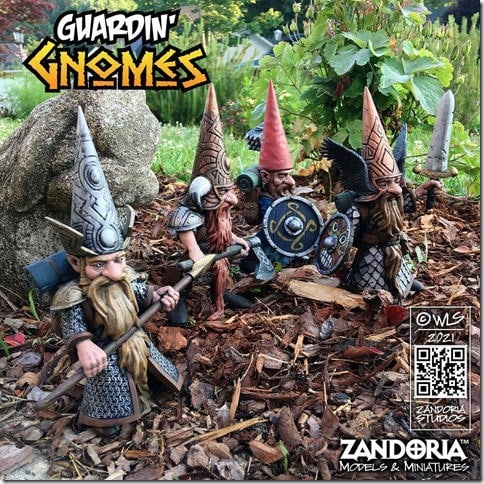
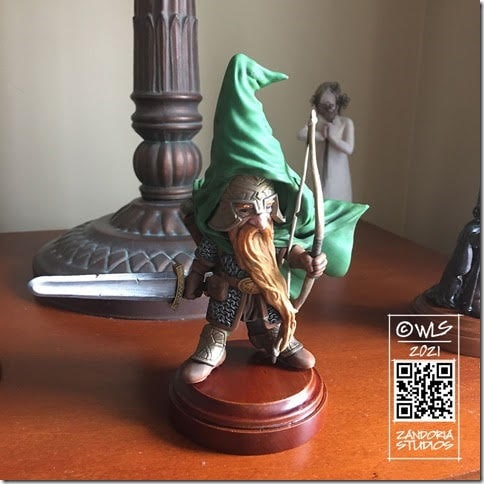
Guardin' Gnomes
MH:I feel like it would be negligent not to dive into your bread and butter, gnomes. You have some fantastic pieces, and by far the widest variety of gnome characters that I’ve ever seen. How did you get into this niche?
Will: After I had created PuzzleLock, which was designed for FDM printing, I wanted to do miniatures too! Everyone was starting a Patreon, and I already had one – so I retooled it to add 3dprintable miniatures. But since most of the things that I had sculpted were not for D&D, It was hardly a success – given that the early adopters on this space were Dungeon Masters! I needed something besides anthropomorphic animals to appeal to them…
I had this idea for sculpting Gnomes like garden gnomes, but outfitted like gnome adventurers in Dungeons & Dragons.
The gnomes turned out to be pretty adorable, and I got a lot of likes on Instagram and Facebook. What I didn’t realize until then is that Gnome enthusiasts are a much bigger niche than Dungeon Masters with 3Dprinters! I keep making more gnomes and am even getting knocked-off by fake companies on the internet pretending to be selling mass-produced ones! At last count I have had to issue DMCA takedowns against 15 different domain names!
MH:Are there any sneak peaks or anything that you can provide that might give us a clue as to what you’ll be releasing next?
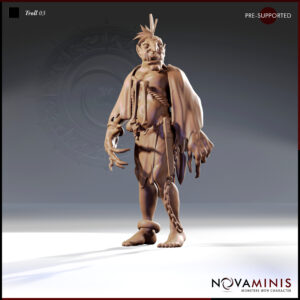
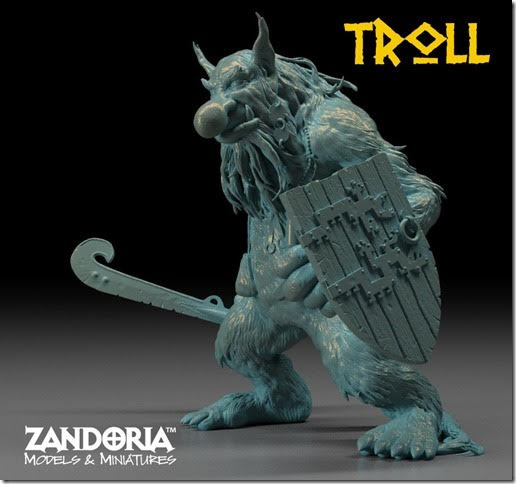
Will: I started reading more about Gnomes, their place in folktales and mythology, and branching out to some other things like Trolls. So I started creating some trolls too. My influence was the fairytale artwork of John Bauer.
Continuing to read about lost civilizations, I have run into a theory of a lost antediluvian “golden age” that was lost beneath the floods at the end of the last Ice Age, when the changing climate flooded large areas of the Continental shelves, forcing survivors to higher ground to start over… This is the setting that I am exploring now – and of course, gnomes are involved! Maybe this will finally reveal the Lost kingdom of Zandoria!
MH:Let’s talk about these trolls for a moment. I have to say, the first time I ran into them I thought they were someone else’s work, just because I didn’t realize you had branched out from the gnomes (or hobbits… let’s not forget your hobbits). I really love the look and feel of these models. Was there anything about your process that you had to change when switching from a small humanoid that’s wearing fur and armor to a larger monster that’s mostly covered in fur?
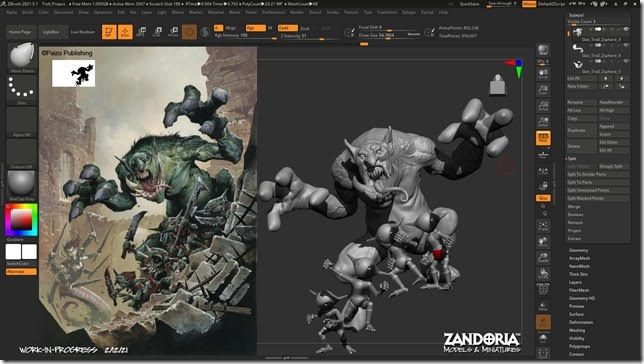
Will: I had made a poll on Patreon about what other kinds of model would they like. Items from the Pathfinder Bestiary made the top of the list! I started to sculpt the Troll from the first Bestiary, as painted by Wayne Reynolds. Because Pathfinder is a spin-off from D&D using the open Gaming License, I didn’t think they would care – and it was just for Patreon…
Early Work in Progress
But Jim Butler from Paizo Inc. (who I am friends with on Facebook) sent me a message saying NO to that idea! I could do it, but it can not be behind a paywall like Patreon. I totally respect that, and stopped working on it. But it gave me an idea… The thing that is the IP of Pathfinder is really just the artwork and stories – what they did was to create a unique interpretation of those OGL monsters. Games themselves – the rules and methods of play – are not protected by copyright. That is why Wizards of the Coast and Games Workshop put so much art and story into the games!
I decided to do a little research on Trolls, as well as gnomes, to did a little deeper into folktales and mythology, in order to inform my own interpretations. This would let me create my own IP within this fantasy world, and give everything my own spin.
I discovered the works of the Swedish illustrator, John Bauer. He brought these tales to life in the early part of the 20th century. He is also an influence on later artists such as Paul Bonner and Brian Froud. Since he died in 1918 and his work is in the public domain, I knew I would be OK to take some inspiration there.
My first troll is carrying a bronze age Scandinavian sword, and using a door for a shield. If you look at the design of the hinges on the door, you will see it is a dragon-like monster from Scandinavian mythology, called a Lindwurm – the design of it was inspired by a Mountain troll’s door in the background of one of Bauer’s paintings!
Troll Sketch by Will Sutton
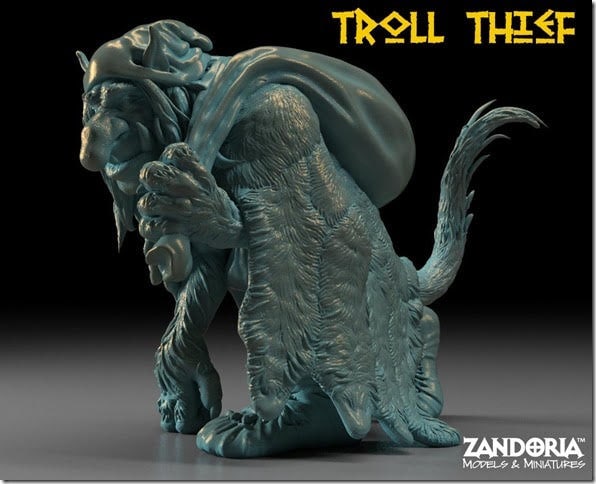
My Trolls are hairy and shaggy – reading the stories, I felt that the Trolls might be like the Neanderthals displaced by the arrival of men–maybe the origin of Yeti and Bigfoot and trolls. In some of the fairy tails, the trolls would tuck their tails in their belt, and try to disguise themselves as men…They would venture near the farms and villages and take things. that gave me the idea for the Troll Thief.
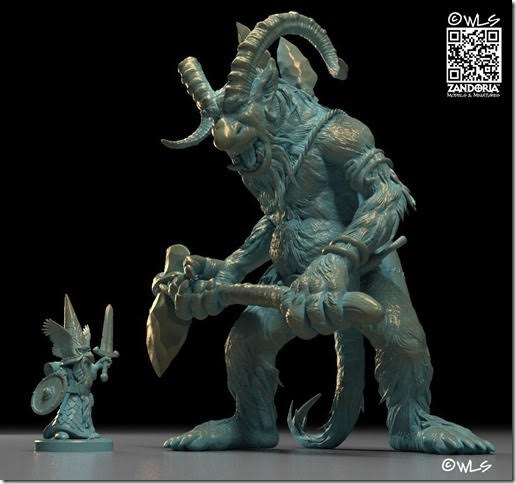
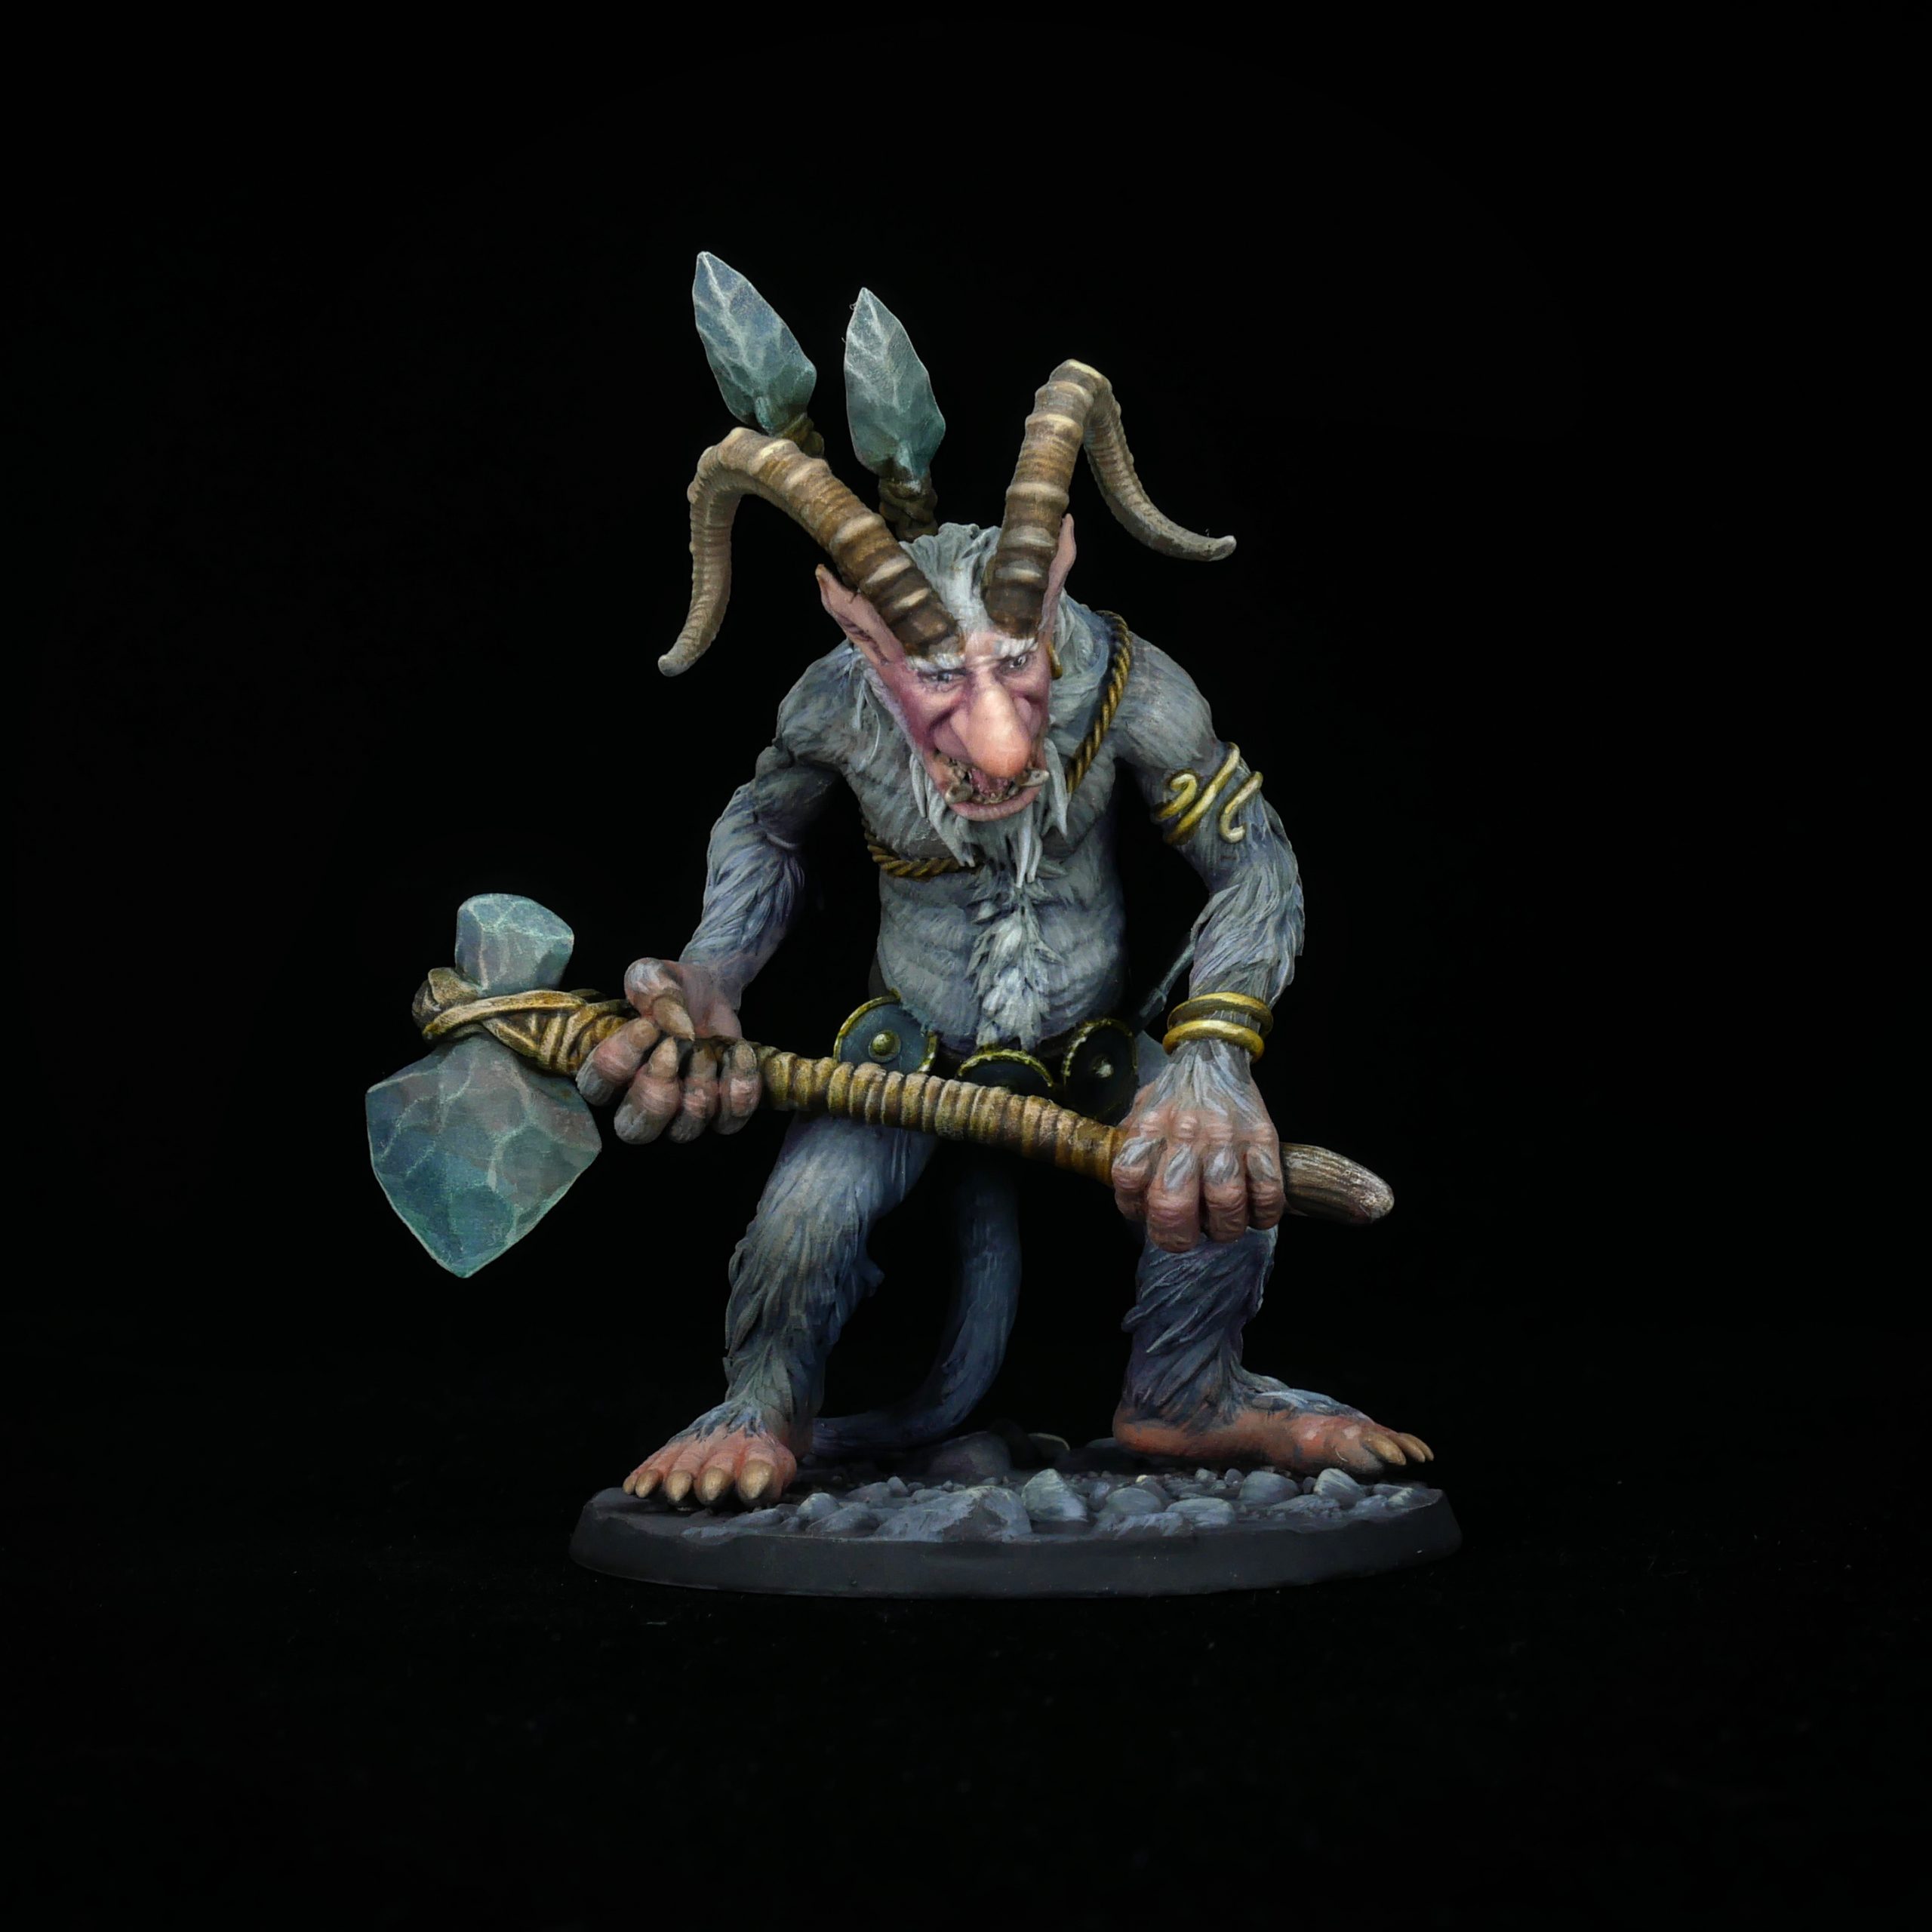
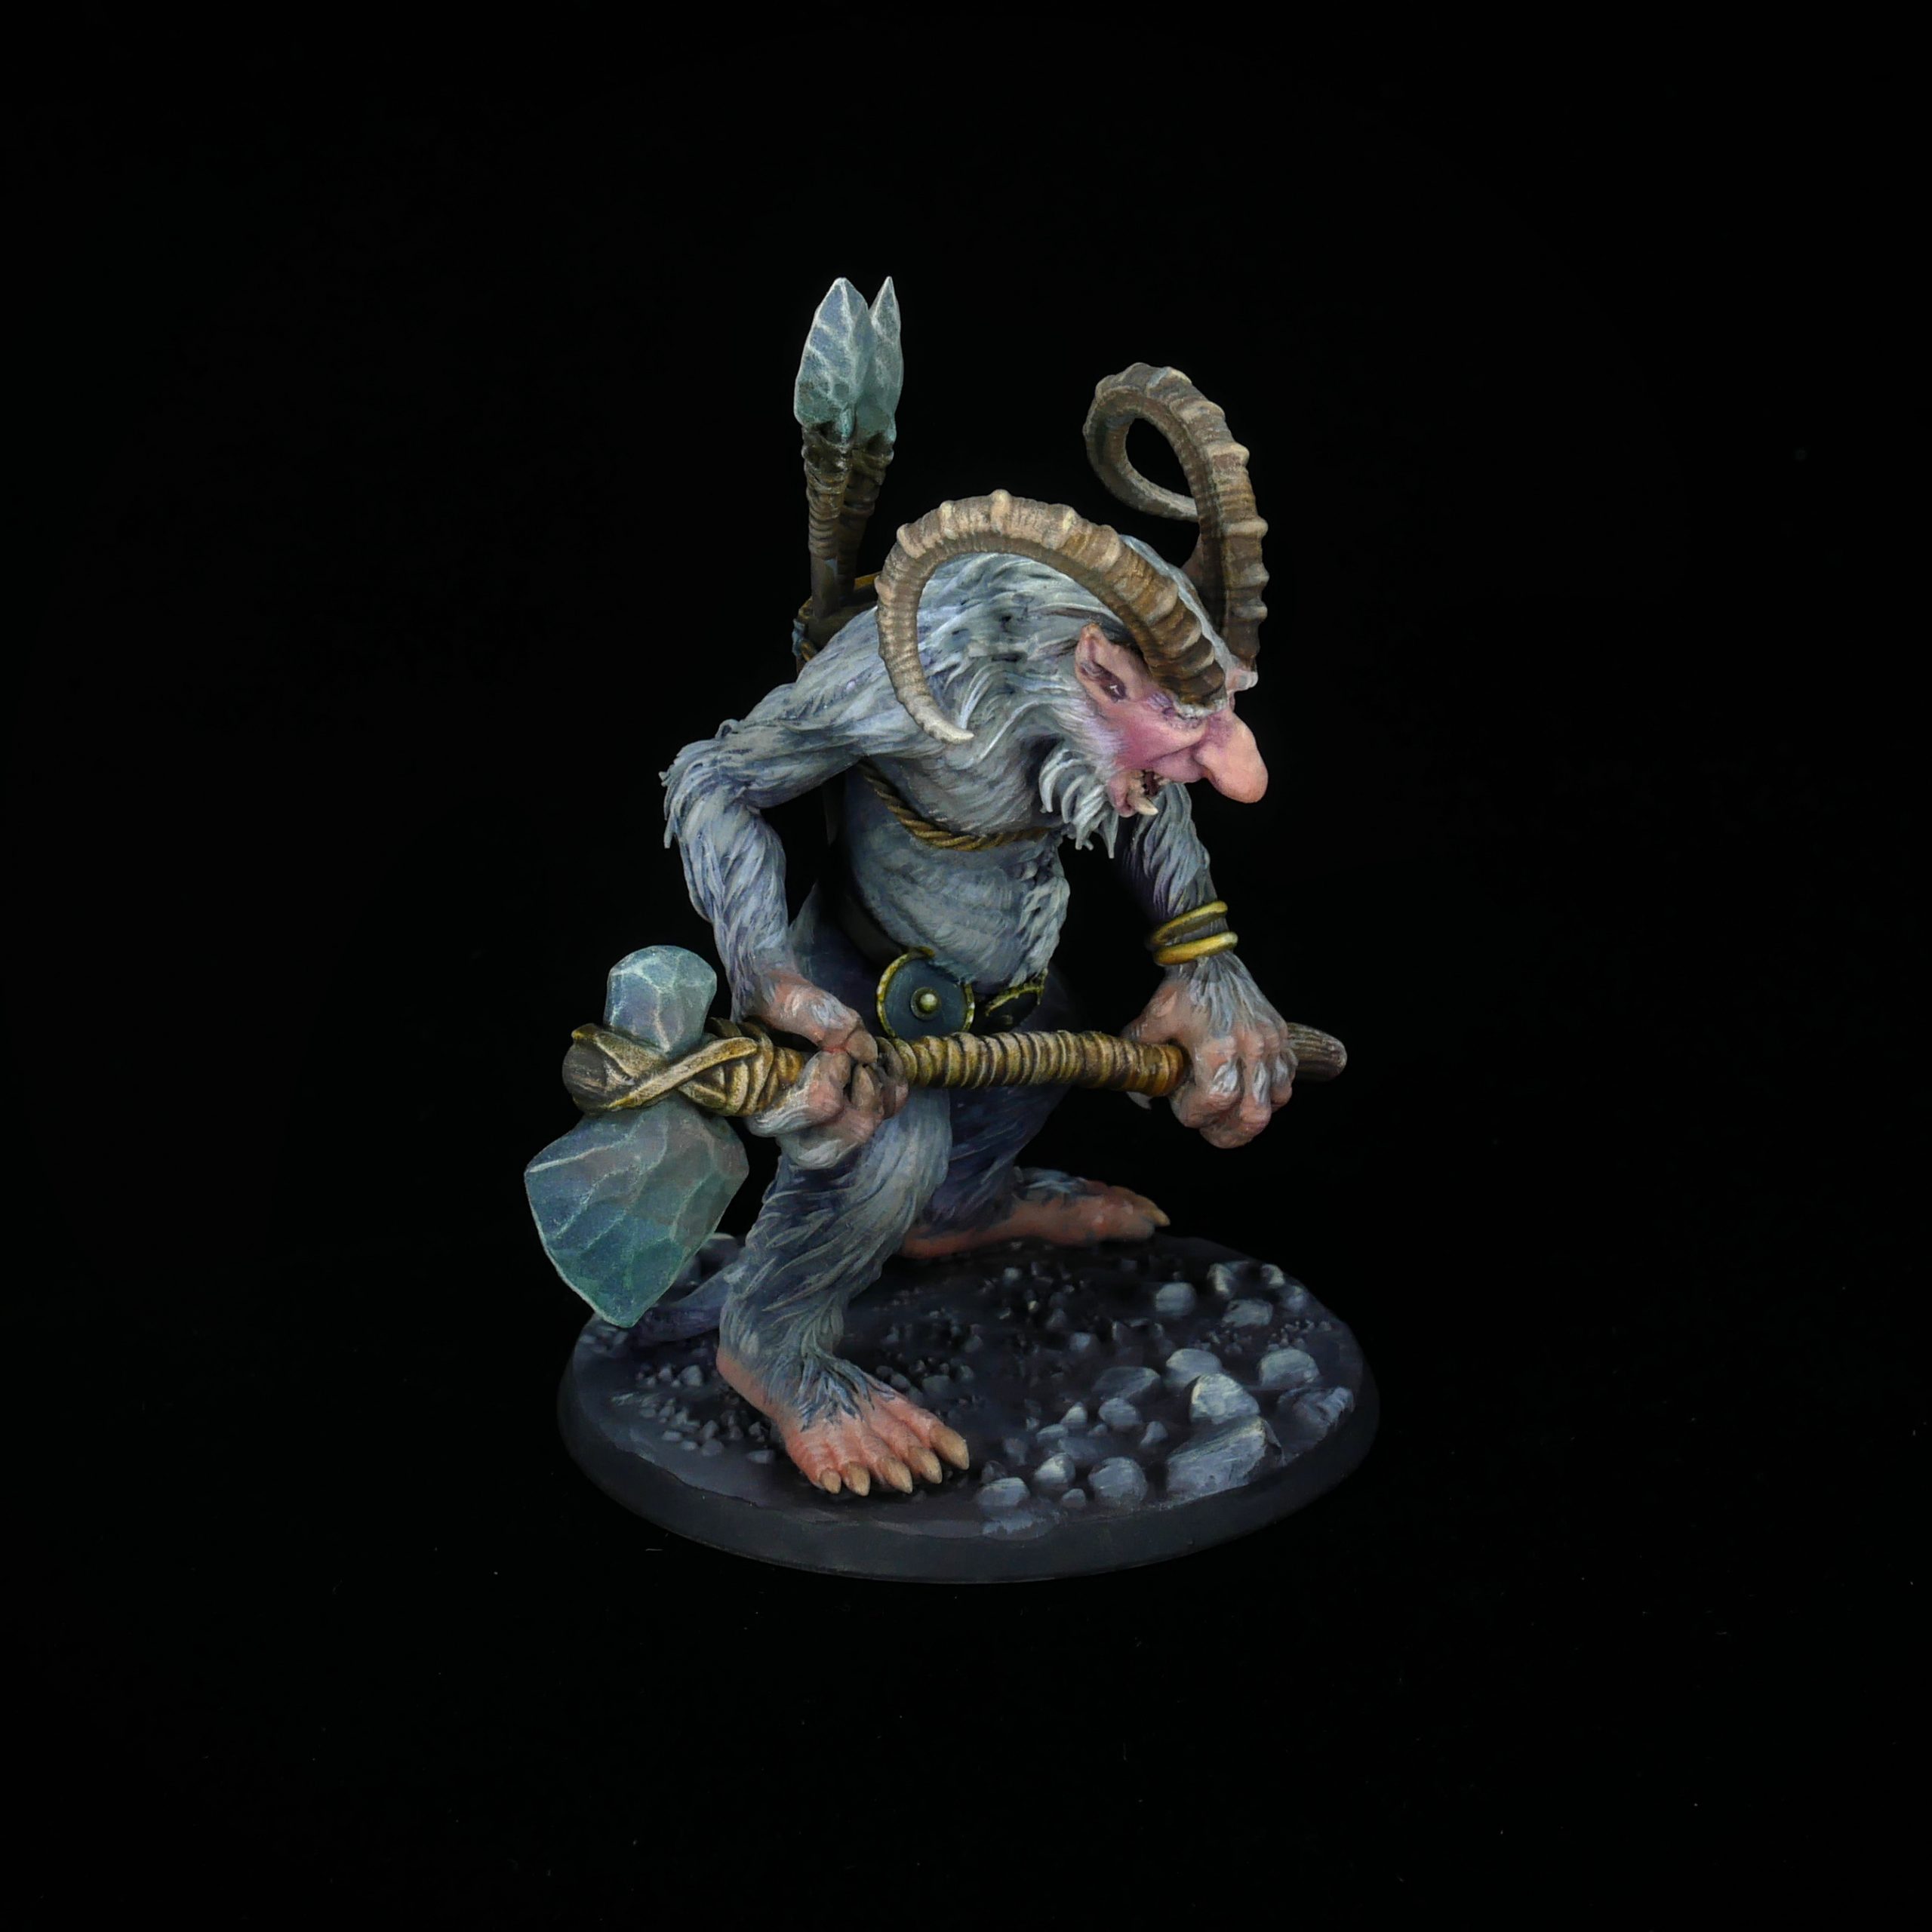
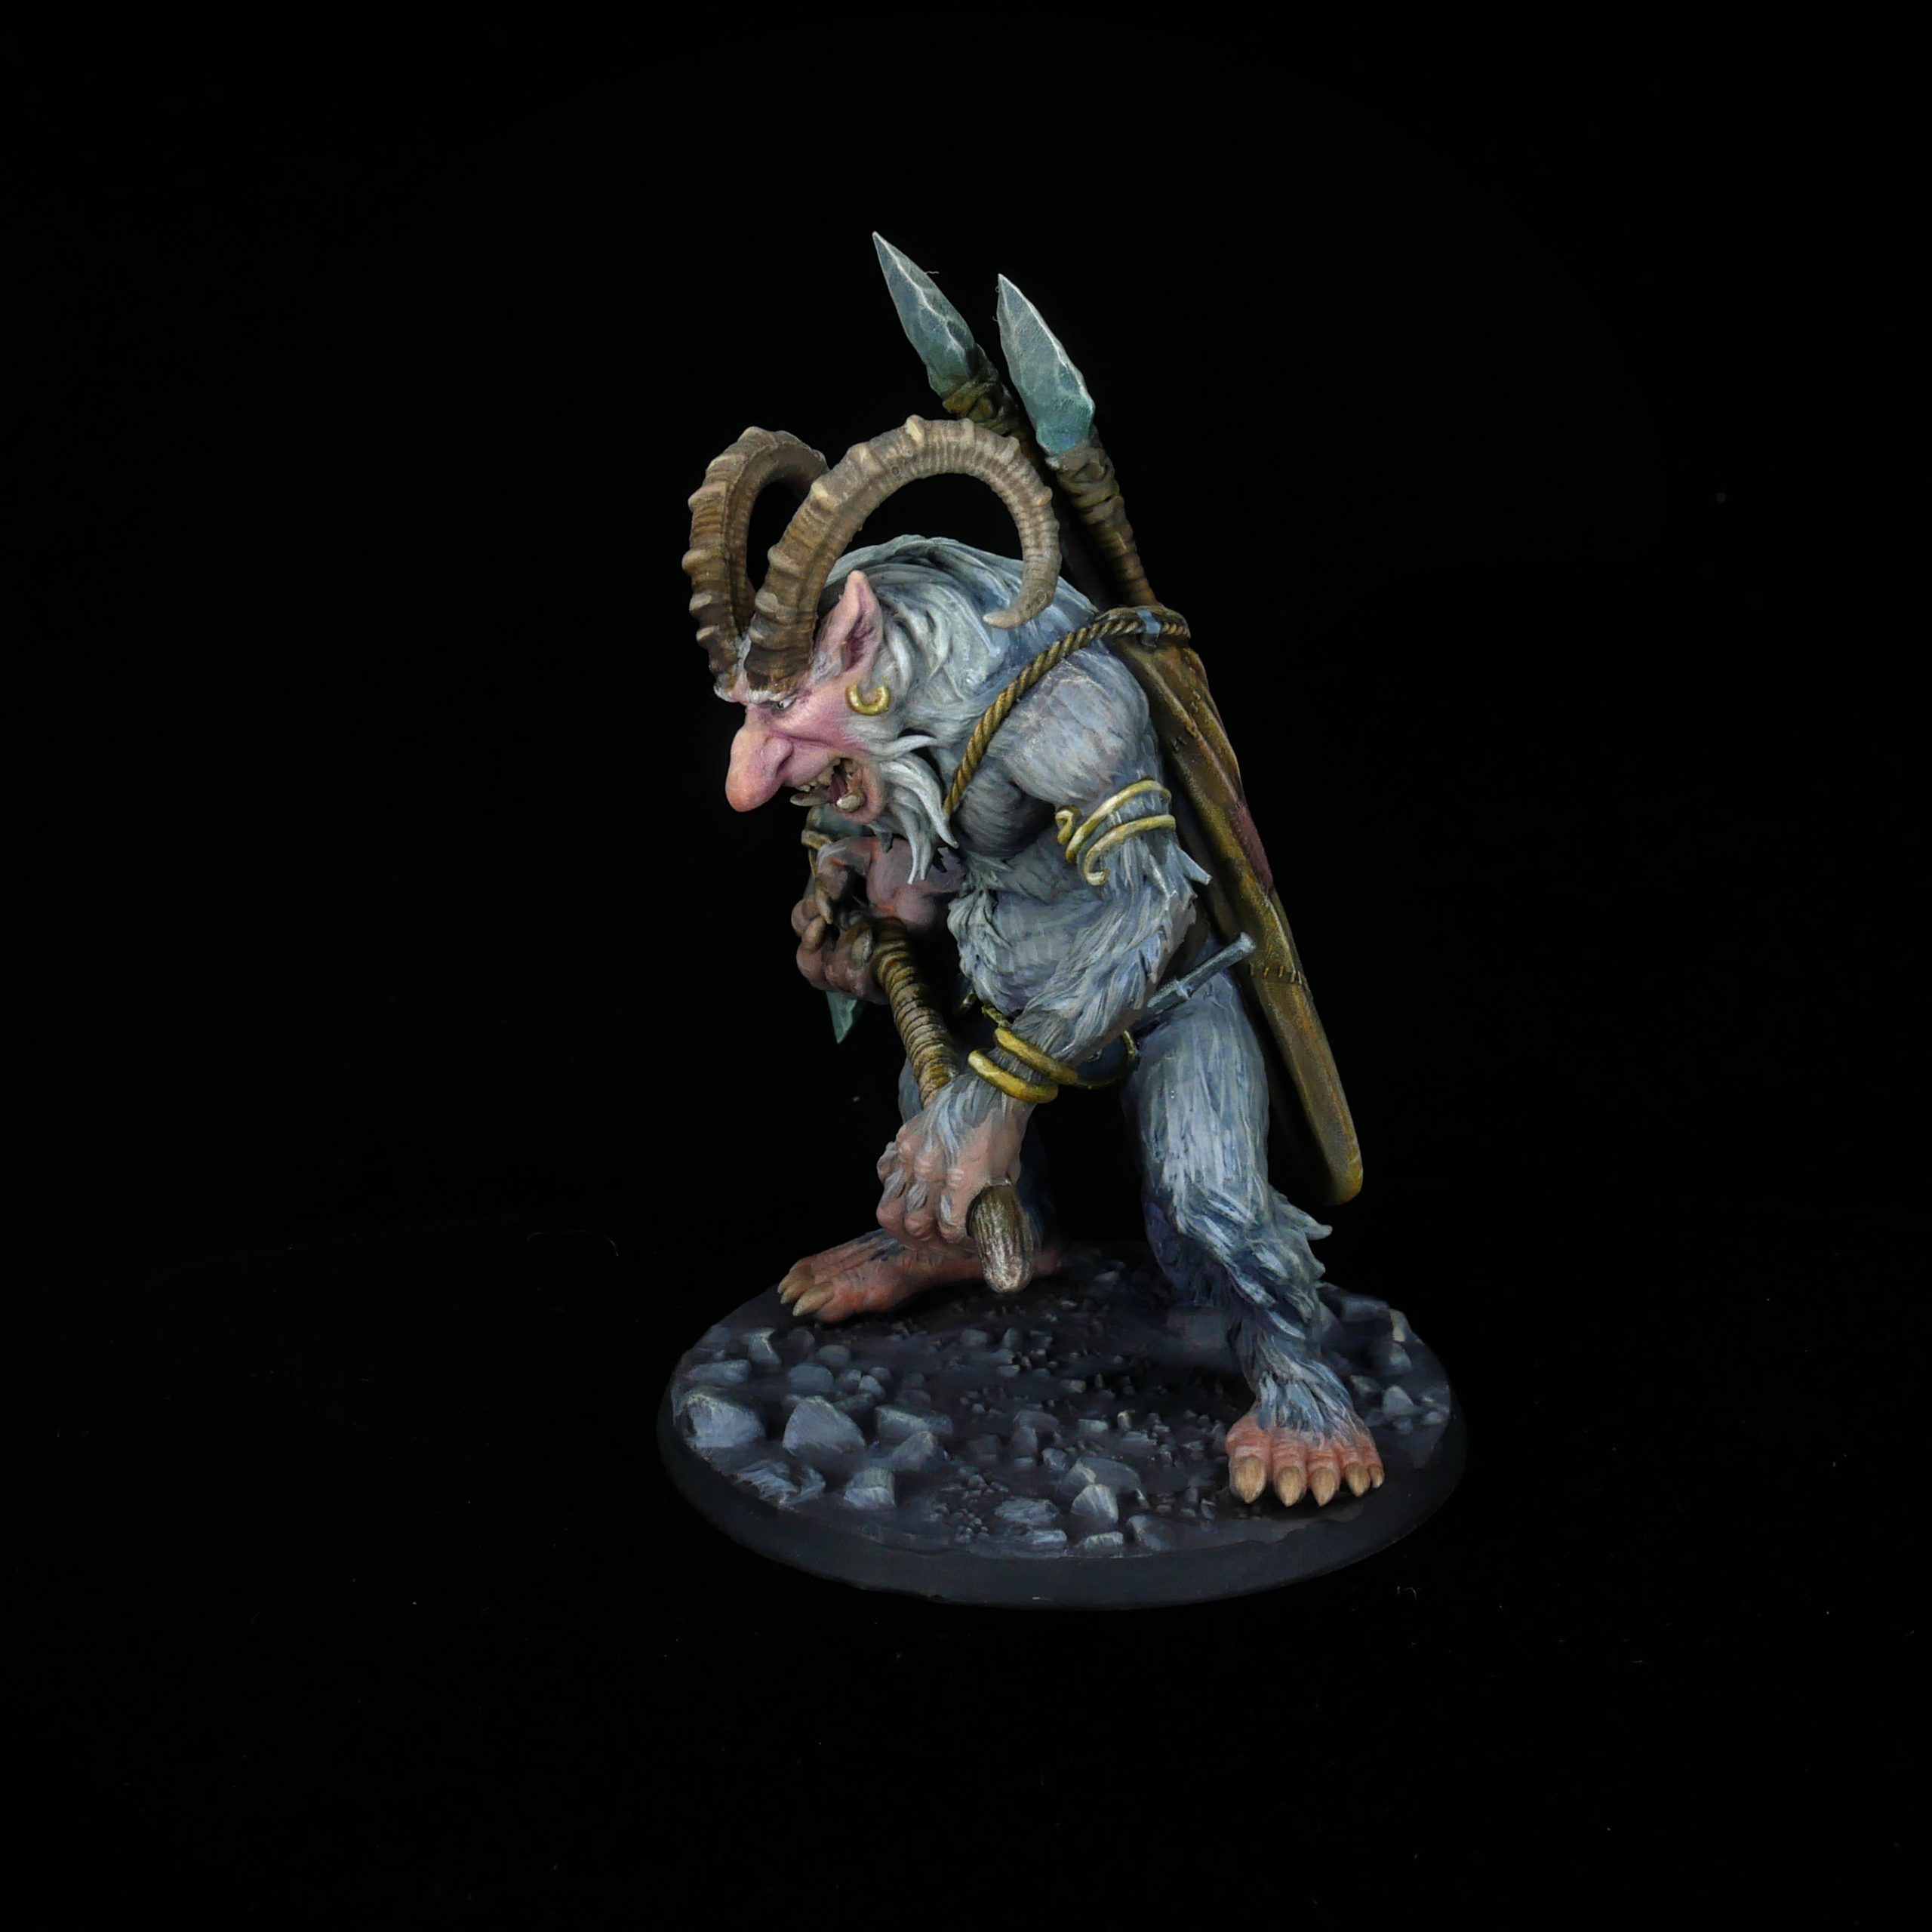
The 3rd troll that I sculpted was a Mountain Troll. For this I wanted him to be a little bigger, maybe the same thing as a Frost Giant or jotun. Some of Paul Bonner’s paintings of Frost Giants and trolls for Trudvang have big horns. So looking at some mountain goats, I picked a big shaggy goat for my inspiration for his fur and horns!
Because Trolls are not crafty like gnomes, I figure that their weapons -especially for a giant – would need to be stone-age hafted weapons. I watched some videos on YouTube to learn how to haft an arrow head, and how to wrap the sinew to hold it. It was very fascinating! Then when I looked at photos of artifacts of stone age weapons and even some bronze age axes, I could understand better what I was looking at, and how it really worked. I even have a paleolithic axe head in my personal collection of stuff!
The fur was a lot of work! I didn’t want it to look cartoony or too stylized. I had done some miniatures with fur, but this was a step beyond my comfort zone, for sure! I took it eave further when I had the idea for the Ice Age Gnome, LOL! That mini has the sabretooth rabbit, the fur cap and cloak, and the gnomes beard and hair – that was a big challenge!
MH:Can you describe your process for us a little bit? Any favorite tools of the trade or specific steps you take when deciding what to sculpt?
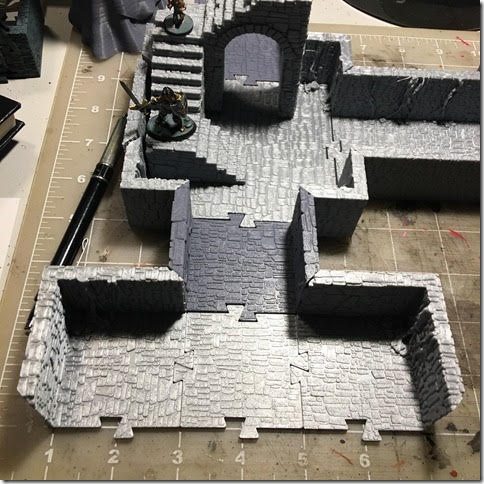
Will: Because I have a background with CAD, a lot of times I will design something in Rhino. This is what I used to design PuzzleLock. I can work out the tolerances there and later export it to ZBrush for sculpting details. I think this design for manufacturing background give me an advantage when it comes to designing for 3Dprinting.
Printed PuzzleLock Pieces
PuzzleLock Design Layout
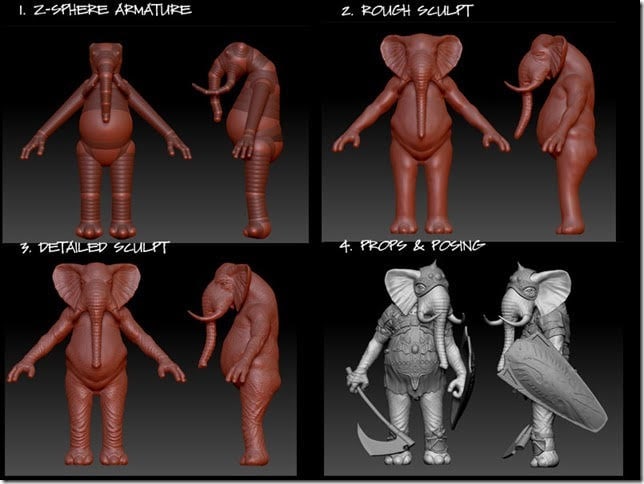
For pure sculpting, like for miniatures and figurines, I will start in ZBrush with a ZSphere armature to create the basemesh for sculpting:
Sculpting with ZBrush zspheres
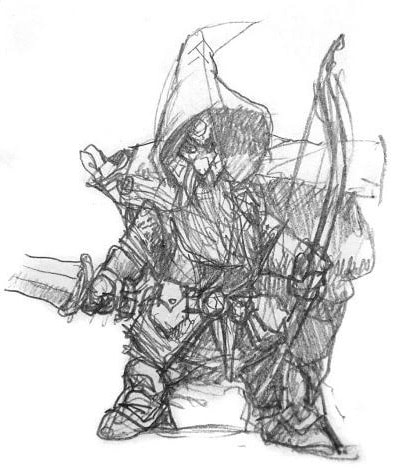
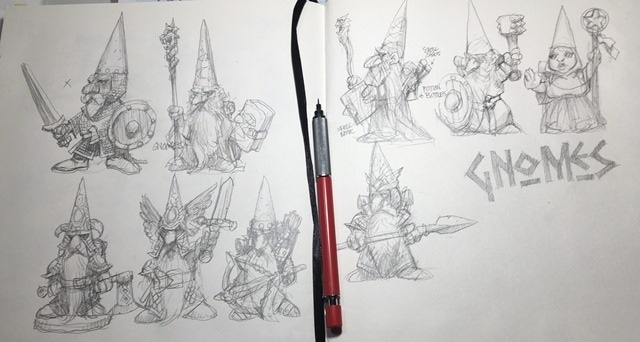
ZBrush is indispensable for an artist in this space. I am lucky that I bought it when it was only $299—They have continued to improve and update it at no cost to their users. It is just fantastic! I never jump right in to the computer with an idea. I always start with a sketchbook. This is a habit that I also encouraged with my designers at SMP. It is faster to iterate and work out the design on paper first. Sometimes I will only have a doodle for inspiration, and sometime I will do a lot more on the concept before I start sculpting.
Sketch
Model
Print
MH:While your work with gnomes is some of the most popular, you do a very broad variety of art, from comics to, of course, sculpting. How did you break into sculpting for 3D printing?
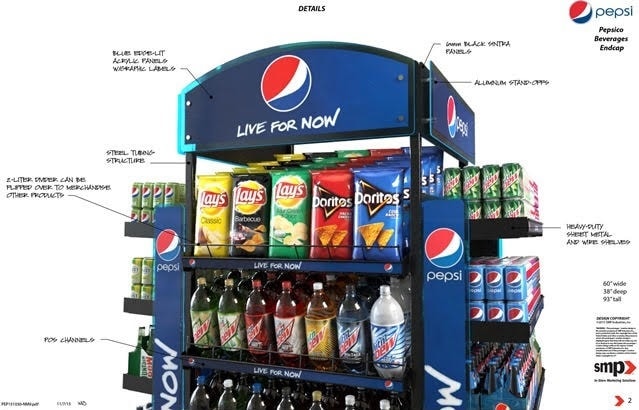
Will: I was a traditional artist long before I got my first computer. drawing, painting, sculpture, airbrush art… I got a job doing Design for point-of-purchase displays, and learned how to model in 3D, and make renderings for presentations. I work for SMP Instore Marketing for about 15 years, starting as a designer and then Creative Director.
Even so, I was fascinated with the technology and the whole idea of it. By the time Makerbot had the Replicator2 available, I bought one for the Design and Engineering department at SMP. That was my first experience printing myself, and learning about it. I had ZBrush at this time, and I could see the potential, though the quality was not good for miniatures and the only Resin printer was the Form1, and it was over $3000… so I couldn’t buy one.
During those years I was also learning computer animation on the side and pursuing that. When 3Dprinting was first available it as only for prototyping parts which would later be injection molded. The machines were so expensive that you had to send to a service bureau to get them printed.
Around 2014, I started freelancing from home. I had a Printrbot Simple Metal that I used for printing my own stuff. One of my freelance clients was Shapeways. They had a designer-for-hire program that I was a part of, and later a Design with Shapeways program. I learned all of the limitations and constraints for their machines and materials and picked up a lot of modeling gigs through their forum, and also on Reddit. the cost for prints on Shapeways kept getting ridiculously higher every year, and at the same time the project managers that had come on board kept trying to get us to lower our quotes and would pitch things to different artists and take the cheapest – so I eventually stopped responding to quote requests from them.
Point of Purchase Design
I started getting into designing my own STL files for sale, because I could see that the cost of printers was dropping each year, so it was not going to be long before home users started to adopt the technology. It made sense to me that there would be a market for the patterns, in the same way that you might go to a fabric store like Joanne’s and buy materials and a patttern to make something. I joined Cults3D.com when it was a NEW website! I have a good relationship with Pierre who is the founder.
When I was able to get my own resin printer, it was a SparkmakerFHD that I pledged for on Kickstarter! It was only $249 at the time and Form2 was the other I was looking at, and it was $3,000. Once I could print things myself, I could see that the machines could print much finer than Shapeways would allow, and my cost was a tenth of theirs.
MH:Do you have any tips for folks that are interested in pursuing digital sculpting or art in general and are just getting started? Any major pitfalls to avoid that you had wished someone would have warned you about?
Will: Don’t go on Artstation and get bummed out and depressed that you will never get there! Everyone starts at the beginning – I am embarrassed by my old work that my mom will bring out to show her friends! It takes years to master the craft – whether drawing, painting, sculpting, etc. But whatever you create, it was only you who would have done it. We are all unique, and the vision we have is unique to us. Don’t rush past those beginner exercises. Every stroke that you make is practice. Be mindful and give every piece of art your best.
Never do a rush crap job, because you are in a hurry, or the budget is low – give it your best. It will stay out there in the world with your name on it! So be proud of what you do and be true to your art. If you remain true to your vision, then your true fans will respond to your work, and they will find you. And though I am not taking STL subscriptions on my Pateon, I am still looking to connect to my fans there!
Will Sutton's Sketchbook
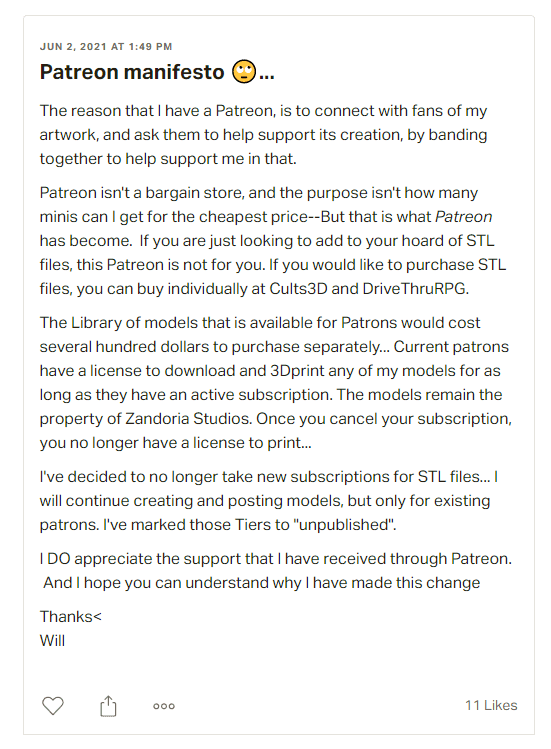
MH:Speaking of Patreon, you recently made a drastic change in your subscription model… and by drastic, I mean you pretty much cut it off all together. Could you tell us a bit about how you came to make those changes and the direction your future plans are taking you with regard to your art?
Will: Like many artists, I hoped that I could use Patreon to connect with my fans, and with their combined support I would be able to just make art all day! I’ve had a Patreon for several years, but only had a few fans on it, and I really didn’t have an idea of how to use it… As you have seen in the past couple of years, Everyone is jumping into it – especially after the exponential growth of the market after Artisan Guild launched their Patreon a couple of years ago. I like to take my time on a sculpture, because it is a timeless medium and I want my work to last. I can’t create at the frantic pace that is burning out even the younger artist in our group, so I decided to take an approach that was all-inclusive. I would make ALL of my work available to print, without a fear of missing-out! I thought of it like Netflix – binge print everything! My hope was that people would join if their was a theme that they were interested in, like the Trolls. I knew that people would come and go, but I had a hope that I could get my number of subscribers to at least 100 – which if I had a good ratio between $10 Adventurers and $20 Merchants, I might actually make Minimum Wage!
During the pandemic, we saw Raging Heroes and Titan Forge enter the Patreon market – maybe others that I’m not thinking of – which I believe were companies who had previously manufactured minis. Now they were pulling from back catalogs of models which they had purchased as work-for-hire and dumping them into Patreon and just swamping it! 20 or more models for $10, and 10 years worth of back catalog to pull from! So it was the beginning of the end for smaller patreons in this space… Patreon “Samplers” is another get rich quick scheme flooding the space.
It isn’t just that it is a crowded field. I don’t see myself and my fellow artists as competitors. While we are all wanting to sell our models, everyone is going to have their own interpretation of a particular thing – whether Orcs or Dragons or trolls or gnomes. No one else’s work will be the same as your own. So in theory, even Titan Forge should help the “market” in a rising-tide lifts all boats kind of way…
But even though this is an expensive hobby, and people buy the latest and greatest 3Dprinters – sometimes owning multiple! There is an idea that they can spend thousands of dollars for printers, but they aren’t going to pay more than a few dollars for STL files! The Kickstarter and Patreon markets both contribute to this idea that the STL has no dollar value – because there is no shortage of models available.
Compounding this is the ease of Piracy… Even though I had let patrons have access to my entire library of models for a very low price, as a reward for their subscription, my models still end up on Telegram channels and pirate sites such as The Trove… There is no respect for the artist in a community that turns a blind eye to this problem… A prominent moderator from our 3dprintiong community, tells me that it is OK because they were never going to be your customer anyway…But this same person is a member of those file-sharing groups! (which really makes my head spin)
My future plan is to re-evaluate the entire way that I have been thinking about 3Dprinting. I will still put up STL sets on Cults3D. But instead of just selling the STL files, I want to print and hand-paint as collectibles. I keep getting requests for the gnomes from fans who are not a part of this hobby. They just want the sculptures! So I will look at using the printer as a tool of production, not as just prototyping.
The Grande Finale
We’re very grateful to both Will for taking the time to chat with us, as well as Chris Spotts for doing such a fantastic job on painting the Mountain Troll. Will’s work can be found here on MiniHoarder, and for those who just want to support his art, you can do so via his Patreon.
Chris is the painter behind The Spotted Painter, and runs a YouTube channel and can be found via his FaceBook page.
If you’re an artist and would like to be featured in our Artist Spotlight, give us a shout at [email protected].
When you have a hoard of screaming fans waiting to be able to access your work, it’s important to be able to deliver it to them on time and in a way that is easy for them to access. MiniHoarder has always strived to provide a service that enables creators and artists to easily and reliably share and distribute their work to their patrons, Kickstarter backers, and the gaming community at large. Today we are thrilled to announce one more piece to that pie: Patreon Integration.
Now before we jump into the setup, let’s take a moment to go through how this integration works and what it will let you do. What we’ve done is take advantage of Patreon’s REST API to allow you to connect to your account from the MiniHoarder website. From there, we can pull down a list of your current Patreon backers. We can then use this list to work such magic as granting them access to special coupons (and restricting it to everyone else). Even better, you can just straight out give them a product. Sound intriguing? We thought so too.
We should mention that there are a few limits to the capability. While there is absolutely no need to manually grab email addresses or keep track of any sort of lists, currently these operations are not automatic. This means that if you get a new patron in the middle of the month, they will not be automatically granted access to any specific products or coupons. However, you can grant them access to whatever they need with the click of a button. With that out of the way, let’s cover basic setup and usage.
Getting Started
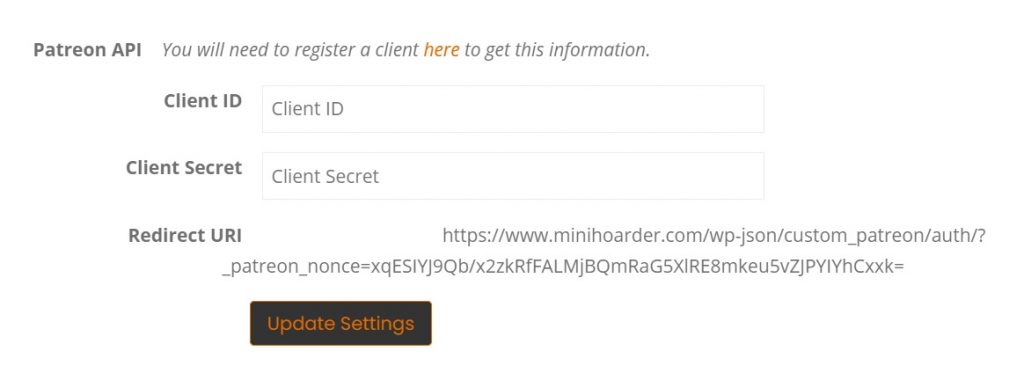
Getting setup is pretty simple, but there are a couple of steps that we need to go through before we can start giving your products to your faithful patrons. First, head to your social profile under your store settings from your MiniHoarder vendor dashboard. You should be able to see that we’ve added few new fields. We’ll get to the Client ID and Client Secret in just a minute, but for now, let’s grab the Redirect URI. This is needed by Patreon to tell it where to send you after you’ve authenticated your account.
New Fields for Patreon Integration
With the Redirect URI in hand, it’s time to head over to Patreon and create the client. Patreon is no longer actively developing this aspect of their service, so it’s not actually that easy to find where to do this. Fortunately, we’ve done the digging, and you can access that page here. You will want to make sure that the title of the page says, “Clients & API Keys”, and that there’s a blue button on the left side that says, “Create Client”.
Creating a New Patreon Client
When you click on “Create Client” button, a modal window will open that asks for a bunch of information. For most of it, you can put what you like. However, there are three fields that we really care about. For the field labeled “Company Domain”, you’ll need to enter www.www.minihoarder.com. For field labeled, “Redirct URIs”, you will need to add the URL that you copied from the social profile settings from your vendor dashboard. Finally, you will want to make sure the “Client API Version” field is set to 2.
Patreon Client Fields
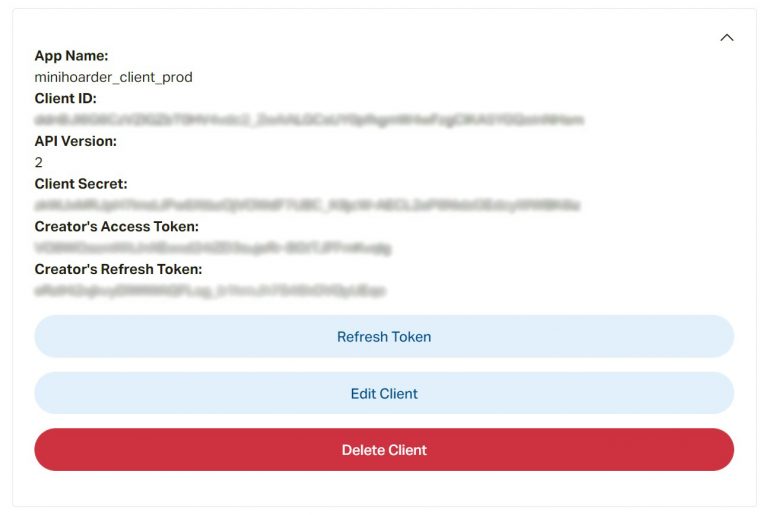
Patreon Client Details
When you finally hit, “Create Client” at the bottom, you’ll be redirected to the client list, which should now show the one you just created. Click the down caret icon on the right side of the client to show the details. This is where we’ll find the needed Client ID and Client Secret. Copy both of those values, and paste them into their respective fields under the social profile page of your store settings, located on your vendor dashboard. Now that the basic setup is complete, we’re free to start adding our patrons to coupons and giving them products.
Giving Products to Patrons
Now that we have our client set up, let’s go through the steps needed to give a product to your backers. First, pick a product (pretty obvious, we know), and go to its product edit screen. This can be reached from the Products tab of your vendor dashboard.
Giving Products to Users
From here, scroll down to the bottom of the product edit screen. Here you should see the “Give Product” section. It will have two buttons labeled, “Give Product”, and “Add Patrons to List”. First you will want to click on the “Add Patrons To List” button.
This will either ask you to give MiniHoarder access to your Patreon account information, or ask you to log into Patreon. If it simply asks for permission to access your Patreon information, then once you agree, you will be redirected back to the product page. If you scroll back down to the “Give Product” section, you will notice that the “Email Addresses” field has been filled with your patron emails.
At this point, you can hit the button labeled, “Give Product”. This will schedule a job on the server to create an order for every email listed that is associated with a MiniHoarder account and doesn’t already own the product. This means that if you give out your patron rewards, and then get an influx of new patrons, you can just click the button again. The new followers will get the product, and the old ones will not get any duplicate orders. Processing should be fairly quick, but might take a few hours, depending on how many emails are submitted.
If you’re asked to click on an email link during after logging into Patreon, note that you will not be redirected back to the product page, and will have to manually navigate back to it. From there, you will want to re-click the “Add Patrons To List” button. Also note that you can add any email to that list. It doesn’t strictly need to be patrons.
Restricting Products to Patrons
Fortunately, restricting coupons to patrons is just as easy as it is to give them products. First, navigate to the Coupons tab under your vendor dashboard. Then, either click on the “Add New Coupon” button, or the edit link for an existing coupon.
Adding Patrons to a Coupon
Scroll down a bit down the page, and find the “Email Restrictions” field that is sandwiched between the Amount and the Total Usage Limit. On the far right of that field, you will find a button labeled “Add Patrons”. Clicking on it will have you go through the same authentication process that’s outlined above for giving products to your patrons, but it will add the email list to the “Email Restrictions” field. After you see them listed, simply save the coupon, and your patrons will enjoy all of the coupon bliss they can stand.
Note that if you’ve already added all of your patrons to the email restrictions list, and then get additional patrons, you can update the list by simply clicking on the button again. Emails that are already on the list won’t be added again, and only the new emails will be appended to the end of the list.
Wrapping Up
That’s really all there is to it! Please don’t hesitate to let us know if you have any questions or issues with this aspect of the site, or any other. You can comment below, or email us directly at [email protected]. We take a lot of pride in providing services and tools that are meaningful and valuable to our creators, hoarders, and gamers. Happy hoarding!
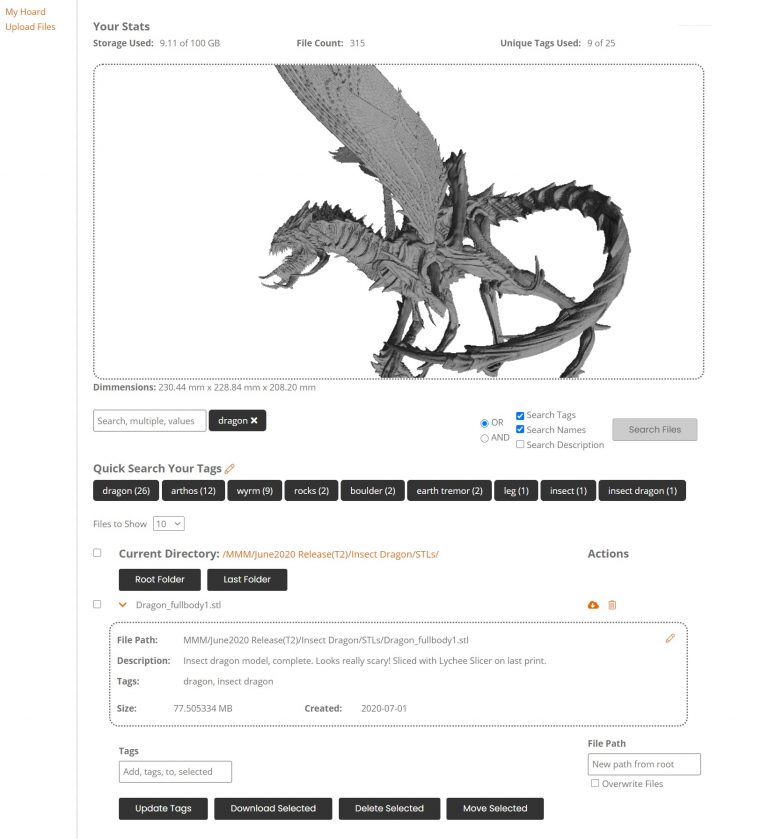
Keeping up with thousands of 3D printable miniatures and terrain pieces can be a nightmare. Looking for a specific skeleton from your collection can feel an awful lot like looking for an undead needle in a haystack. Fortunately, we heard your cries of agony, and are here to help. MiniHoarder’s storage and organizational system can help keep your minis organized and, more importantly, searchable. Today we’re going to hone in on one particular feature: tags.
Expand Your Hoard
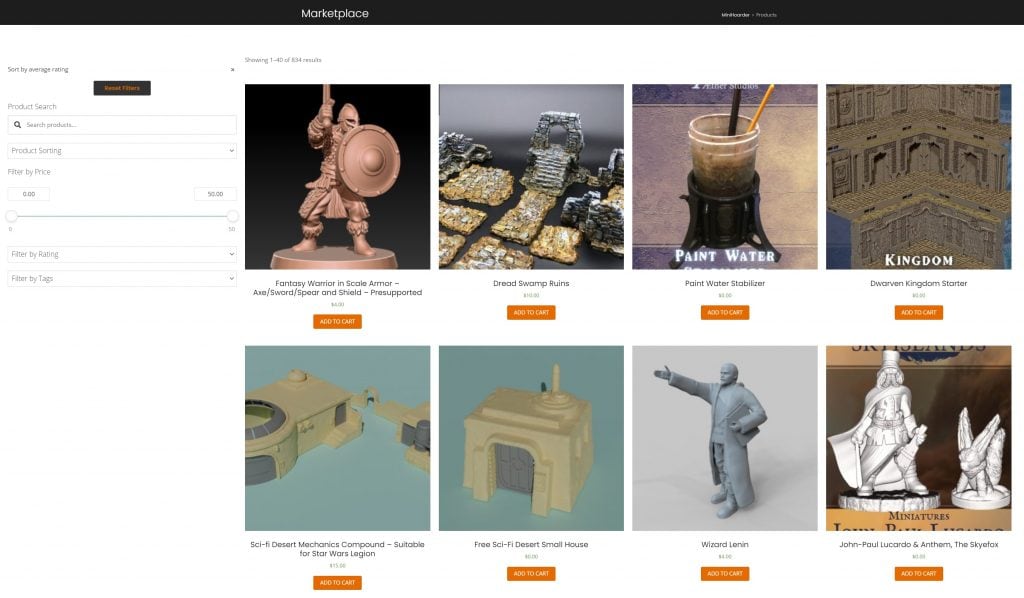
Looking for that perfect 3D printable miniature or terrain piece to add to your collection? Our marketplace has an incredible selection of 3D printable models that will be perfect for your game table.
Tags are probably a familiar concept for many folks, but just to keep everyone on the same page, let’s take a minute to discuss what they are and how they can be helpful. A tag is a word or phrase that is used to both describe and group files together. On MiniHoarder, tags can be assigned to individual files, or to several files at the same time. Additionally, you can assign tags to files as you upload them to our cloud storage service. More on the details later.
Tags can be used to group your 3D printable files in just about any way you can image.
Want to mark certain models as being part of a campaign for your tabletop adventures, or even a specific encounter? Add a descriptive tag to lump them all together. Want to be able to quickly find every goblin from all of the 50 artists you back on Patreon? Slap a goblin tag on there, and you can find them all with the click of a button. It’s also useful to group several files that are part of the same model. While sticking them in the same folder is also a great way to go, being able to pull them all up on a moment’s notice is a pretty great feeling.
Combined with our advanced search capabilities (more on this in an upcoming article), your ability to both group sets and subsets of models together, as well as the ability to pull them up quickly, helps to ensure that you’ll never loose, or get lost in, your 3d printable hoard again.
Using tags to find files is all well and good, but if it’s a pain to add them, then what’s the point? We’ve added several ways to add tags to your files, and continue to refine the process to make it as easy as possible. As we mentioned above, there’s currently three ways that you can add tags to files. One important note that we should mention is that tags are not case sensitive. This means that if you add the tag “goblin”, “Goblin”, and “GobLIN”, it will all register as the same tag. We did this both to minimize the chance that folks accidentally create separate tags when they intended for files to be grouped together, and also to more efficiently track tags on our end.
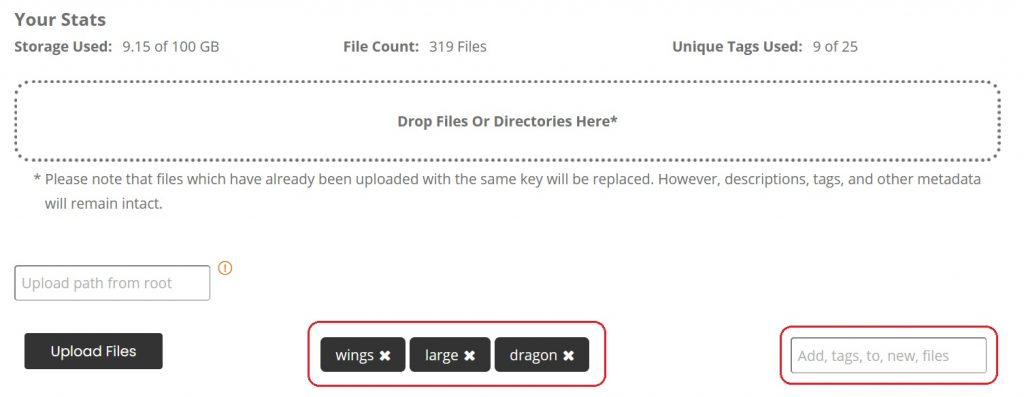
During File Upload
The first chance you’ll get to add tags to your 3D printable files is during the upload process itself. If you happen to be bulk loading a bunch of files that you’d like to be grouped together, but that don’t necessarily fit into the same folder, then this is the way to go. To do this, just type your tags into the text field with the text “Add, tags, to, new, files”.
To add multiple tags to the files, separate them in the text field with a comma or by using the enter key. You’ll see them added as a button next to the input field with a big “X” next to the tag name. To remove the tags listed, just give that “X” a friendly tap, and it should disappear. Any tags that are entered will apply to all of the files that are being uploaded.
Tags Can be Added While Uploading Files
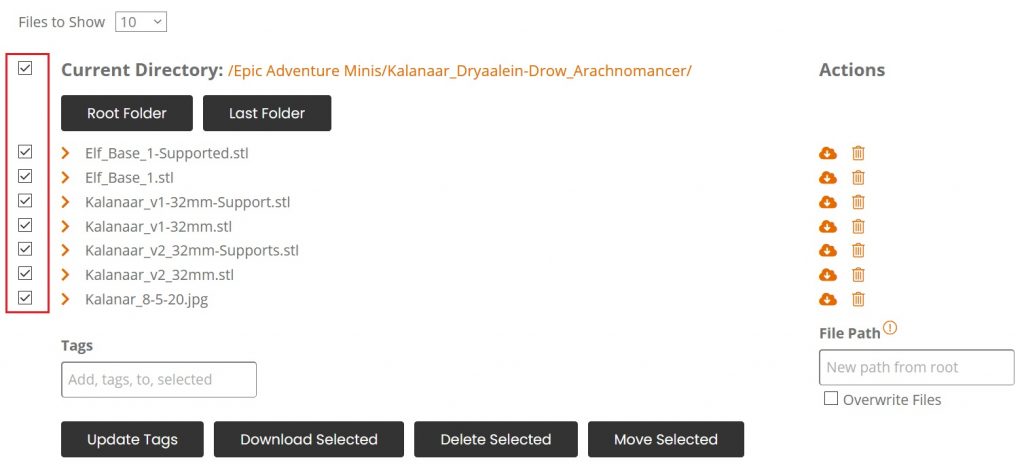
Add to Files In Bulk
Add Tags to Several Files at Once
If you want to add tags to files that have already been uploaded, you’re in luck. The fastest way to do this is to navigate to the folder that includes the files you want to tag and check the box next to each file you want to add the tag to (or check the box next to the title, “Current Directory” to add everything in the folder).
Once you’ve selected all the files, enter the tags you want to add to the selected models in the text field labeled “Tags”. You can add multiple tags by separating them with commas or by hitting return. To remove any tags you’ve entered accidentally (or realized you misspelled, like me), just hit the “X” on the tag button that’s created as they are entered.
Finally, when you’re satisfied with both the tags and the selected files, hit the button labeled, “Update Tags”. Voila! You’ll also notice that the tags listed under the quick search area automatically update with your new entries.
Add to Individual Files
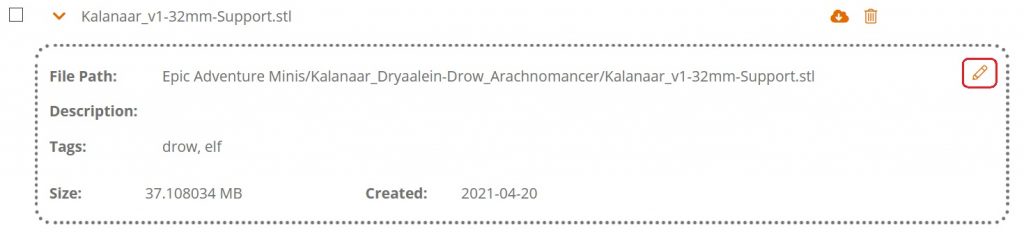
If you’re looking to make several changes to a single file, it’s possible to add (and remove) tags from them individually. To do so, navigate to the file that you want to modify, and then hit the down arrow next to the file name. This will expand an area to show any additional details you’ve entered about the file, the full file path, the file size, when it was originally uploaded, and of course, any tags that are already associated with it.
Click the Pencil Icon to Edit File Details
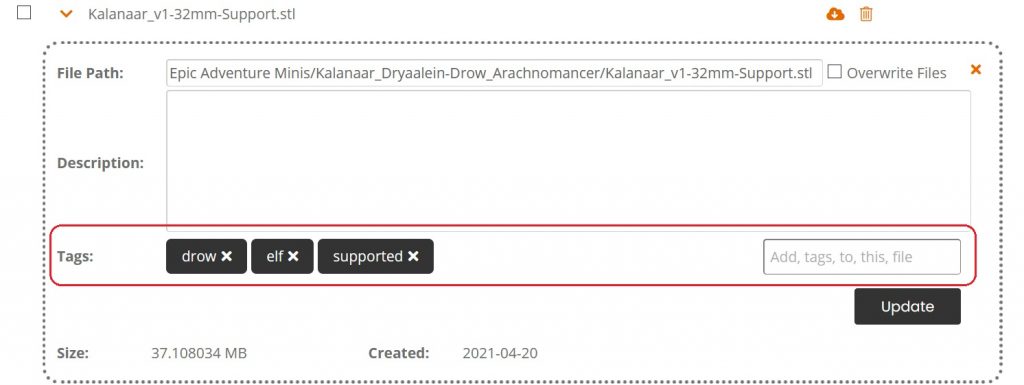
To modify these tags, click on the pencil icon in the top right corner of the file details panel. This will change the editable fields to become inputs. Adding tags here is much like adding them from the other available methods. Type new tags into the field on the right with the placeholder text, “Add, tags, to, this, file”. New tags should be separated by commas or by hitting the return key. To remove a tag, hit the “X” listed to the existing tag, and it will be removed from the list.
When you’re done editing the tags and happy with how they are, hit the button labeled, “Update” on the bottom right of the file’s details pane.
Add or Remove Tags to an Individual File
Using Tags to Find Your 3D Printable Files
Now that your file have all the tags, it’s actually time to put them to use. MiniHoarder currently offers two ways to search for files based on tags. Let’s take a look.
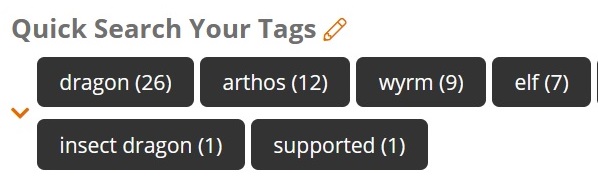
Quick Tags
The first is to simply click on the tag listed under the heading, “Quick Search Your Tags”. Clicking on this will, surprise surprise, quick search your files using the tag that you clicked on. If you click on another quick tag button, a new search will be preformed and will replace the current search results with items containing the tag you just clicked.
Quick Search Your Tags by Clicking Them
The results will only show files with the selected tag, and not items with the tag in the name or description. For example, let’s say you have a file named BigDragonOfAwesomeness.stl. If doesn’t have the tag “dragon” (but you have several others that do), when you click on the “dragon” tag, this file will not show up. This provides with a quick an easy way to get access to a specific group of files without having to remember where they all live.
Search Bar
There are times you might want to combine a search to use multiple tags. The search bar above the quick tag section will let you do exactly that. When you start typing in the search bar above the quick tag list, you’ll notice that we conveniently suggest your tags as an autocomplete option. You can add as many tags as you’d like to search on by hitting enter or comma to separate them. Just like with the other tag text fields, these tags will be added to a list to the side of the search bar where you can remove them if you make any sort of mistake.
Your Tags Will be Suggested as You Search for Files
The search bar functionality is pretty extensive, and we will cover it in greater detail in a separate article, but there is two points that we need to make here. The first is that make sure the “Tags” radio button is selected if you want to search models tags with you entered values. This is pretty straight forward.
The second point is that MiniHoarder currently offers different Boolean operations for searching. Currently, it’s only “AND” and “OR”. Selecting “AND” will only show models that have all of the tags that are entered. For example, if you’re looking for skeletons with bows, and have tagged your models by type and equipment, then you can enter the tag “skeleton” and “bow”, make sure that “AND” is selected, and hit “Search Files”. This will return all models that have both of the tags, “skeleton” and “bow”.
Selecting “OR” will show any models that have either of the tags. Using our previous example, you would find any skeletons using any weapon, as well as any other models using a bow.
Editing Existing Tags
So you had a late night, busy… adventuring. Of course the first thing you do when you get back is to start adding tags to your expanding hoarding. In the morning, you realized you spelled “dragon” as “dragonzes”, and now have two separate tags that you’d like to combine into one that is properly spelled (or not, we don’t judge). MiniHoarder’s will let you remove, edit, or combine tags at your leisure. The power is yours to wield with reckless abandon.
Enter Tag Edit Mode by Clicking on the Pencil
To make changes to the tags themselves, click on the pencil icon next to the quick tag list next to the title, “Quick Search Your Tags”. This will place your tag list in edit mode, and will put a dotted border around all of your tags. To edit them, click on the offending tag, and the tag will change to an editable input with a couple of icons next to it.
Enter your new tag in the input field. To save it, click on the check icon. To cancel the edit and keep your original tag, click on the “X”. If you’d like to remove the tag and its references entirely, click on the trash can icon. Note that if you rename the tag to one that already exists, the two will merge. That’s it!
Edit or Delete an Existing Tag
The Grande Finale
With that, you’re well on your way to mastering your printable hoard. It can definitely be overwhelming, but don’t let your massive collection of 3D printable files get the better of you. With file tagging, your ability to organize and search the exact miniature or terrain piece you need is at hand. We’re constantly adding new features to our 3d printable file storage service and organizational tools. If you have a feature you’d like to see, let us know in the comments below, or send us an email directly to [email protected].
No idea what we’re talking about? Man, we’ve been there. If you’re a fan of 3D printing and have a massive amount of 3D printable files that have started to overwhelm you, checkout out our hoarding plans. We can keep your files safe and manageable, regardless how large your hoard has become.
Just Dipping Your Toes Into 3D Printing? It All Starts With the Files.
If you’re just hopping into the 3D printing scene, one of the first things you’ll need to do before you start cranking out stunning printable miniatures and epic terrain pieces is to… actually find the 3D printable files for those miniatures and terrain pieces in the first place.
Now, if you’re reading this article and in need of said printable models, I’d encourage you to hit the menu item labeled Marketplace up at the top of this window. There you will find thousands of choices to satisfy just about every gamer’s fancy. And this brings us to our second problem. Printing miniatures and terrain is a lot like opening a can of Pringles. Once you pop, you can’t stop.
But what to do with all of those files? Once you get going, it can feel like they multiply faster than rabbits. Unless you want to spend your nights looking for “Intimidating Orc #57”, planning ahead is key. Fortunately for us, our friends at Slice Print Roleplay recently made a video that addresses both the problems of where to find printable files, as well as what to do with them once you start to amass a small hoard.
Now you might be thinking to yourself, “What’s the big deal? I’ve been messing with files since I could reach a keyboard!” Now, that is probably true and you might be one of the few savants out there that can actually remember every file you’ve ever cut, copied, or pasted. If that’s true, this might not be for you.
However, keep in mind that once you get rolling, it’s not uncommon for individuals to end up collecting terabytes worth of files. While some models can get pretty heavy in the size department, I’m looking at you massive and incredibly detailed epic bosses, that is still thousands and thousands of files. Not to mention that you’ll likely have them coming in from different sources and by different artists over months, and possibly (hopefully!) years.
The organizational scheme outlined by Print Slice Roleplay in the video above is a great way to stay on top of your collection.
Level Up Your Organization with MiniHoarder
Now, if you see yourself with thousands of files wishing for a better way to track, organize, and store your 3d printable files, our cloud storage and organizational tools might be the ale to quench your dwarven thirst. Not only do we provide a cloud based storage solution to keep your files safe no matter what happens to your hard drive, we also provide a way to tag them, search them, view them in the browser, and add detailed notes, such as the artist or where you go the model.
Just in case you missed it, Slice Print Roleplay also shared a coupon code near the beginning of the video for a free month of the storage service. Give it a shot and let us know what you think!
Wrapping Up
Getting started with 3D printing miniatures and terrain is a fantastic hobby, but can also be a bit difficult to break into. Figuring out the best place to get your models, and then knowing what to do with them once you have them is all part of the fun. For more tips and information on getting started with 3D printing, we can’t recommend Slice Print Roleplay’s videos enough. We’ll certainly be doing more posts on them, but if you can’t wait (and we couldn’t blame you!), you can find more at their YouTube channel.
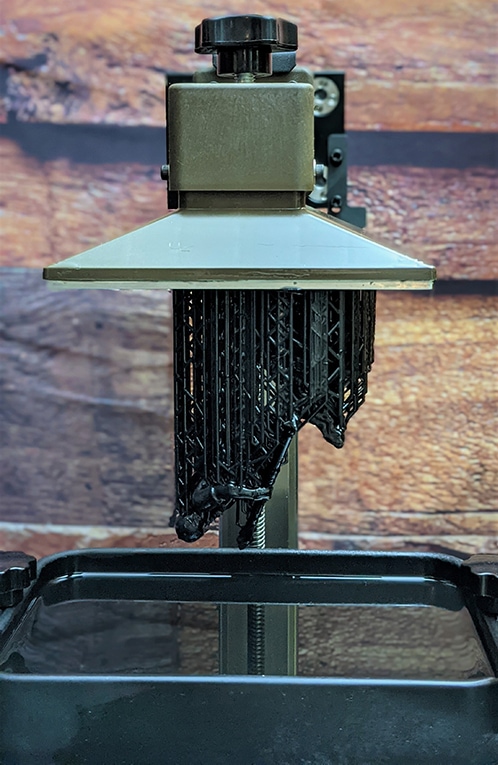
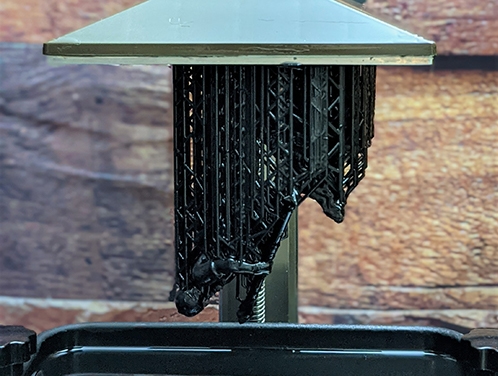
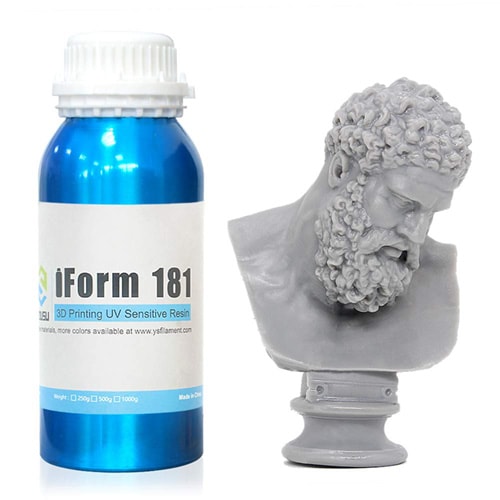
In the world of 3D printing, next to the actual 3D printer you use, few choices are as important as the resin. The resin you choose can make all the difference in a miniature that turns out fantastic and lasts for years, or one that looks like it ended up on the wrong end of an acid splash spell and breaks after it’s first time on the game table (not that you’d necessarily mind at that point). In this video, our friends at Slice Print Roleplay perform a very nice Yousu iForm 181 Resin review using a model from The Printing Goes Ever On, and their trusty Elegoo Mars 2 Pro.
Resin costs can really range the gamut, from around $20 a bottle to well over $100 a bottle for dental grade resin. Fortunately for us, we’re not putting these anywhere near our mouth (right?!), so we can stick to the more reasonably priced bottles. Even for the resins typically used for printable miniatures, the Yousu iForm 181 Resin is priced beautifully at $17 a bottle.
Durability and Flexibility
If you haven’t watched the video by this point, you really should. Slice Print Roleplay performs some flexibility and drop tests with nice results. There’s something both sad and fantastic about watching parts of a miniature snap in half. It’s okay to admit it. It’s the barbarian in all of us. Suffice it to say, you won’t be using the Youso iForm 181 Resin to 3D print an actual battle worthy warhammer, but it gets the job done.
More About Those Models
If you’re interested in the models that were used in the video, you can find The Printing Goes Ever On right here on MiniHoarder. If you’re looking for a long term commitment to the artist (which we always highly recommend), you can find their Patreon page here.
More To Come
What’s next? We’re very excited about our partnership with Slice Print Roleplay and the content that they bring to the gaming and hobbyist tables. You can expect to see more content of theirs featured on our site, along with additional articles and tutorials on all things modeling, printing, and gaming related. If you’d like to see anything specific, let us know at [email protected], or leave us a comment below!


