Articles and blog posts for the happy hoarder and gamer in all of us.

Necromancer’s Tower late pledges are live!

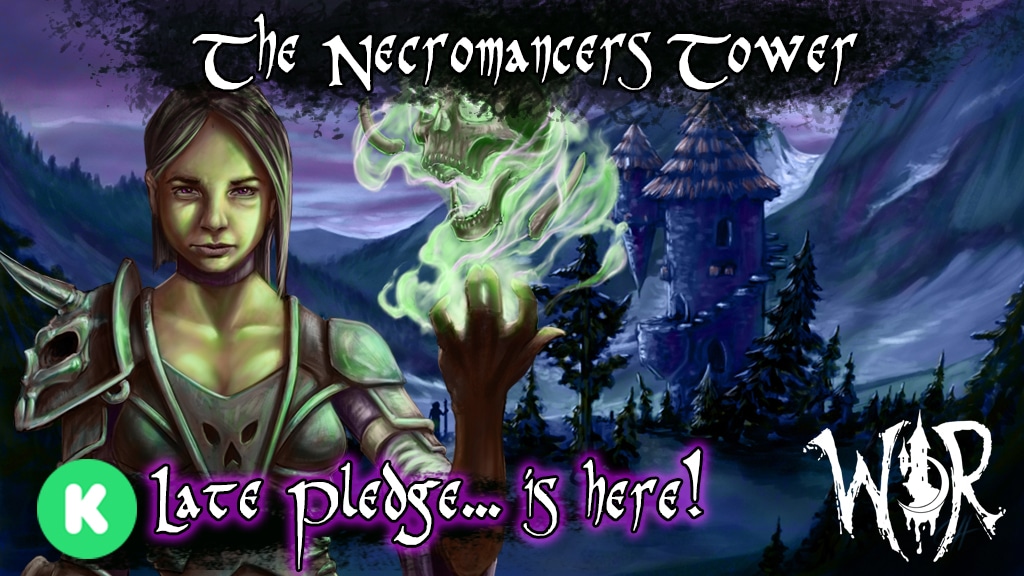
Since the close of the campaign we’ve had several people reach out to us to ask if we would be doing late pledges. Well if you’re one of those people or randomly stumbled across this campaign sometime after it finished, I have some good news for you–we are now accepting late pledges through the Top Doug Design store on MiniHoarder! We wanted to make sure that all of our initial backers had access to their rewards before we opened up late pledges, but now that we’ve sent out rewards to our backers, we’re opening it up to late backers.

All of the reward tiers from this campaign will be available on MiniHoarder, but to receive the Stretch Goals you do need to select one of the bundles. For the best deal and access to the exclusive God Titan model, we recommend going with the All In Bundle. Since all of the files are now live on MiniHoarder, if you’re a late Backer you’ll get access to those files immediately! Also, we are offering the late pledges at the Kickstarter price, but for a limited time only! Kickstarter pricing will only be available through May 27th, after that the models will still be available on MiniHoarder but the price will go up to regular retail price.

The Commercial Printing License Add On is also be available through MiniHoarder; these are limited to 10 total, so if you’re interested in selling prints of the models from this campaign you’ll need to pick one of those up asap because once those are gone they’re gone for good!

Artist Spotlight: BlueWyvern

It’s that wonderful time of month again. The time for us to sit around with an interesting artist and talk about their work, the wonderful and weird hobby of 3D printing, and life in general. This month, we had a blast chatting with Christopher, the artist behind BlueWyvern. He’s been making his work available on MiniHoarder since he started, and has quite the collection available. He’s also has a Patreon that you can subscribe to, and receive all of his models for a low monthly cost.

Miniature Spotlight: Stinger

For every Artist Spotlight, we have one of the artist’s miniatures professionally painted. This months, we’ve asked our friend Max at MadMax Miniatures. Christopher selected one of the models from his recent “The Hive” collection, Stinger. Max did a phenomenal job bringing this model to life. You can find more work by BlueWyvern on their store here.

MH: We’ve had the pleasure of knowing you for quite awhile now, and remember when you first got started. Can you tell us about what first got you interested in sculpting 3D printable minis, and how you’ve ended up where you are now?

Christopher: I started BlueWyvern at the start of 2021 in February. But, coming up with BlueWyvern was a long and tedious journey. Having been in the 3D sculpting field for many years now I wanted to do something for myself. To set up my own company where I could bring my own original and unique looking fantasy miniatures to the Tabletop market and make a living off of it. That is a dream of mine that keeps me going every day. Creating an environment where I could independently create miniatures so I don’t have to rely on other people. Having to be dependent on other people to make content is something I absolutely despise.

At the beginning, when I started brainstorming about how I want to make my miniatures a reality. I took Character/creature design as a base. That was something I have always been passionate about and I knew I wanted to focus on. But I didn’t have an idea on what my selling point would be. After playing a lot of tabletop games months prior, I noticed that a lot of 3D miniatures looked very similar to one another. I felt like there really wasn’t anything unique going on with any of the miniatures I had seen both in real life and online. To me it felt like if I had seen one miniature, I had seen them all. So, it finally hit me. I could 3D sculpt original and unique looking miniatures that people could 3D print for their own tabletop games. Miniatures you couldn’t find anywhere else. That was a branch of 3D miniature sculpting that I could do completely solo. Perfect for what I was searching for.

I researched the market and found out that I was mostly right about my hypothesis. While you can find unique miniatures here and there, the majority looked and felt very similar. I now knew what I had to do. Though, I was a total newbie with 3D printing, so that was something I had to put time and effort into figuring out. After many weeks of further brainstorming about what kind of miniatures I wanted to make, what sculpting style I wanted to use and what I should call myself. I came across the creator Artisan Guild. I liked their style so much that I used them as inspiration for my own style. They have a very simple stylized sculpting style. And seeing how I’m all about efficiency and simplicity, it only felt natural to me to use them as a base for my own style. A semi-realistic stylized sculpting style.

Now I just needed a name. Being a fan of dinosaurs and dragons since I was a kid, I wanted to incorporate something with either in the name. Wyvern was something that rolled off the tongue very easily. So, I used that as a base, added Blue to the Wyvern and from that moment on BlueWyvern was born. It almost became RedWyvern at first because red is my favourite colour. But that didn’t sound very good. So I stuck with Blue and used that colour as a colour scheme for my entire brand. With that my dream was finally set in motion.

MH: What was it that pulled you into the 3D digital sculpting field in the first place?

Christopher: Like I’ve mentioned before, I’ve been in the creative field for most of my life. Not just doing 3D. I’ve done all sorts of things. Cinematography, photography, YouTube, game development, 2D design, manga’s, etc. I’ve always been curious about all sorts of creative disciplines and I’ve always disliked sticking to just one thing. I was curious about everything, and I wanted to learn as much as I possibly could. A jack of all trades but master of none kind of deal. Yet, out of all the creative disciplines, 3D is the thing I’m most passionate about. Having been a gamer ever since I was a kid and having a preference for 3D games in particular, 3D was something I slowly got interested in. However, I could never figure out where to start. It was only after finding out about how 3D models in video games were made that I really made a serious effort at learning 3D. I was fascinated by it, though, I was a bit overwhelmed. So I started simple, I just picked the first 3D software I came across and started making basic shaped models using poly modelling. At this point I didn’t even know 3D sculpting and miniatures were a thing. I only knew I could make 3D models in general and had video games in mind. Funny enough, my very first 3D model was a model of Kirby. A Nintendo character. It looked horrible. But, I’m a big fan of Nintendo IP’s so I suppose making a basic Nintendo character was a natural starting point.

After becoming somewhat skilled with poly modelling I came across the sculpting side of 3D design. Where, instead of 3D modelling polygon per polygon, I could just make models like I was sculpting something from clay in real life. I immediately felt a sense of freedom from it. A sense of freedom that I didn’t feel with poly modelling. Poly modelling can be very limited. I found out that with sculpting I could fully make anything I could ever dream of. That part immediately hooked me. I dropped poly modelling for sculpting and fully focused on mastering 3D sculpting. But, while 3D sculpting I didn’t feel like I had a specific direction I wanted to follow. I still wanted to do something with video games but I didn’t feel passionate enough to focus on that specific part.

A few years later, my opinion completely changed after I came across tabletop games and 3D miniatures. Both were completely new to me and I loved what I was seeing. I felt like my fiery passion only became bigger when working on 3D miniatures. These 3D miniatures were the answer I was looking for. The direction I wanted to follow. I fully shifted my focus to making 3D miniatures, started working on my own company and from that point on I became a 3D printable miniatures creator.

MH: It’s been a lot of fun watching your style evolve over the past year or so. What were some major influences in your work?

Christopher: I’ve always felt drawn to stylized styles. I wanted to develop my own due to my need for efficiency and simplicity. I never liked working too long on a 3D model and making them too detailed. With everything I do in life I want to do it as quickly, simple and efficiently as possible. That’s why a stylized style was something I’ve always naturally gravitated towards. As a source of inspiration I came across the creator Artisan Guild. I found out that they also have a similar stylized style for their miniatures. So it felt natural for me to use them as inspiration for developing my own sculpting style. My own version of a Semi-realistic stylized sculpting style.

MH: What can we look forward to from your Patreon subs over the next couple of months (if you know already)?

Christopher: People can expect to see all sorts of different creature and character races made into Miniature sets. Both Popular and underrated ones. Also showing more painted miniatures people can look at is something I’m working towards. Though, I really want to bring more spotlight to some lesser known/played tabletop races like Haregons and Loxodons. I’ve seen plenty of Goblins, dragonborn, kenku’s, gnomes, etc around. So it’s time to give the underdogs a moment to shine.

Besides that you can expect me to add some more new Rewards to the different Patreon Tiers when growth goals are reached. For example, I have a growth goal where I want to release Digital lore cards of Miniature design I put out that are also playable. Just some extra bits Patrons can play around and be more immersed with.

I’m always looking for new Miniature themes to design, new rewards to add, etc. Always going for the next new thing that hopefully my Patrons will enjoy. I just added two new merchant Tiers and a Paper miniature reward to my Patreon.

But, at the end of the day my biggest goal for the upcoming year would be to attract more people to my Patreon. I’m at around 28 right now. Yet, I want to at least reach 100 within this year. With another 100 the next. I’m working hard to get people on board my Patreon so that I will be able to work on BlueWyvern full-time as my actual job. I don’t know when I will reach that goal. But, I’m not second guessing myself. As long as I believe in myself, keep working hard and moving forward, I will eventually reach my goal. No matter how long it takes.

Like Sylvester Stallone said in his Rocky movies: “But it ain’t about how hard you hit. It’s about how hard you can get hit and keep moving forward. How much you can take and keep moving forward. That’s how winning is done”. Nothing will keep me from working towards my dream of making BlueWyvern my actual job. So expect to see my determination throughout the upcoming year!

MH: What are some of the biggest lessons you’ve learned since you’ve started your sculpting journey?

Christopher: Learn by doing. If you want to reach a certain goal. You will never get there by only imagining getting there. Just start doing and don’t wait for something magically to happen that will make you reach said goal. Life is gonna hit you hard. Nobody is gonna do the work for you. You have to do it all by yourself. Stop worrying about failure. Dare to fail. Dare to go beyond your limits. Failure and the drive to learn from said failures will only make you a better creator. Failure is ok and is the key to success. Don’t worry about what might happen. Just do. Dare to see your creative future not as how it appears to be. But, as what it could be. Enjoy your work and the time you put into it. Have fun. Your quality of mind will reflect on the quality of your work. So just breathe and relax. Everything will be fine. Maybe not today, maybe not tomorrow, maybe not next month or next year. But, it will eventually. Never stop dreaming.

Quoting the actor/comedian Jim Carrey: “You can fail at what you don’t want, so you might as well take a chance on doing what you love”. So just go out there, follow your passion and go for it.


When starting out you will probably come across a lot of doubters that will say that your dreams are impossible. That you can’t do it. These are the types of people that also have their own dreams. Dreams they don’t act on due to fear disguised as practicality. Don’t listen to them. You don’t need that kind of negativity in your life. The only person that can decide what you can and can’t do is you. Stay true to yourself no matter what happens and surround yourself with people that make you better.

Fifth Idólion Kickstarter and 6 month Road Map.

Ahoy People

We have our Fifth Kickstarter in Pre-Launch Fase. The Launch of Idólion Merchant Alley is expected next Week.

Our adventure is taken us through the City of Elderheim and will end up in the wilderness.
We will be continuing to switch between a Resin Set and a Pay What You Want Building for the rest of the Elderheim Chapter in our Story.

Elderheim Break Down:

Resin set: Merchant Alley – Launch March – Delivery April

Pay What You Want Building – Modular Merchant House. – Launch April – Delivery May

Resin set: Mayors Office (Set Name might Change) – Launch and Delivery to be announced

Pay What You Want Building – Modular Mayor House. – Launch and Delivery to be announced

Resin set: Through the Gate (Set Name might Change) – Launch and Delivery to be announced

Pay What You Want Building – Modular Gatehouse, Add-ons maybe Walls, Towers. – Launch and Delivery to be announced

Pictures From Merchant Alley:

First Picture of Wine Shop models in Merchant Alley.
First picture of Street Food Seller models in Merchant Alley.

Join our adventure as a Backer on our Fifth Kickstarter Idólion Merchant Alle.

Sail Ho !!

Artist Spotlight: Imagine Minis

Aaaaaaand we’re back after a several month hiatus with another Artist Spotlight! To celebrate our grand return, we had the pleasure of sitting down with Ivo from Imagine Minis. Ivo and his miniatures have had a solid presence with us for quite awhile now, and it been a constant joy for us to see his releases show up on a monthly basis. In addition to individual (and beautifully done) models, Ivo runs a very reasonably priced subscription service through MiniHoarder. If you’re interested in receiving all of his new releases automatically through MiniHoarder, it’s absolutely worth a look!

On top of that, Ivo has generously provided a coupon, valid through March 12, for 30% off of all the models on his store! You can take advantage of this with the coupon code, ImagineTheDiscount30!.

For every Artist Spotlight, we have one of the artist’s miniatures professionally painted. This months, we’ve asked our new friend Max at MadMax Miniatures. Ivo selected one of his newer Defender of the Glades models and the results were incredible. You can find more work by Imagine Minis on their store here.

MH: We have a tradition of starting with the artist’s studio name. How did you come up with Imagine Minis, and what does the name mean to you personally?

Ivo: At first, I started with IvoMG. That is my name but, it did not sound very professional and I could not use it if I started to work with others, so I started thinking about how to create a name that kept IMG in it. I started brainstorming some ideas but did not like any. My wife came and suggested Imagine since it has IMG on it. It was a good suggestion but it did not mean what I was doing. I added the Minis at the end, and it sounded just right and easy to pronounce. It can also be used here in Brazil because the word “Imagine” exists in our language.

Imagine Minis sounded perfect because I am the type of person that even when sculpting I am already imagining the other miniatures I will do. I know that some people Imagine Miniatures differently from others and to appeal to as many people as possible, I like to add some kind of variation or modularity to my models. 

MH: I’ve really loved watching your sculpts come a long and seeing your style work evolve over the past several months. What kinds of modeling experience did you have before sculpting specifically for 3D printing?

Ivo: I started around 2015. A friend and I decided to make games in Unity. He would do the programming and I would do the modeling. So I started using Blender and watched a few low-poly YouTube tutorials. Specifically, I started to learn from a YouTuber, Pigart. I finished a few characters for the game but one day my friend gave up. I kept modeling low-poly but not with the same speed or discipline as before. Two years later, I decided to make games solo using Unreal Engine. Programming and modeling at the same time is not an easy task. Doing that while learning is even harder, and after a while without much progress I gave up. But I still wanted to make games. 

Prototyping board-games was my initial plan for buying a 3d printer. I finished a 6 players ludo, with different pawns (Knight, Bishop, Archer, and Pawn) and cards. After that, I started learning how to sculpt to make gifts for friends. Since I had a printer “why not give it a shot?”, and that led me to what I am doing today.

MH: What are your current tools of the trade?

Ivo: I mainly use Blender, Pureref, and Krita. For 3d printing Chittubox and Lychee slicer along with Elegoo Mars 2 pro. Also lots and lots of Spotify (Heavy metal), music is essential to keep the flow. 

MH: Can you give us a sneak peek of what you’ll be working on next?

Ivo: Right now I’m working on the second part of the Defenders Of The Glade, a Set of Night Elf-inspired units for RPG, Wargame, or Paint. This second part will take more than one month. I am working on a group of Male Druids that can also be used as Barbarians. Each will have two versions, a Bear hat or hair, and 12 hand options.

MH: There are a lot of artists out there doing 3D sculpting work now. How do you approach each set to try and set yourself apart from the others?

Ivo: I always like to hear what people wish to see on their table and, sometimes miniatures are hard to find exactly the way you want. I want to sculpt for people, no matter how rare their request (or popular), so I created a Patreon Commission. Every month I create a request post, and the fastest Patrons to reply can describe their requests that I will place on a poll. The most voted will be sculpted. 

Besides the Patreon commission models, I work based on themes selected by my Patreon Community. If a patron has a theme suggestion I can evaluate and even put it on the poll.
 
I am a person that can’t hold back some intel and when I finish sculpting and test printing I release the miniature. That’s the reason I don’t release miniatures in a batch. That way, people will have something new almost every week.
 
My welcome pack is also flexible. Every month I will add a previously sculpted miniature to it. That way there is always a reason to come back to Imagine Minis.

MH: Do you have any advice for folks that are interested in doing any 3D mini sculpting of their own?

Ivo: A few things that helped me to start: tutorials, practice, and goals. Without knowing what you are doing you will be hitting your head on a wall. Learn from those that are teaching. YouTube is a great place to start if you are not interested in a paid mentor-ship. Be careful: only watching tutorials will take you nowhere. You will need to practice. Practicing every day will make you faster.

 
When I was learning I had to search for tutorials all the time. After doing it a few times, it was already on my mind and I no longer had to watch. After more practice I could do things without even thinking much about it.
 
When I started I had clear goals in my mind. At first, I wanted to do games and later on, I decided to make gifts for friends. I always focused on modeling/sculpture, though. Set achievable goals, because if you fail or don’t see any progress you might give up or lose your motivation.
 
Always analyze your 3d printed sculpture. There is so much you can learn from it. Because of the scale difference, what you see on screen is not always the same as what you print. For instance, for 32mm sculptures I can zoom really close and do some really tiny little details in the software but, in real life, some of the tiny details will not show (Unless you scale it up). You will have to find a balance to what kind of details you wish to add. If you add too much it will take you time and will not show but, your miniature can be scaled up and still look good.
Don’t waste time make things functional. They only need to look like they are. You could model a nice functional belt buckle but, for a miniature, it does not need to be a belt buckle. Having something that looks like a belt buckle can save you time and will still look good in the end. Remember that all will be scaled down (unless you are making a 75mm or bigger).

MH: What sort of future goals and dreams to you current have?

Ivo: It’s my goal to grow and develop DIY board games. Right now in my free time, I am making a sketch for a free-to-play skirmish game that people can use any miniature they have. Since I don’t have the resources or time to spend, it will be a kind of unpolished manual. Maybe in the future I will run a Crowdfunding campaign to make the manual with a professional look. Even then, it will still be free-to-play.

I love miniatures and like anime, fantasy, and sci-fi miniatures equally. Unfortunately, I cannot sculpt all of those. I am only one person, and they appeal to different groups of people. I started with sci-fi minis but could not get much support so I changed my focus to do only fantasy miniatures. It’s my goal to go back to make anime and sci-fi miniatures when I have more people working with me.
Lady Audra, printed by @thingsi3dprinted, and painted by @pear.miniatures
I know that there is a long road ahead for success and I don’t intend to be anyone’s main 3D miniatures supplier yet. The more supporters I have, I will continue to increase the number of sculptures, and will try to continue to keep the prices low.  I want to supply the gaming community with affordable awesome miniatures, grow bigger like GW but with much lower pricing. I know it’s a bold statement but it’s my dream.
 
I am a sculptor, RPG player and always dreamed of being able to create games so that people can have a great time. Let’s Imagine Minis Together.
Temperature Tower

Making a Temperature Tower Test in Cura

Making a Temperature Tower Test in Cura

A guide by Slice Print Roleplay


In this guide, I will explain how to make a temperature tower test using the Calibration Shapes Plugin for Cura. This process works with any model and you can create tests for any printer that’s supported in Cura. The reason we’ll be using this plugin is that it makes the whole process much easier. With the Calibration Shapes plugin, we only need to add a few values to one script and the plugin will do the rest of the work for us. Once you understand how to use it, this plugin lets you create a temp tower test in just a few seconds!

If you are the type of person who learns better from a video tutorial then check out the video below.


Temperature Tower Tests Explained


Let’s quickly go over what a temp tower test is and why you would want to print one.


As the name suggests it’s a tower and each level of the tower will print at a different temperature. This allows you to find the best temp for each filament by printing only one test.

So what do I mean by, “Best temp”? Well, all filaments will have a minimum melt temp and a maximum melt temp. 

If you go below the minimum melt temp then the filament simply won’t melt.

If you go above the maximum melt temp then the filament will likely burn inside the hotend.

If your goal is to have strong functional parts then a higher temp is better. This is because the layers melt into each other and form a stronger bond.

If your goal is to have highly detailed parts then a lower temp is better. This is because it takes the layers less time to get below the minimum melt temp so they hold their shape better.

So how do you figure out what’s too hot and what’s too cold? You guessed it, you print a temp tower test. You can test a wide range of temps and then review the results to figure out what’s the best temp for your needs.


And remember there is no one size fits all temp for every type of filament.  It might sound odd, but it’s normal for two colors of the same filament to print at different temps.

For example, you might have blue PLA that gives the best finish at 200°c. But then have red PLA that gives the best finish at 190°c. This is true for most types of filament even when the colors are from the same brand.

Are you on the edge of your seat yet? Well, strap in because it’s about to get wild!

The other reason temp towers are so useful is that temperature values on 3D printers are not calibrated! *gasp* 

That just means you might set your nozzle temp for 200°c, but it could be 5°c to 10°c above or below. This is also why you might have two identical printers that print the same spool of filament at different temps.


So in short, if you want to get the best results for your needs then run a temp tower test when printing with any new filament on each printer.


Installing the Calibration Shapes Plugin


Installing this plugin is quick and easy. First, start Cura. Once it’s open, just click on the box labeled, “Marketplace” in the top right-hand corner. From there look for the Calibration Shapes plugin under the “Plugins” tab. Click on the icon and then hit “Install”. Once that’s finished be sure to click on, “Quit Ultimaker Cura”. 

You will have to quit and restart Cura after installing a plugin in order to be able to use it.


How to Add Calibration Shapes

The Calibration Shapes plugin comes pre-loaded with tons of different calibration models. To access them click on, “Extensions”, and then, “Part for calibration.” Here you’ll find different temp tower models as well as models to calibrate stringing, bridging, and so much more. How cool is that?!

For this guide, I used the option, “Add PLA TempTower.” However, you can use this process with any temp tower model.


How to Add A Temperature Tower Script

Okay, so here is the coolest part about this plugin. It also comes pre-loaded with easy to use calibration scripts. This means that you can create tons of different tests using the pre-loaded models and scripts all from the same plugin!

To access these scripts go to, “Extensions” then, “Post processing” then, “Modify G-code” and then click on, “Add script.” 

This will open a long drop-down menu with lots of options for different calibration scripts. When creating a temp tower you’ll want to select the script labeled, “TempFanTower.”


Temperature Tower Script Explained


For this script to work correctly we will need to enter data for each of the four values below.


Starting Temperature

As the name suggests you will set this to match the starting temp of your model. The temperature range of your test should always start with the highest temperature on the bottom/first block. Then move to the lowest temperature on the top/last block. 

If you start with the lowest temp first you run the risk of the filament being too cold to print. Then the first layer wouldn’t print which would ruin the whole test….Just trust me on this.


Temperature Increment

This is where you tell the script how the temperature should change when moving between each part of the test.

Temp towers for PLA normally drop by 5°c between each block. However, towers for higher temp materials may have a greater decrease. 

You can confirm this by reading any notes from the creator or checking the model for temperature change designations.


Change Layer

This is where you tell the script how many layers are in each block of the test. Or to put it another way, how many layers should be printed at each temp. 

Depending on the model and layer height, each block of the test will be sliced into 30+ layers. So you want to be close, but if you’re a little off it won’t be the end of the world. We’ll talk about this more in just a bit.


Change Layer Offset

This is where you tell the script how many layers are in the base of your temp tower model.

This value is important because, if set incorrectly, it will throw off the rest of the test.

This might sound a little confusing, but it’s really not bad once you get the hang of it.


Now that we’ve covered all of the settings, let’s go over setting it up step by step.


How to Setup Your Temperature Tower Script


It’s important to note that all of these values will change depending on the temp tower model and layer height you’re using.

So learning how to correctly define each value for your model and layer height is vital for getting good results.


Layer Height 

Unless you have very specific goals in mind, you’ll have good results when using a layer height equal to half the diameter of your nozzle. Since almost all printers come with a 0.4mm nozzle installed you’ll want to set your layer height to 0.2mm. To save time I would also recommend using the 0.2mm profile in Cura. This should be a quality setting in the drop-down tab for most printers. Obviously, if your printer has a different size nozzle then adjust accordingly.

Once you have your layer height set go ahead and slice your model.


Change Layer Offset

Once the model is sliced, figuring out how many layers are in the base is pretty easy. Grab the layer view slider on the right of the screen and take it down to the first layer. From there, use the up arrow on your keyboard to go up one layer at a time. It should be easy to find the layer where the base ends and the first test block begins. I’ve found that this process is even easier if you change your Color Scheme to “Line Type.”

You can see that the base of this model has 4 layers so our Change Layer Offset value is 4.


Change Layer

Finding this value takes a little more effort than the last one, but once you understand the process, it goes really quick. 

You know how many layers are in the base of your model right? If not check out the Change Layer Offset section above and then come back. Got it? Okay great, Now just subtract that amount from the total layer count of your model. You can find the total layer count by moving the layer view slider to the very top.

At a 0.2mm layer height, the model I’m using has 378 layers. So for this model, the first part of the process looks like this, 378 – 4 = 374. This tells us how many layers are in the test, excluding the layers in the base. With me so far?…. Good!

Next just count how many blocks/temperatures there are in your test model.

Now we divide the number of layers in the test by the number of different temperatures. For the model, I’m using that would be 374 ⁒ 9 = 41.55. It’s not at all uncommon to end up with fractional digits like that. However, we can’t use fractional numbers so let’s fix that. 

If the number after the decimal is 5 or greater round it up. If it’s 4 or less then round it down. Or have you forgotten, “5 and above, give it a shove. 4 and below, let it go.”…Because I sure did and had to look up that rhyme.

Okay, I said we’d talk about it, so here it is. It’s okay if the model doesn’t divide evenly and you have to round a little. The reason it’s okay is that there are plenty of layers in each block so being off the mark by a layer or two isn’t going to make the results of your test unreliable. This is especially true when the temperature is only changing in increments of 5°c – 10°c. So don’t stress over it too much. 

Okay so now we’ve got 42 which is our Change Layer value…And that makes sense since, after all, 42 is the answer to life, the universe, and everything.


Temperature Increment

This is probably the easiest of the values to find. Simply look at the temperatures of the first test block and the one above it. How much is the temperature changing by? 

For the model I’m using, the temperature decreases by 5c° between each block of the test.


Starting Temperature

Just like Temperature Increment, to find this value all we have to do is look at the temperature of the first test block. The model I’m using starts at 220°.

For best results, there is an additional setting you’ll want to adjust. This setting is not part of the script, but adjusting it will ensure your test prints perfectly.

The setting is called “Printing Temperature.” and it can be found under the “Material” tab.

You want this setting to match your Starting Temperature. This will tell Cura to print the layers in the base at the same temp as your first test block. The reason this is important is that those layers in the base may start printing 20° or 30° less than your first test block. So by the time your nozzle reaches the correct temp the first test block might be half printed.


Enter Values, Slice, & Save 

Now, all that’s left to do is enter those values into the script, slice your model, and save the file.

Leave the box labeled, “Active Fan Tower” unchecked.


Congratulations You’re Done!

Just don’t forget to remove the script and put the “Printing Temperature” setting back to its original value before you slice another model.

Hopefully, you now know how to use the Calibration Shapes plugin to create a temperature tower using any temp tower model.

If you have any questions feel free to post them below and I’ll gladly help.


Help Support Slice Print Roleplay

Support from this amazing community helps me keep making tutorials and other helpful content like this.

If you found this guide helpful then I humbly ask for your support.

Joining my Patreon is a great way to support my work and get some awesome rewards, too!


Or if money is tight you can always show support by giving my videos a thumbs up and sharing them with your friends. 


Whatever you decide to do, your support is greatly appreciated!


Alright, now let’s go print something.

Improving the Build Plate Adhesion of Your 3D Printer with Slice Print Roleplay

In this guide, we discuss why you might want to improve your 3D printer’s build plate adhesion and how to do it. If your prints have mysteriously started failing after previously being successful, this guide might help save you a lot of heartache and frustration. Keep in mind there are several reasons a print might fail. One reason that is often overlooked is the ability for your print to actually stick to the the build plate.

Protect Your Hoard

Never get lose, or get lost in, your 3D Printable Hoard again. With our cloud based storage and organizational tools, your hoard will always be ready for when you need it, where you need it.

Why Scuff Your Build Plate

Over time, some build surfaces will begin to fill up with tiny bits of resin/filament and become smooth. That means there’s nothing for your first layers to grip. Scuffing your build surface “refreshes” it by removing those old bits of resin/filament. It also creates a bunch of tiny imperfections that greatly increase bed adhesion.

When to Scuff Your Build Plate

You should consider scuffing your build plate if you start to notice an increase in prints detaching or not sticking at all. While there are a lot of reasons your prints might fail, these are tell tale signs that your build plate adhesion is an issue.

The first things to check are bed level and print settings. After those have been ruled out, scuffing your build surface is a great next step in resolving the issue.

Note that this process can be used for both FDM & Resin Printers. However, some build surfaces should not be scuffed. Check with the manufacturer of your printer/build surface before following this process.

Required Materials

  1. One piece of 220 grit sandpaper roughly the size of a playing card
  2. IPA (or another cleaner)
  3. Paper towels
  4. Facemask
Required materials to scuff a build pate
Required Materials

Getting to Business - How to Scuff Your Build Plate

Before starting, let’s make a quick point. We use sandpaper in this process, but you shouldn’t think of it as “sanding your plate down.” Rather think of it as, “scuffing your plate up.” 

You DO NOT want to make circular patterns on your build plate like you would when trying to smooth a surface. Instead, you want to scuff the surface so the resin/filament can get a really good grip. Also note that one pass in each direction should be sufficient.

Step #1: Scuffing in the First Direction

Start at one corner of the plate and drag the sandpaper across the surface to the opposite corner. Then move forward roughly 3mm and move in a straight line back to the side you started on. Repeat until you have moved across the whole plate.

Scuff a build plate, step 1
Scuff Strokes in First Direction

Step #2: Scuffing in the Second Direction

Scuff a build plate, step 2
Scuff Strokes in Second Direction

Turn the plate 90 degrees and repeat the same process. You should be making intersecting lines that form a grid pattern.

Turn the plate 90 degrees and repeat the same process. You should be making intersecting lines that form a grid pattern.

Scuff a build plate, step 2
Scuff Strokes in Second Direction

Step #3: Clean the Plate

Thoroughly clean the build surface using a paper towel with IPA or another cleaner. You want to make sure all dust has been removed from the plate before use. The last thing anyone wants to experience is going through the trouble of scuffing your build plate to increase it’s adhesion, only to have your prints fail because the build plate is covered in dust.

Note: Put your cleaner in a spray bottle for easy use.

Clean your build plate
Cleaning the Build Plate

Step #4: Printing Glory!!!

3D Printing Glory!
Victory!!!

Congratulations!! You are all done and ready to print!

Your build surface will now provide greater adhesion and should help give you a more reliable printing experience.

If you found this guide helpful please consider supporting me on Patreon. Support from patrons helps me make more great content like this. If you have any questions, please feel free to leave them in the comments below.

Alright, let’s go print something.

Artist Spotlight: Aether Studios

It’s a special month for us here at MiniHoarder, as we’re celebrating our first anniversary. A special event deserves a special Artist Spotlight, and we’ve certainly brought that to you today with the crew at Aether Studios. Aether Studios has an extensive history, has published hundreds of products, several Kickstarters, and creates incredible terrain pieces (often the form of Dragonbite tiles) and miniatures. Their work spans several genres, including fantasy, sci-fi, and steampunk. It was a joy getting to chat with the Will, Carl, Colin, and Nasos, and learn more about the individuals that make up the unit.

Will and the Aether Studio team have been exceedingly generous to MiniHoarder and our readers this month. They’ve decided to give out their spotlight miniature away for free, and exclusively on MiniHoarder. I’d like to attribute it to my sparkling personality, but really they’re just a great group of folks. We’re truly honored and humbled that they would offer this through our site. For a limited time, you can get the werewolf mini, officially named Sullivan Howle, here, completely free of charge.

For every Artist Spotlight, we have one of the artist’s miniatures professionally painted by our friend Chris at The Spotted Painter. Will chose their new werewolf model (a MiniHoarder exclusive!!!), and Chris turned out an impressive version of this frightening beastie. Above are the final images. You can find more work by Aether Studios on their store here.

Spotted Painter

MH: It’s been a tradition for us to start with the name of the artist, and we are not ones to break with tradition. How did you come up with the name Aether Studios?

Will: Colin Christenson, who co-founded the studio with me several decades ago in 2018, came up with the name. We were tossing around ideas when he suggested Aether Studios. We all instantly knew that it was the right one. Nebulous, but mystifying. Hard to describe or define, yet powerful. The discussion immediately ended and we went back to work.

MH: You happen to be the first traditional “team” that we’ve interviewed so far. Can you tell us a bit about how you all came together to start this adventure?

Will: Often It is hard to condense a question like “how you all came together” into a short answer or even a medium answer and have it be fully correct. However, in the case of Aether Studios it is quite easy to answer with the name of one person: Tom Tullis. Tom created the Dragonbite clip system and Dragonlock terrain. Originally Colin Christenson and I (Will Walker) were a part of a small group working on user requests from the old FDG Forums. The forum was a relic of the days when Fat Dragon Games was focused on Papercraft rather than 3d printing. Requests would come in for remixes of existing tiles, The Ruined Floor from Set 3 mixed with a Cracked Wall from Set 4 and a tentacle from Set 9, or some other mix and match remix work. Tom was very gracious in allowing us to chop up and rework things as requests came in. He also personally encouraged me to find quality people to work with. These were just the two most influential acts of kindness that helped form Aether Studios, but there were dozens of other smaller acts on his part that helped move us on our path.

Aether Studios' Swamp of Sorrow Trophy Tower
Printed and Painted by Artist Peter Galeno

Eventually we started working on original designs: Egyptian, sci-fi, and steampunk themed terrain. We added more team members and we found that we were able to work together very well. Our team has continued to grow over time and we agreed on a few core tenants, long term projects and goals, and set ourselves to see their completion.

Aztlan Set by Aether Studios
Printed and Painted by BJ Altman

MH: You and your team have been making some incredible looking terrain pieces and miniatures for quite awhile now. One of the most impressive things to me is the breadth of themes that you cover. How do you and the team come up with these different sets?

Will: We explore almost every idea we are given by our team of patrons, backers, fans, and supporters. Their ideas and inspirations allow us to deliver mountains of content for their games. We must because they are the most amazing and encouraging cohort of supporters that anyone could ever hope share a fellowship with. There has never been a limit to the imagination of D&D players and our art is without boundaries. The horizon has no end and the mountain no peak.

Carl: Be a player. Where would you like to play? Which setting can be made and can look amazing? What situations can the DM (Dungeon Master) toss at the poor unfortunate souls? What can work in tile system? What can work on scatter? Will I play on that terrain? Simply put: Brainstorm as a DM or player.

MH: What are some things you wish you had known when you first started sculpting? Is there anything you would pass on to individuals who are interested in sculpting, but might not know where to start?

Nasos: I wish I knew that I should be treating sculpting like drawing on paper from the beginning – ie, turn a hand around and focus each time on that side as if it was 2d, that way you achieve very good silhouette of something as well as detail. Also, I wish I knew there is no right or wrong way, there is my way, so not to try to copy another’s techniques. From Colin: I think setting your scale to inches if you are doing tiles and such would have been helpful when i started. Also write down your steps for sculpting something so if you want to come back later and make more you can remember how you made it.

Carl: Always start in low polycount, and build up from there. In lower polycount you can lay down the forms and bigger details much more easily. Big details, medium details, high details. Remember the order, or you’ll gonna have more trouble later. Start with DynaMesh, go as far as you can with the polycount you have. When you’re happy and on the detailing phase, ZRemesh, project details, divide. Never give up and always (!) ask for feedback. From more experienced artist, ask for real feedback. That is the only way to improve. If you don’t ask for feedback, you’re not going to improve, just doing the same shit over and over again.

Dwarven Kingdom Half Sized by Aether Studios
Printed and Painted by Alexander Laschwitz

MH: Let’s talk setup for just a second. What applications and hardware do you use personally for sculpting?

Nasos: ZBrush for software. Hardware is: XP-Pen Artist 22 Pro monitor, Razer Tartarus v2 keypad and HP Omen 15 laptop (Ryzen 7 4k series, Nvidia GTX2660 6gb, 18gb RAM)

Will: Meshmixer for Assembly, Zbrush for sculpting. Hardware is a custom tower (Ryzen Threadripper 1950, GTX 1060 6gb, 32gb of Ram).

Colin: I use Tinkercad to start building a model and for constructing the final piece. I transfer parts to Blender to do sculpting and texturing. Plus a few other programs for error fixing and such.

MH: Has the popularity of resin printers changed how you and your team approached your designs? With higher resolution and bigger build plates, it seems like FDM might not be the only option for terrain anymore.

Will: Yes, it has. We’ve begun to explore new resin friendly options for terrain tiles, and we’ve added additional monthly production capacity for resin related requests by our patrons. However, we still expect FDM to be the go-to choice for several more years. If resin does become the primary option, we’re prepared for it.

Alien Lair Hive Infestation by Aether Studios
Printed and Painted by Steven Giguere

MH: Your team has covered so much terrain (see what I did there?) already with your massive sets and multitude of genres. Where can we expect to see you delve next?

Will: Atlantis Undersea Terrain is going to be one of our big pushes for 2022 with sunken ships and hidden temples. We’re also going to be launching a campaign for Roqom the Dragon Hellplane, a very evil mix of undead, lava, and dragon temple ruins. We’re also thinking about doing a few dozen other projects, but those are two that I am most excited about for 2022. For the next few months we have a pretty full schedule mapped out. October will feature a lot of Halloween themed terrain plus our Clip-On Nano Dungeons. November the Artists pick whichever set they want; the one they feel deserves an additional release this year. December is always space ships/sci-fi related. This year we are going to be finishing a Scout type Bird of Prey with playable interior and other projects cut short due to illness. We’re very excited for the rest of the year!

The Grande Finale

We’d like to thank you for joining us on another wonderful ride with our friends at Aether Studios. If you have any questions you’d like to toss their way, feel free to let them know in the comments below! If they’re better questions than what I’ve here, send us a message and lets get you involved in the next round!

As always, we’d also like to give a huge thanks to Chris Spotts for doing such a fantastic job on painting the intimidating WerewolfChris is the painter behind The Spotted Painter, runs a YouTube channel, and can be found via his FaceBook page.

If you’re an artist and would like to be featured in our Artist Spotlight, give us a shout at [email protected].

Artist Spotlight: NovaMinis

This month’s Artist Spotlight brings us another fantastic artist as well as some beautifully sculpted (and painted) minis. This time, we had the wonderful opportunity to spend some time with our friends at NovaMinis. NovaMinis is a husband and wife duo that not only puts out some very interesting theme based Patreon releases, but does so with a focus on tabletop gaming and usability. Walt is another artist with a varied and unique background, and we really enjoyed getting to hear more about his work, his process, and how he wound up in our special little corner of the gaming world.

NovaMinis has a store right here on MiniHoarder, as well as a monthly subscription through Patreon that is well worth the value.

Miniature Spotlight: Orc Pirate Captain

For every Artist Spotlight, we have one of the artist’s miniatures professionally painted by our friend Chris at The Spotted Painter. Walt chose his Orc Pirate Captain, and Chris went to town. Above are the final images. You can find more work by Walt on his store here.

Spotted Painter

MH: It’s been our tradition to kick things off by asking about the creator’s studio name, and we’re certainly not one’s to break with tradition. Can you tell us why you chose NovaMinis and what it means to you?

Walt: My wife, Katia, and I started a company a couple of years ago. After much thought, we chose the name Nova Mentis (Nova meaning new and Mentis meaning mind). We wanted a name that would reflect the beginnings of a new way, a new approach of thinking and working. It was only natural to continue with attaching the prefix “Nova” to all our projects, hence “NovaMinis”. Additionally, we  also liked the simplicity of the name and felt it carried the spirit of our intentions and work ethics.

MH: Before you jumped into sculpting, we have it on good authority that you spent some time writing for the video game industry. Can you give us a bit of that experience, and how you transitioned from that to sculpting?

Walt: Yes, that is correct, I worked as a video game journalist for a couple of decades. I was involved with some prominent publications and learned a lot as well as had a lot of fun in the process. I mean, who doesn’t want to play video games for a living! In 2009 Katia and I pooled our skills together and started our own video gaming and tech digi-magazine, called Gamecca. Sadly, after almost 10 years, we decided to retire the magazine in 2018 as the video game industry was changing, and we had to adapt. With this decision we decided to follow other passions…

Sculpture was always part of our lives. I was fortunate to meet my wife Katia in the National School of the Arts, where we both trained in fine arts. I have sculpted on and off over the years but in around 2016 I started dabbling with 3D sculpting software. It started evolving into mini sculpts (something that I was keen on even as a kid, back in the early ‘80s) and so we started exploring online options.

Gamecca magazine cover 2018
Hobgoblin Owlbear Rider 02

MH: Your sculpts definitely have a certain feel and aesthetic to them. How has your style evolved and changed over the past year or so, and what would you say are your hallmarks?

Walt: In terms of evolution, I think that the minis have become far more expressive. We’ve been putting a lot of work into posing and expression, as well as into the humor that sometimes makes its way into our minis.

As far as hallmarks go, I think I would definitely define what we create as… versatile. When it comes to designing a mini, becoming very specific with that mini doesn’t really work for me; personally I feel that any particular mini needs to be able to fill a number of roles for it to be truly useful to a gaming group. There are some that are more specific than others, of course, but some degree of adaptability is very important. I believe it also comes into play when you look at how the minis interact with other items on the table-top. They need to be able to ‘fit in’ with whatever else is happening on the table, and to that end we try and fit into a style that blends well with other products that are out there.

MH: There are a ton of artists doing sculpts now. How have you adjusted your style and content to stand out among some of the others?

Walt: Yes, there are a great many amazing artists out there. We have chosen to focus on the table-top. While some folks have sized some of our minis up and painted some of them as display pieces, we are about gaming minis, primarily, and while our intention is always to create something that works in a 28mm or 32mm environment.

We have also chosen to look at strong themes and ideas for each release. I like to think of each release as a play-set… whenever possible, the elements all need to work together, and hopefully inspire great stories for those that use them. Those packs form part of larger themes, too, some of which have more defined ideas, and others being a bit looser… ultimately, it’s a world that we are crafting, and those themes and pack ideas all tie into it.

Funeral Bell

Lastly, maybe most importantly, is the idea of print-in-place objects. When I first started designing for print, I did what I tend to do with new projects…  jump and build my wings on the way down. When I first started printing with my trusty Elegoo Mars (which is still churning out test prints) I wanted to see what parts could be made movable. I knew that some folks were doing it with FDM, but I wanted those results in resin. It took a hell of a lot of trial and error, but we got there eventually. Being new to the industry, I believed that this was more common, but  I was quite surprised to find that it is not. We like to strive to have at least one print-in-place piece in every pack, even if it is just something simple. But I really enjoy the more complex pieces, like the cages and wagons, because they add a fun logical challenge to the creation process for me.

MH: I have to say, your latest set was reeeeeally impressive. Especially the ship! We can’t wait to print that beast out. You also have several characters that really caught our eye. Can you tell us a bit about the set, and about the captain in general?

Walt: Thank you! That ship was a great challenge for me, being the biggest piece we’ve released to date. And it needed things that open and close and swing and wobble (because that’s how we roll, right?), so there was a lot of tinkering that went into it.

As for the captain, well… there’s a bit of a process to this, so bear with me!

The first decision was to make the ship which, because we like to present the themed packs, needed a crew. And because we do monsters exclusively (except for the odd slave here and there so far) the crew needed to be some kind of creature. I think orcs were the obvious choice here.

So we set about designing them and decided that we needed options for people who do, and do not, use black powder in their campaigns. Because versatility…

While researching various cannons and flintlock pistols, I started looking at the dress from the high age of piracy…. Tri-corn hats, long coats, that sort of thing. The idea of orcs wearing tri-corn hats was great, and I kind of ran with a very traditional pirate wardrobe for the orcs.

The captain was the last design, and he needed his long coat, epaulettes, hat and beard to really be worthy of the title. He’s around ten percent bigger, too…

We tend towards an organic fluidity when we put together our packs, and that really was the case here. While there are plenty of ideas and concepts at the outset of our design phase, nothing is set in stone; the original ideas were quite different from our final product with this set, and the captain is a good example of that process.

Orc Pirate Shaman

MH: It’s been a huge privilege of ours to know you since you started, and the progress you have made over the past year has wonderful to see. Any tips, tricks, or general advice you have for other artists who are just getting started with trying to sculpt 3D printable models?

Walt: Quite simply, do your research and don’t let anyone tell you what can and cannot be done. Be prepared to try and retry ideas often, and always put in the effort to tweak a good idea into a workable form, rather than getting disheartened.

If you have a good understanding of the tools and techniques involved, along with imagination and ambition, you will get some pretty incredible results.

MH: If you could only listen to three bands for the rest of your life, who would they be, and why?

Walt: When I first read this question I though “only three?” but then I realized that, yeah, I could do that.

The first would be Tool, because they never cease to amaze me with their complexity and excellent musicianship.

The second – still sticking with the prog thing – would be Porcupine Tree. Once again, this band is thrilling to me, because they push boundaries and do things that are normally not done, particularly in their last few albums… I wish they would reform!

Lastly, Pink Floyd (before Roger Waters left…) Part nostalgia and part emotion here. Pink Floyd has always been a band capable of moving me. And their guitar work is simply sublime! If it isn’t cheating, I would include some of Roger Waters’ solo stuff, but that might be pushing my luck, right?

The Grande Finale

As always, we really enjoyed the opportunity to sit down with an artist and hear more of the story that inspires their work and how they got where they are. We really appreciate Walt taking the time to answer our questions and share his experiences with us. If you have any questions you’d like to ask NovaMinis, feel free to let them know in the comments below!

We’d also like to give a huge thanks to Chris Spotts for doing such a fantastic job on painting the Orc Pirate CaptainChris is the painter behind The Spotted Painter, and runs a YouTube channel and can be found via his FaceBook page.

If you’re an artist and would like to be featured in our Artist Spotlight, give us a shout at [email protected].

MoonBeast 3

Artist Spotlight: VoidRealm Minis

This month in our artist spotlight, we had the chance to sit down with the man behind VoidRealm Minis, Kent Caldwell. If you follow any of the FaceBook groups centered around 3D printable minis, you’ve likely run across his work. He has a very distinct (and often creepy) style centered around cosmic horror. With an extensive background that spans through everything from acrobatics to dioramas, we really enjoyed our time getting to know Kent, and his work a bit more. In addition to selling his work on MiniHoarder, he also runs a Patreon account. We encourage everyone to give them both a look.

For every Artist Spotlight, we have one of the artist’s miniatures professionally painted by our friend Chris at The Spotted Painter. Kent chose his new moon beasts, and Chris did a phenomenal job painting it. Above are the final images. If you’d love to print this beasty out and give it a paint job of your own, you can find it here.

MH: Last week we started of with a question about the origin of the studio name. It seems only fitting to start there again. Where did you get the inspiration for VoidRealm Minis?

Kent: The pandemic in 2020 changed my life overnight; I went from performing nightly with Cirque du Soleil in Las Vegas (I’m an acrobat) to finding myself unemployed and my industry decimated in what seemed like the blink of an eye. I always knew one day my career would move away from performing, but I never expected it to happen so suddenly, nor that the entire live theater industry – where I had my professional network – would essentially disappear. I felt, quite literally, thrown into some Void or alternate dimension. In Spring of 2020, I was starting to realize that I could channel my decades of experience as a Fine Artist into a creative practice that was potentially sustainable for me, while also allowing for a large degree of creative freedom. In trying to brand something from the ground up, I liked “VoidRealms” because it implies a landscape or cosmos that is unknown and mysterious. It’s also a subtle tip of the hat to my workflow, since I sculpt in Virtual Reality (VR… VoidRealms… get it?!).

Kent Caldwell with his Cirque Du Soleil team.
Kent with his Chinese Poles team, backstage at Cirque du Soleil during their final show before a 14 month layoff.

MH: You have a very unique style to your sculpts. What inspires your designs and creatures?

Kent: I get this question a lot, and I think there are several driving forces that give my sculpts their style and flavor:

Firstly, sculpting in VR gives my work (ironically) a very handmade feel in a way that Zbrush does not. I still use Zbrush for surface refinement and tooling, but I do most of my sculpting in VR. Being able to “hold” the object in your hands, spin it around, and extrude / carve digital clay in 3D space is incredible. When I want to make a curving tail or a nasty tongue, I’ll stand up and make a sweeping gesture with my shoulder to draw out the curve.
Holding a VR monster up for the camera

Also, my Fine Art (dioramas) are all about world building but in a way that is very suggestive, almost poetic; I like to imply deeper narratives without spoon feeding it to the viewer. I adore video games like Hyper Light Drifter and Blasphemous, which both do this quite well. I love creating characters and monsters that have these rich narratives implied in their design.

Kent's Fine Art work - "The Abandoned Dimension" - Meow Wolf / Omega Mart installation, 2019

When I work, I like to surprise myself and let the sculpture “speak to me” in a way as it takes shape. I have a lot of traditional fine art training and have studied anatomy a fair amount, but I do not come from the concept art / movie art / character design fields. I’ve been designing concepts for myself for years without answering to art directors or using that traditional industry pipeline. I treat the initial sculpting phases as part of the sketching / design process and do very little sketching. I’m constantly looking for opportunities to take the sculpt in new directions that I wasn’t expecting while I’m building it.

Vol'Shorm
Vol'Shorm, Harbinger of Oblivion

A good example of this is the model “Vol’Shorm” from my current Patreon bundle. Vol’Shorm was designed almost entirely in 3D. I originally had him flying / elevated and balanced by a tail, but felt he worked better grounded, like a lot of the old 60s Kaiju from Japanese series like Ultraman. The “head” of the strange serpentine thing in his belly also went through several iterations and the silhouette changed until I landed on the final form. This keeps the process exciting and fresh for me, but without a clear sketch or direction, you have to rein yourself in from time to time and be willing to make decisions and nix elements that you may have initially liked a lot – definitely a balancing act.

MH: Just as unique is your method for doing sculpts. You’re one of the few artists we know to work almost solely with VR. Can you tell us more about your setup, and how you got into that as opposed to a more traditional work flow?

Kent: I use an old Oculus Rift CV1 (first generation!) that I got back in 2016, tethered to a PC with a strong graphics card in my home studio. I downloaded a couple of games, but took pretty quickly to the software “Medium,” which I still use to sculpt to this day. Using Medium was like discovering drawing as a child; suddenly I was putting on the headset and “sketch-sculpting” every day, ravenously. I couldn’t get enough – I didn’t have to motivate or discipline myself or force myself to create daily habits, it just flowed so naturally to sculpt in VR and brought me so much joy. My output became quite prolific, if unrefined.

Early VR sculpt by VoidRealm Minis
One of Kent's very first sketch-sculpts in VR in 2016
nyarlathotep
The Crawling Chaos, designed almost entirely in VR, March 2021

MH: It should be noted that you’re an artist of many different formats, and that you are trained as a Cirque Du Soleil performer. How did you make the jump from that to digital sculpting, and has it had any sort of impact on your art?

Kent: When I went to the University of Michigan (2010), I competed on the varsity NCAA gymnastics team and earned a BFA in Fine Art. I’ve been a gymnast my whole life, as well as a visual artist. It was really the pandemic and the job layoff that pushed me to consider how I could monetize my skills as a sculptor in a field that would give me a lot of creative freedom.

MH: We are so thrilled to be able to celebrate your one year anniversary with you. What are some of the biggest takeaways or lessons you’ve learned over the past year as a digital sculptor?

Kent: I still get so much joy when people discover my work and are excited by it. Nothing is more thrilling in this field than when a happy Patron takes the time to print one of my pieces and personalize it by painting it in their own style. This is a really humbling lesson in reminding me that I am sharing my work with many other people, and inspires me to constantly push myself and my sculpts to new levels.

Probably the biggest lesson I’ve learned through the VoidRealm Minis endeavor is the strength and importance of consistency and iteration. The more you sculpt in a particular format (like mini sculpting) the more you find ways to push the technical execution and aesthetic quality of the sculpts. My sculpts 1 year ago for VoidRealm Minis are almost embarrassing for me to look at now… my current stuff is much more refined, smartly designed, and visually stronger. However, my skill level and knowledge as a sculptor really hasn’t changed at all in the past year. The difference is that I now understand how to really push my sculpts merely from the act of having made dozens (hundreds?) of them for people over the past year.

MH: This past month has included some really incredible looking sculpts. Would you mind describing these a little more, and telling us about your inspiration for them?

Kent: I decided to create a bit of a mixed-bag for the lineup in July with several gargantuan monsters as well as some smaller creations. I decided to pull directly from the Cthulhu Mythos a bit, settling on the “Dreamlands” as a theme and do a take on Moon Beasts and the Hound of Tindalos. Both are statted in Sandy Petersen’s “Cthulhu 5e” book – a wonderful 5e sourcebook that’s so much more than a mere monster manual.

Rather than simply reposing the moon beasts to make variations, I decided to use some of the same components – heads, hands, etc., but to re-morph the bodies between varieties since, in the Lore, they have shapeshifting abilities. With the Hound, I wanted to do something a bit more enigmatic as it technically lives “in the angles of time” – whatever that means! There have been several great Tindalos hounds done by other designers before, so I settled on a simple design that would be easy to print, recognizable, but somewhat unique.
 
I absolutely love “Kaiju” in all of their strange, bizarre forms. There’s nothing like a bizarre titan to really spark that feeling of childhood joy for me, and so I had a lot of fun sculpting the larger guys. “Vol’Shorm” is inspired directly from the Kaiju in old Japanese action series like “Ultraman.” You almost get the feeling that he could be played by a human wearing a costume on one of those sets. I needed to create a Guardian or counterpart to Vol’Shorm, so I conceived “Batan Hisnu,” an original concept as a protector of death. I had fun in my head playing with the idea of this angelic figure residing over death as an essential part of Universal harmony, while Vol’Shorm – being very other and destroying matter via “obliteration” – was the “real threat” so to speak.
The Corrupted Purple Worm was a collaboration with Chris Sigler from the 5eMagic.shop. In designing the tail, I thought it would be fun to make it its own, sentient entity with the ability to spawn these flying demon serpents – this is an example of me riffing while I sculpt to try and come up with something novel for the tabletop.
I also had to throw in an Astral Dreadnought because, you know, how can you NOT sculpt something so iconic when doing a series of inter-dimensional Kaiju?
 
Overall, I felt it was fun to celebrate my anniversary month with more of a “random” variety of beasts rather than linking them so closely together. Hopefully this will be well received, as it could be the start of a fun annual tradition for VoidRealm Minis!

MH: Do you have any advice or folks who might be just starting out with digital sculpting?

Kent: I could probably write a novel answering this question, but here are some quick tips:

  • Study the figure – figure drawing AND figure sculpture. Get books by George Bridgeman and Phillipe Faraut.
  • Level up your ZBrush skills (watch Michael Pavlovich on YouTube, take a class from Scott Eaton)
  • Constantly assess a sculpt from all angles (not just a turntable – look at it from high and low angles as well)
  • Sculpt prolifically, experiment, iterate. Quantity always trumps quality.
I also live-stream sculpting sessions on YouTube where I chat about techniques and design.
 

The Grande Finale

We had a fantastic time talking to Kent  and really appreciate him taking the time to chat with us. We’d also like to give a well deserved shout out to Chris Spotts for doing such a fantastic job on painting the Moon Beast. More of Kent’s incredible work can be found here on MiniHoarder, and for those who want access to his monthly sculpts for a single low price, you can do so via his Patreon.

Chris is the painter behind The Spotted Painter, and runs a YouTube channel and can be found via his FaceBook page.

If you’re an artist and would like to be featured in our Artist Spotlight, give us a shout at [email protected].

Mountain troll front

Artist Spotlight: Zandoria Studios

Welcome to our first ever Artist Spotlight! Here, we take a moment to get to know some of the artists behind the sculpts and models that have changed our hobbies and game tables so dramatically over the past few years. We’ll laugh, we’ll cry, it will be an all around great time. We’re going to kick off this parade of grand artistry with Will Sutton, the artist for and owner of Zandoria Studios. For those that might not know, Will is the master of all things gnome related, though he also makes a lot of terrain using his PuzzleLock system and branches out into other minis as well.

For every Artist Spotlight, we have one of the artist’s miniatures professionally painted by our friend Chris at The Spotted Painter. Will chose one of his new troll miniatures, and we are were blown away at how it turned out. Above are the final images. If you’d love to print this beasty out and give it a paint job of your own, you can find it here.

MH: It’s always interesting to hear where artist’s come up with their studio names. Where did Zandoria come from?

Will: “Zandoria” was a name in a shared campaign world that my friends and I used for our D&D games years ago… We took turns DMing and had a different part of the world that our game took place in. Part of the map, I noted “the lost kingdom of Zandoria”… In 1999 I started using Zandoria Studios for a business name. Because it is a unique name, it doesn’t get lost on the world wide web!

I also used the name/setting for my story of a wandering hippopotamus Barbarian named TAR. This was a character that I created in Animation:Master with the plan of making a series of animated shorts.

Zandoria map
Map of Zandoria

It is a kind of Zatoichi/Conan character in an anthropomorphic world… I only made one short before I realized that my story would take me a hundred years to finish as an animation! When you watch the credits in any Hollywood animated movie, you will not only see hundreds of artists involved, but it also take a lot of computers to render all of those frames! I started thinking that I should make it a graphic novel instead.

Guardin Gnomes
Guardin' Gnomes

MH: I feel like it would be negligent not to dive into your bread and butter, gnomes. You have some fantastic pieces, and by far the widest variety of gnome characters that I’ve ever seen. How did you get into this niche?

Will: After I had created PuzzleLock, which was designed for FDM printing, I wanted to do miniatures too! Everyone was starting a Patreon, and I already had one – so I retooled it to add 3dprintable miniatures.  But since most of the things that I had sculpted were not for D&D, It was hardly a success – given that the early adopters on this space were Dungeon Masters!  I needed something besides anthropomorphic animals to appeal to them…

I had this idea for sculpting Gnomes like garden gnomes, but outfitted like gnome adventurers in Dungeons & Dragons.

The gnomes turned out to be pretty adorable, and I got a lot of likes on Instagram and Facebook. What I didn’t realize until then is that Gnome enthusiasts are a much bigger niche than Dungeon Masters with 3Dprinters!  I keep making more gnomes and am even getting knocked-off by fake companies on the internet pretending to be selling mass-produced ones! At last count I have had to issue DMCA takedowns against 15 different domain names!

MH: Are there any sneak peaks or anything that you can provide that might give us a clue as to what you’ll be releasing next?

Will: I started reading more about Gnomes, their place in folktales and mythology, and branching out to some other things like Trolls. So I started creating some trolls too. My influence was the fairytale artwork of John Bauer.

Continuing to read about lost civilizations, I have run into a theory of a lost antediluvian “golden age” that was lost beneath the floods at the end of the last Ice Age, when the changing climate flooded large areas of the Continental shelves, forcing survivors to higher ground to start over…  This is the setting that I am exploring now – and of course, gnomes are involved! Maybe this will finally reveal the Lost kingdom of Zandoria!

MH: Let’s talk about these trolls for a moment. I have to say, the first time I ran into them I thought they were someone else’s work, just because I didn’t realize you had branched out from the gnomes (or hobbits… let’s not forget your hobbits). I really love the look and feel of these models. Was there anything about your process that you had to change when switching from a small humanoid that’s wearing fur and armor to a larger monster that’s mostly covered in fur?

Will: I had made a poll on Patreon about what other kinds of model would they like. Items from the Pathfinder Bestiary made the top of the list! I started to sculpt the Troll from the first Bestiary, as painted by Wayne Reynolds.  Because Pathfinder is a spin-off from D&D using the open Gaming License, I didn’t think they would care – and it was just for Patreon…

Work in Progress from Paizo
Early Work in Progress

But Jim Butler from Paizo Inc. (who I am friends with on Facebook) sent me a message saying NO to that idea! I could do it, but it can not be behind a paywall like Patreon.  I totally respect that, and stopped working on it.  But it gave me an idea…  The thing that is the IP of Pathfinder is really just the artwork and stories – what they did was to create a unique interpretation of those OGL monsters.  Games themselves – the rules and methods of play – are not protected by copyright. That is why Wizards of the Coast and Games Workshop put so much art and story into the games!

I decided to do a little research on Trolls, as well as gnomes, to did a little deeper into folktales and mythology, in order to inform my own interpretations. This would let me create my own IP within this fantasy world, and give everything my own spin.

I discovered the works of the Swedish illustrator, John Bauer. He brought these tales to life in the early part of the 20th century. He is also an influence on later artists such as Paul Bonner and Brian Froud. Since he died in 1918 and his work is in the public domain, I knew I would be OK to take some inspiration there.

My first troll is carrying a bronze age Scandinavian sword, and using a door for a shield. If you look at the design of the hinges on the door, you will see it is a dragon-like monster from Scandinavian mythology, called a Lindwurm – the design of it was inspired by a Mountain troll’s door in the background of one of Bauer’s paintings!

Troll Sketch
Troll Sketch by Will Sutton

My Trolls are hairy and shaggy – reading the stories, I felt that the Trolls might be like the Neanderthals displaced by the arrival of men–maybe the origin of Yeti and Bigfoot and trolls.  In some of the fairy tails, the trolls would tuck their tails in their belt, and try to disguise themselves as men…They would venture near the farms and villages and take things. that gave me the idea for the Troll Thief.

The 3rd troll that I sculpted was a Mountain Troll. For this I wanted him to be a little bigger, maybe the same thing as a Frost Giant or jotun. Some of Paul Bonner’s paintings of Frost Giants and trolls for Trudvang have big horns. So looking at some mountain goats, I picked a big shaggy goat for my inspiration for his fur and horns!

Because Trolls are not crafty like gnomes, I figure that their weapons -especially for a giant – would need to be stone-age hafted weapons.  I watched some videos on YouTube to learn how to haft an arrow head, and how to wrap the sinew to hold it. It was very fascinating! Then when I looked at photos of artifacts of stone age weapons and even some bronze age axes, I could understand better what I was looking at, and how it really worked. I even have a paleolithic axe head in my personal collection of stuff!

The fur was a lot of work! I didn’t want it to look cartoony or too stylized. I had done some miniatures with fur, but this was a step beyond my comfort zone, for sure! I took it eave further when I had the idea for the Ice Age Gnome, LOL! That mini has the sabretooth rabbit, the fur cap and cloak, and the gnomes beard and hair – that was a big challenge!

MH: Can you describe your process for us a little bit? Any favorite tools of the trade or specific steps you take when deciding what to sculpt?

Will: Because I have a background with CAD, a lot of times I will design something in Rhino. This is what I used to design PuzzleLock. I can work out the tolerances there and later export it to ZBrush for sculpting details. I think this design for manufacturing background give me an advantage when it comes to designing for 3Dprinting.

Printed PuzzleLock Pieces
Puzzle Lock Design
PuzzleLock Design Layout

For pure sculpting, like for miniatures and figurines, I will start in ZBrush with a ZSphere armature to create the basemesh for sculpting:

Sculpting with ZBrush zspheres

ZBrush is indispensable for an artist in this space. I am lucky that I bought it when it was only $299—They have continued to improve and update it at no cost to their users. It is just fantastic! I never jump right in to the computer with an idea. I always start with a sketchbook. This is a habit that I also encouraged with my designers at SMP. It is faster to iterate and work out the design on paper first. Sometimes I will only have a doodle for inspiration, and sometime I will do a lot more on the concept before I start sculpting.

Gnome Ranger Sketch
Sketch
Model
Print

MH: While your work with gnomes is some of the most popular, you do a very broad variety of art, from comics to, of course, sculpting. How did you break into sculpting for 3D printing?

Will: I was a traditional artist long before I got my first computer. drawing, painting, sculpture, airbrush art… I got a job doing Design for point-of-purchase displays, and learned how to model in 3D, and make renderings for presentations. I work for SMP Instore Marketing for about 15 years, starting as a designer and then Creative Director.

Even so, I was fascinated with the technology and the whole idea of it. By the time Makerbot had the Replicator2 available, I bought one for the Design and Engineering department at SMP. That was my first experience printing myself, and learning about it. I had ZBrush at this time, and I could see the potential, though the quality was not good for miniatures and the only Resin printer was the Form1, and it was over $3000… so I couldn’t buy one. 

During those years I was also learning computer animation on the side and pursuing that. When 3Dprinting was first available it as only for prototyping parts which would later be injection molded. The machines were so expensive that you had to send to a service bureau to get them printed.

Around 2014, I started freelancing from home. I had a Printrbot Simple Metal that I used for printing my own stuff. One of my freelance clients was Shapeways. They had a designer-for-hire program that I was a part of, and later a Design with Shapeways program. I learned all of the limitations and constraints for their machines and materials and picked up a lot of modeling gigs through their forum, and also on Reddit. the cost for prints on Shapeways kept getting ridiculously higher every year, and at the same time the project managers that had come on board kept trying to get us to lower our quotes and would pitch things to different artists and take the cheapest – so I eventually stopped responding to quote requests from them.

Point of Purchase Design

I started getting into designing my own STL files for sale, because I could see that the cost of printers was dropping each year, so it was not going to be long before home users started to adopt the technology. It made sense to me that there would be a market for the patterns, in the same way that you might go to a fabric store like Joanne’s and buy materials and a patttern to make something. I joined Cults3D.com when it was a NEW website! I have a good relationship with Pierre who is the founder.

When I was able to get my own resin printer, it was a SparkmakerFHD that I pledged for on Kickstarter! It was only $249 at the time and Form2 was the other I was looking at, and it was $3,000. Once I could print things myself, I could see that the machines could print much finer than Shapeways would allow, and my cost was a tenth of theirs.

MH: Do you have any tips for folks that are interested in pursuing digital sculpting or art in general and are just getting started? Any major pitfalls to avoid that you had wished someone would have warned you about?

Will: Don’t go on Artstation and get bummed out and depressed that you will never get there! Everyone starts at the beginning – I am embarrassed by my old work that my mom will bring out to show her friends!  It takes years to master the craft – whether drawing, painting, sculpting, etc.  But whatever you create, it was only you who would have done it. We are all unique, and the vision we have is unique to us.  Don’t rush past those beginner exercises. Every stroke that you make is practice. Be mindful and give every piece of art your best.

Never do a rush crap job, because you are in a hurry, or the budget is low – give it your best.  It will stay out there in the world with your name on it!  So be proud of what you do and be true to your art. If you remain true to your vision, then your true fans will respond to your work, and they will find you. And though I am not taking STL subscriptions on my Pateon, I am still looking to connect to my fans there!
Sketchbook by Will Sutton
Will Sutton's Sketchbook

MH: Speaking of Patreon, you recently made a drastic change in your subscription model… and by drastic, I mean you pretty much cut it off all together. Could you tell us a bit about how you came to make those changes and the direction your future plans are taking you with regard to your art?

Will: Like many artists, I hoped that I could use Patreon to connect with my fans, and with their combined support I would be able to just make art all day! I’ve had a Patreon for several years, but only had a few fans on it, and I really didn’t have an idea of how to use it… As you have seen in the past couple of years, Everyone is jumping into it – especially after the exponential growth of the market after Artisan Guild launched their Patreon a couple of years ago.  I like to take my time on a sculpture, because it is a timeless medium and I want my work to last.  I can’t create at the frantic pace that is burning out even the younger artist in our group, so I decided to take an approach that was all-inclusive. I would make ALL of my work available to print, without a fear of missing-out! I thought of it like Netflix – binge print everything!  My hope was that people would join if their was a theme that they were interested in, like the Trolls. I knew that people would come and go, but I had a hope that I could get my number of subscribers to at least 100 – which if I had a good ratio between $10 Adventurers and $20 Merchants, I might actually make Minimum Wage!

Patreon Manifesto

During the pandemic, we saw Raging Heroes and Titan Forge enter the Patreon market – maybe others that I’m not thinking of – which I believe were companies who had previously manufactured minis. Now they were pulling from back catalogs of models which they had purchased as work-for-hire and dumping them into Patreon and just swamping it! 20 or more models for $10, and 10 years worth of back catalog to pull from! So it was the beginning of the end for smaller patreons in this space… Patreon “Samplers” is another get rich quick scheme flooding the space.

It isn’t just that it is a crowded field. I don’t see myself and my fellow artists as competitors. While we are all wanting to sell our models, everyone is going to have their own interpretation of a particular thing – whether Orcs or Dragons or trolls or gnomes. No one else’s work will be the same as your own. So in theory, even Titan Forge should help the “market” in a rising-tide lifts all boats kind of way…

But even though this is an expensive hobby, and people buy the latest and greatest 3Dprinters – sometimes owning multiple! There is an idea that they can spend thousands of dollars for printers, but they aren’t going to pay more than a few dollars for STL files! The Kickstarter and Patreon markets both contribute to this idea that the STL has no dollar value – because there is no shortage of models available. 

Compounding this is the ease of Piracy… Even though I had let patrons have access to my entire library of models for a very low price, as a reward for their subscription, my models still end up on Telegram channels and pirate sites such as The Trove… There is no respect for the artist in a community that turns a blind eye to this problem… A prominent moderator from our 3dprintiong community, tells me that it is OK because they were never going to be your customer anyway…But this same person is a member of those file-sharing groups! (which really makes my head spin)

My future plan is to re-evaluate the entire way that I have been thinking about 3Dprinting.  I will still put up STL sets on Cults3D. But instead of just selling the STL files, I want to print and hand-paint as collectibles. I keep getting requests for the gnomes from fans who are not a part of this hobby. They just want the sculptures! So I will look at using the printer as a tool of production, not as just prototyping.

The Grande Finale

We’re very grateful to both Will for taking the time to chat with us, as well as Chris Spotts for doing such a fantastic job on painting the Mountain Troll. Will’s work can be found here on MiniHoarder, and for those who just want to support his art, you can do so via his Patreon.

Chris is the painter behind The Spotted Painter, and runs a YouTube channel and can be found via his FaceBook page.

If you’re an artist and would like to be featured in our Artist Spotlight, give us a shout at [email protected].